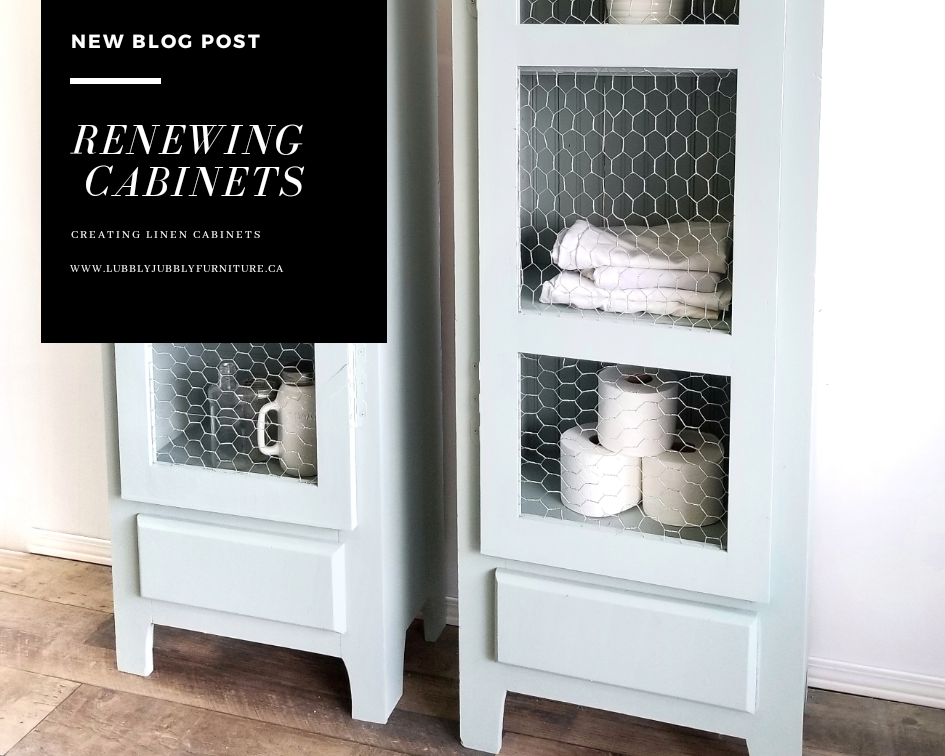
 Hello everyone, ready for Christmas? I am not done yet. Last week to go right? When I saw these cabinets and said “I want them" I had to have them because I knew exactly what I wanted to do to them. They were tall and perfect for a transformation and I could picture them in a bathroom for towels and storage. Country Chic paint Dune Grass was the perfect colour to use. First I knew these were handmade solid wood and that there would be natural tannin bleed through. I find the more you sand down the more bleed through happens so I like to scuff lightly but not too much that youre down to bare wood. Sometimes the previous topcoat can act as a tannin blocker. I cleaned both cabinets with vinegar to remove any surface dirt. Once these two steps were done I started to prime. I did two coats of primer leaving a few hours in between coats so that the primer can settle. Once the primer was dry and left for a few hours to sit I started to apply the dune grass paint. I did about 2-3 coats of paint and then used a mix of tough coat and clear coat for my sealer. I used more tough coat on the shelves as those are used the most and need to be durable. Once dried and settled I started to work on the chicken wire. You can get different shapes and sized gaps like the hexagon shape I got. Measure your panels or door and cut to size. Wear gloves so you don’t get scratched like I did from the wire. Yikes!! Once you’ve measured each panel or one door panel you can either staple them to the back of the door making sure to clean up the ends so they aren’t sticking out or if there are grooves from previous glass or plastic panels like mine did, you can stick the wire into those and staple to secure. That’s about it for these cabinets. You can use any colour you’d like and create the vision you see. Don’t forget to use my code for 10% off LUBBLYJUBBLY Thank you and Merry Christmas 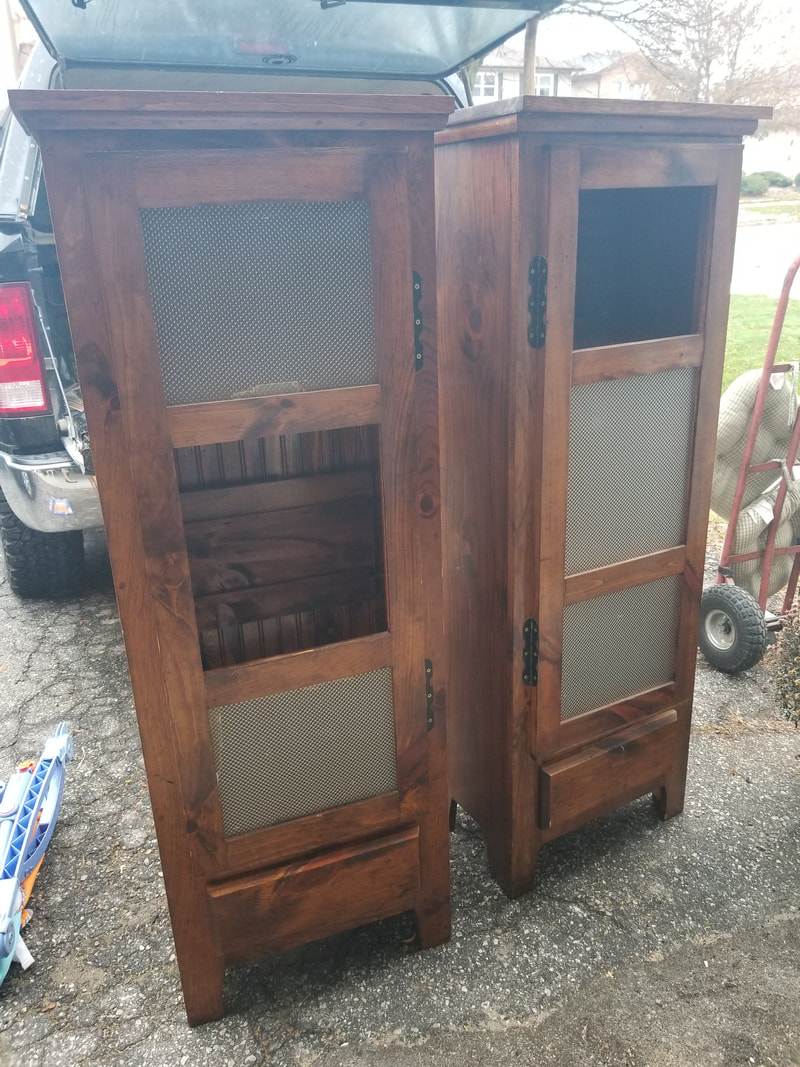 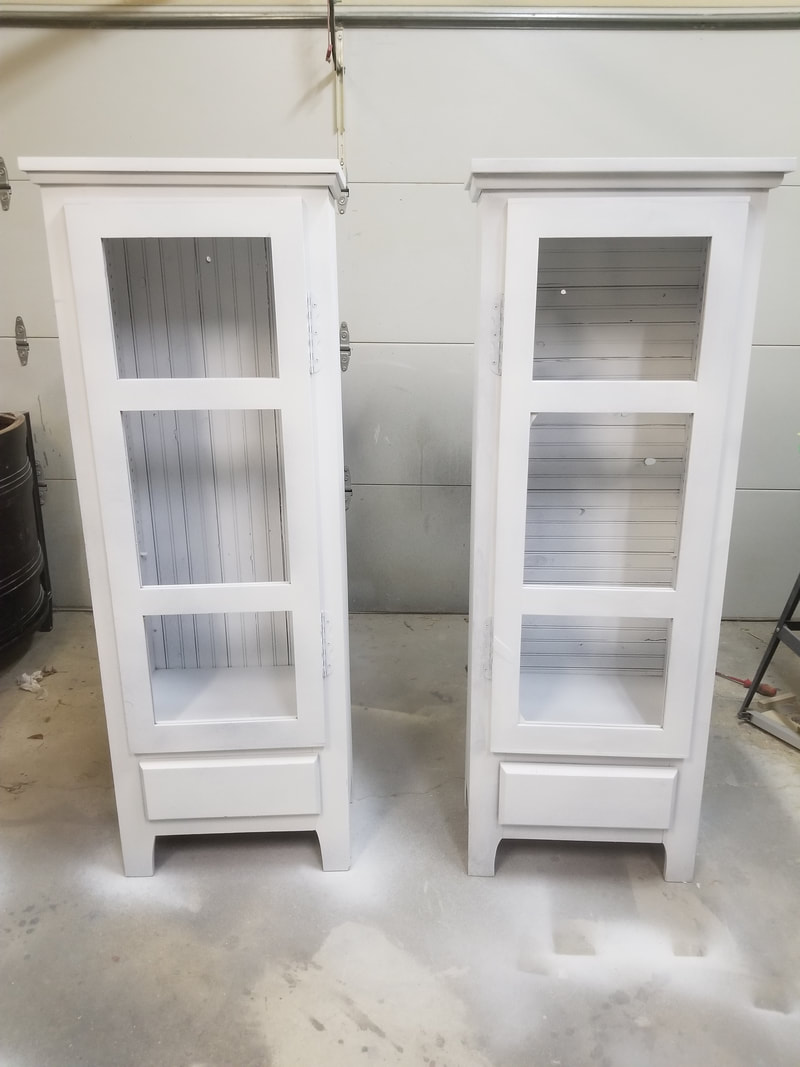 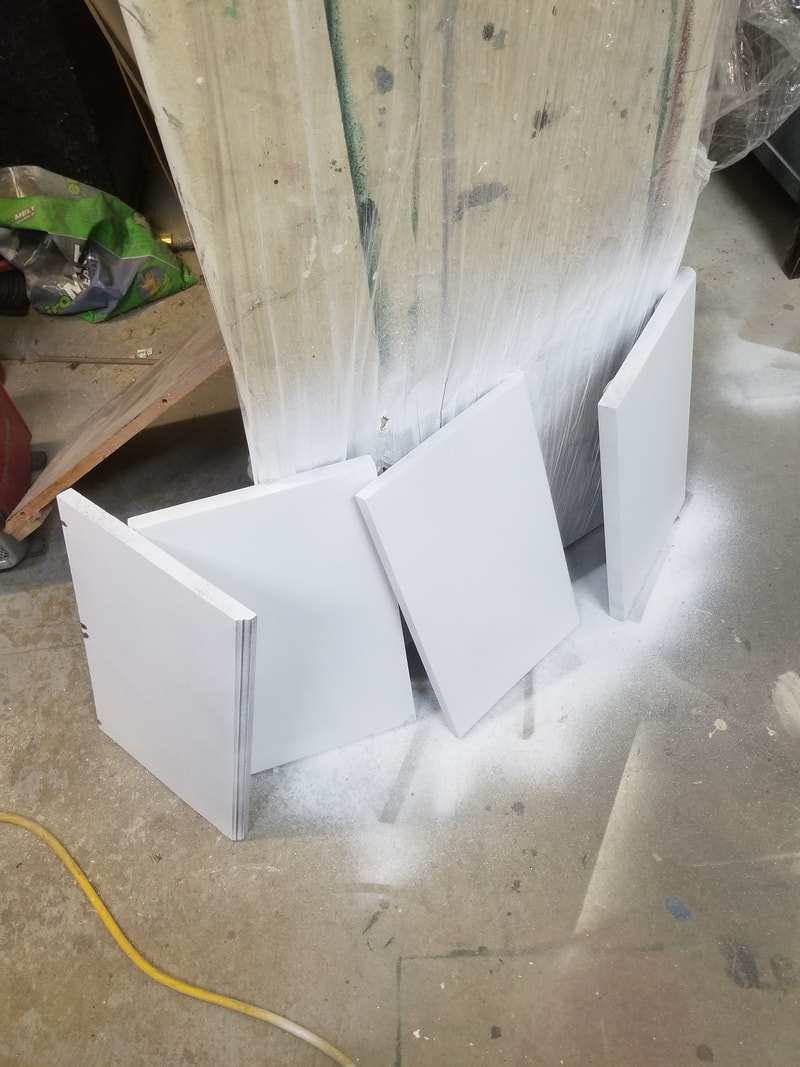  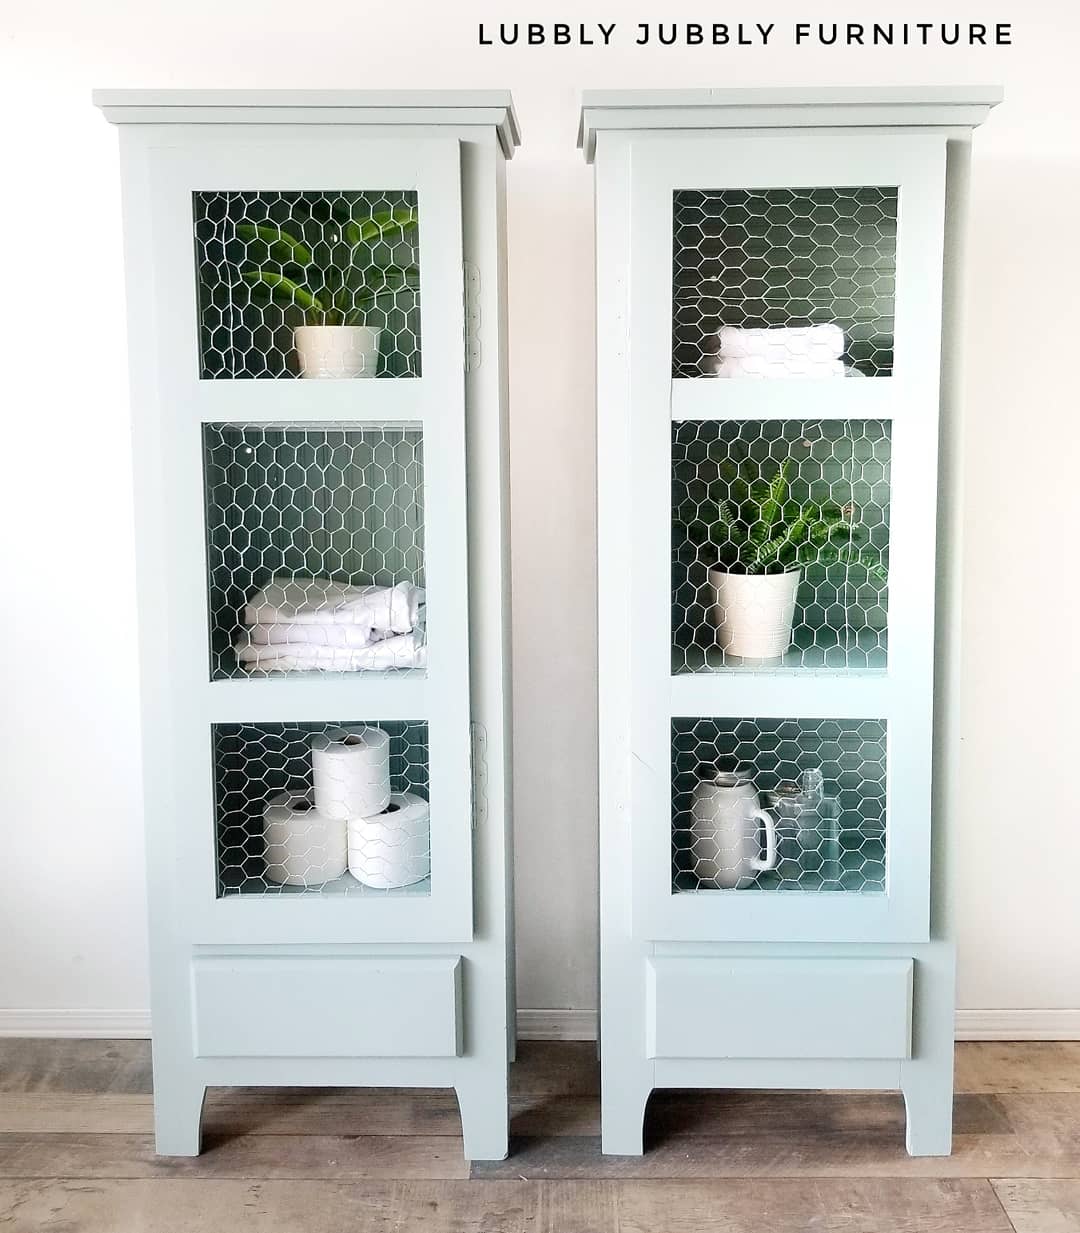 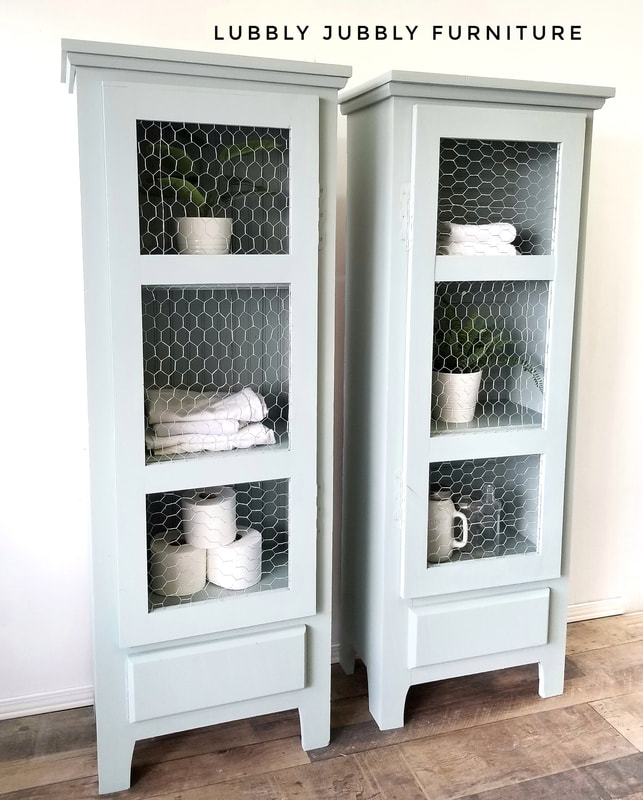
0 Comments
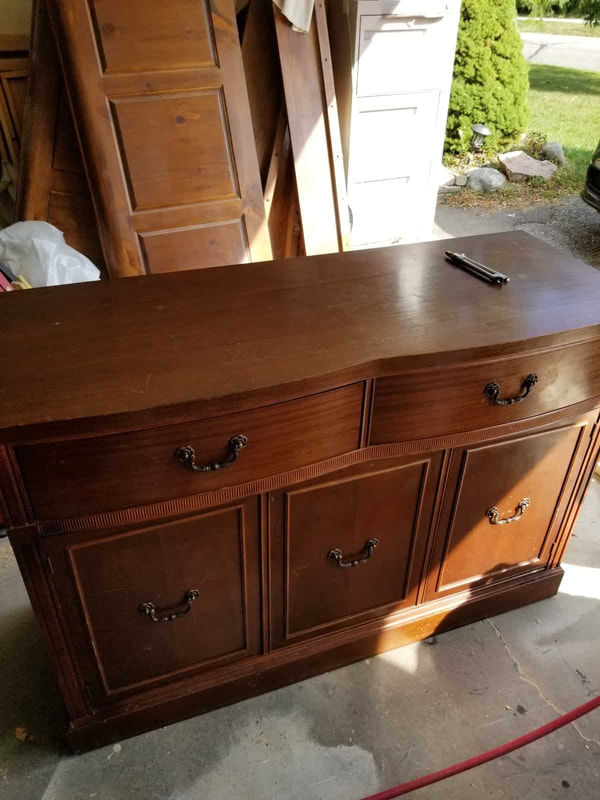
Hello everyone. Well winter has officially come to Ontario, my area anyway. My kids were excited to see snow when they woke up the other day. These two side tables were a custom job for someone who had seen them in my unit. I told her I could add new wood tops and new legs and she loved the idea, so I got started on the job. I always sand pieces first, not down to the wood, but enough to de gloss the finish and create a scuff. I like to use vinegar and lemon mix to clean them. If you plan on adding legs then you need to pre order them as they can take time to get to your home. Once you have prepped your piece you will take off the old top and the hardware. Then start to paint, you probably can do 2-3 coats but you’ll see after the second coat. While the paint is drying you can paint your hardware and make your new top and shelf. To make the top you need two boards that you sand until smooth and then you can stain using your preferred stain and colour. Once dry you can glue and nail them together. Make sure you measure the shelf area that you want and measure and cur your pieces. Stain them and then glue and nail together. You can router each piece if you want a nice edge. Once you have let the stain cure the next day, you are going to put your new top on by gluing and nailing it to secure it to the dresser. Place your new shelf inside the space. I sprayed my Country Chic Paint Clear coat on but you can brush it on if you prefer. Let the clear coat settle. I always tell my customers give the topcoat a few weeks to cure. Topcoat your hardware using a small brush and place on the drawers and you’re done. You now have a beautiful console. Thank you for reading   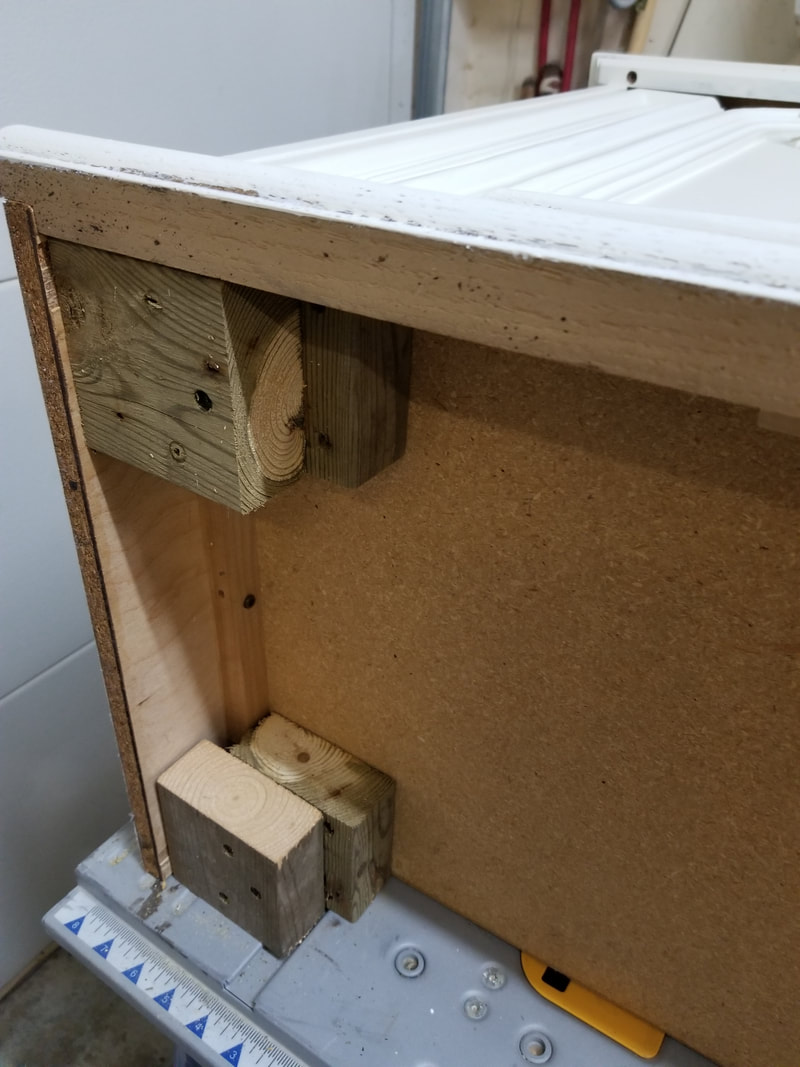 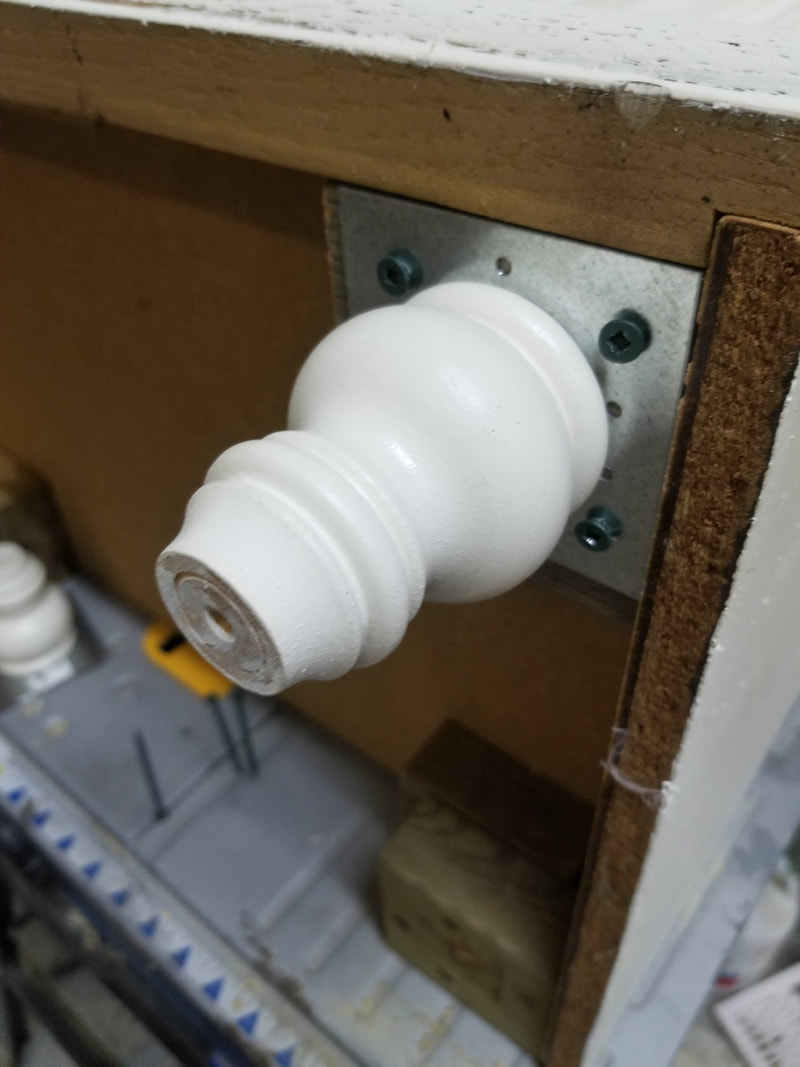 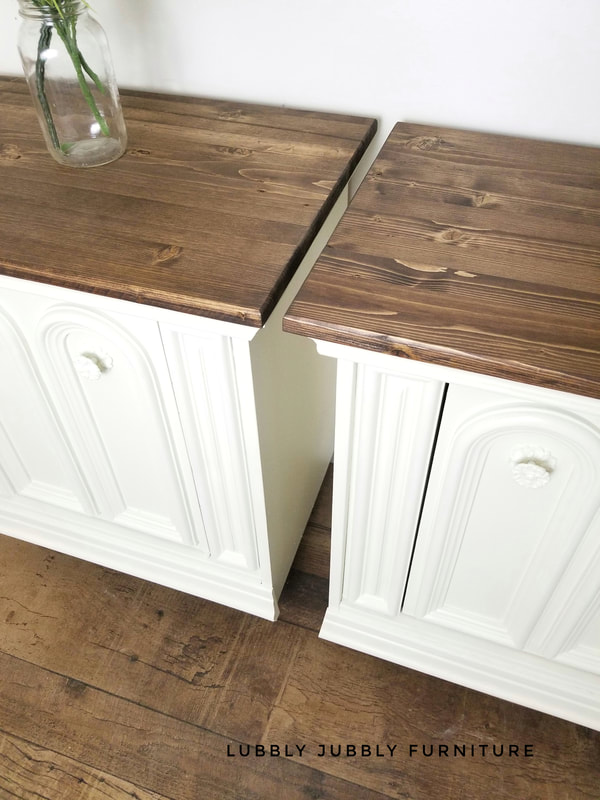 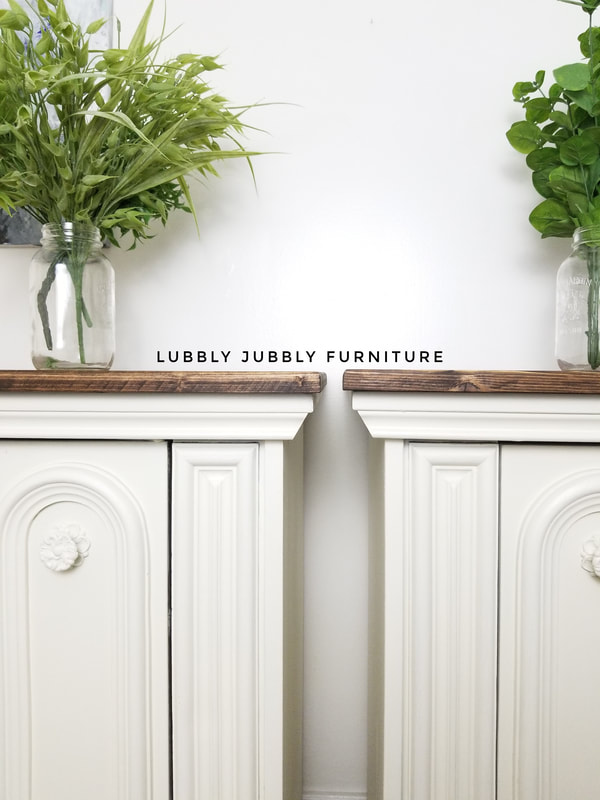 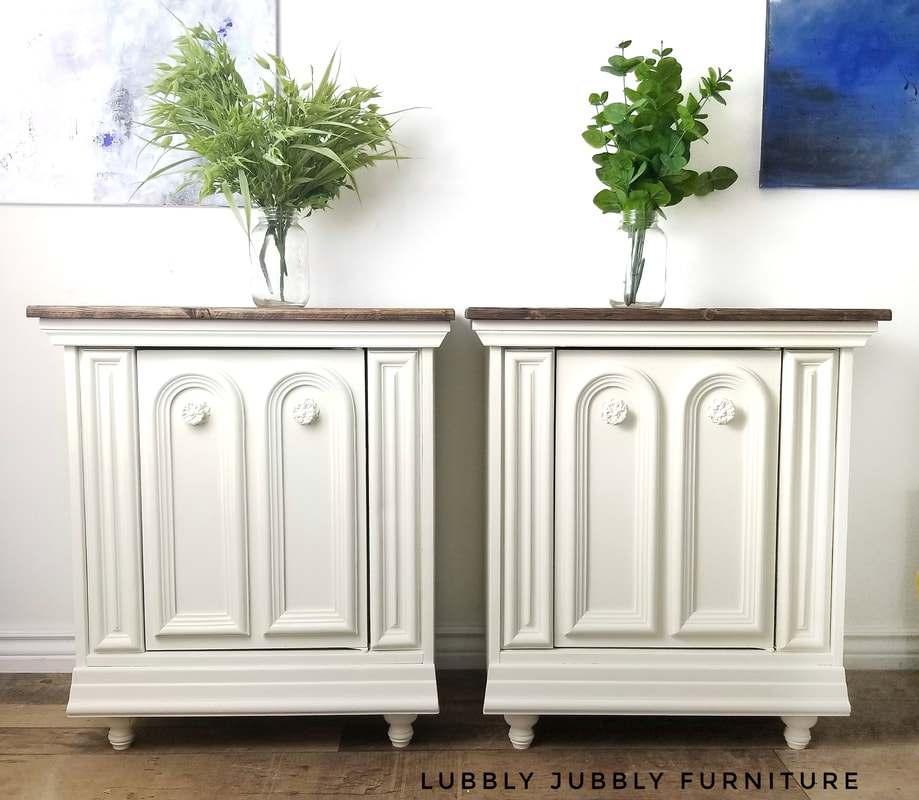 Hello everyone! I love fall, but now I’m looking forward to my other favourite holiday: Christmas. When I’m looking for a piece of furniture I always look to see what catches my eye and what I can do to it. I saw this dresser and knew what I wanted to do with it. I wanted it to have legs and a new top. The one drawer was broken during the move with the owner so I knew I would make that drawer space into a shelf. When painting that space, make sure to paint the whole top inside white because you will see it from the shelf up. 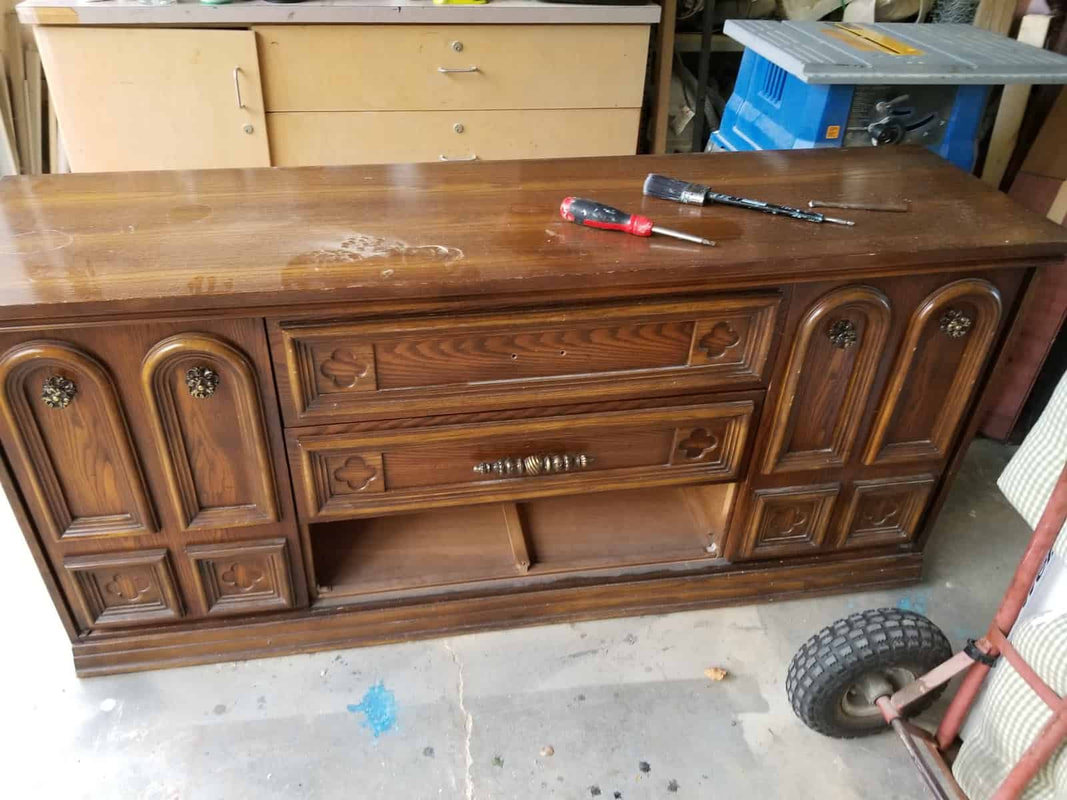 My idea was to make the top grey stain, and the body white. First I lightly sanded the piece and then used vinegar to clean it. I primed it with two coats of primer and I painted the legs that I had pre-ordered. 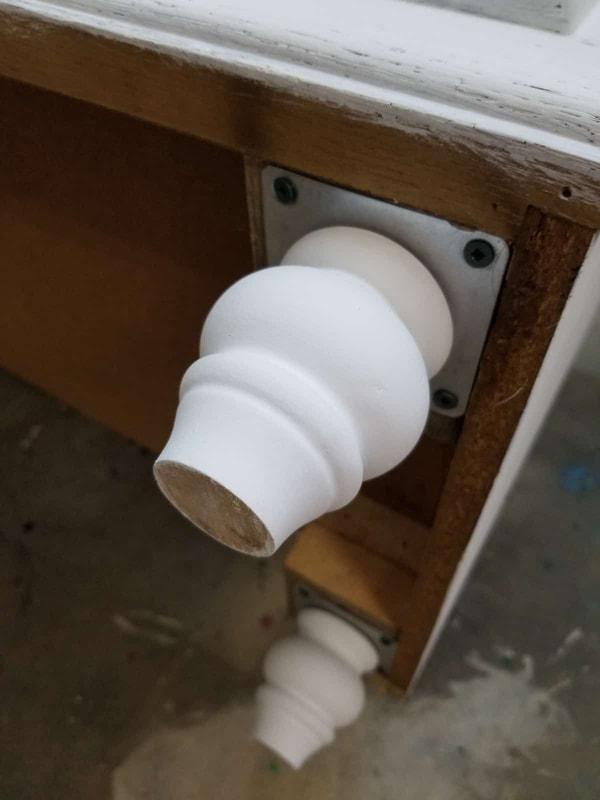 The top is solid wood cut into two boards and stained in grey (same with the shelf). The shelf had two support boards underneath and several vertical boards on top. 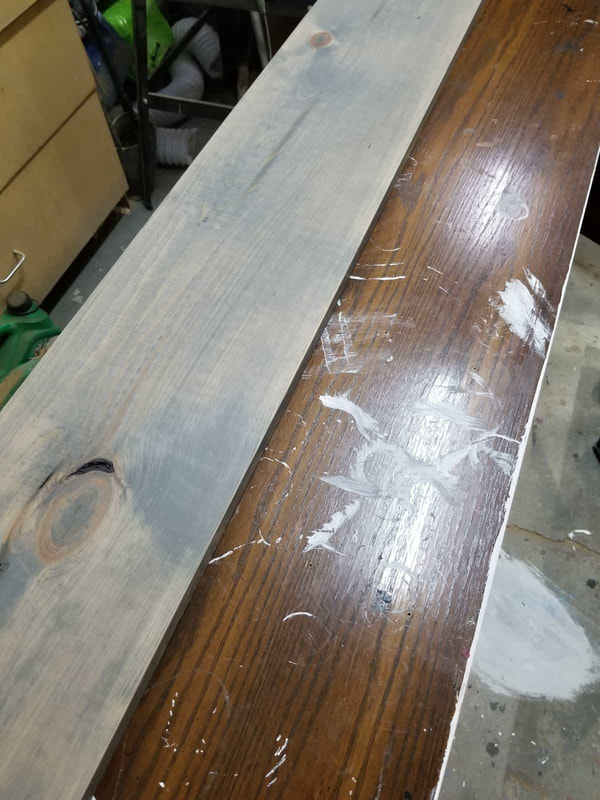 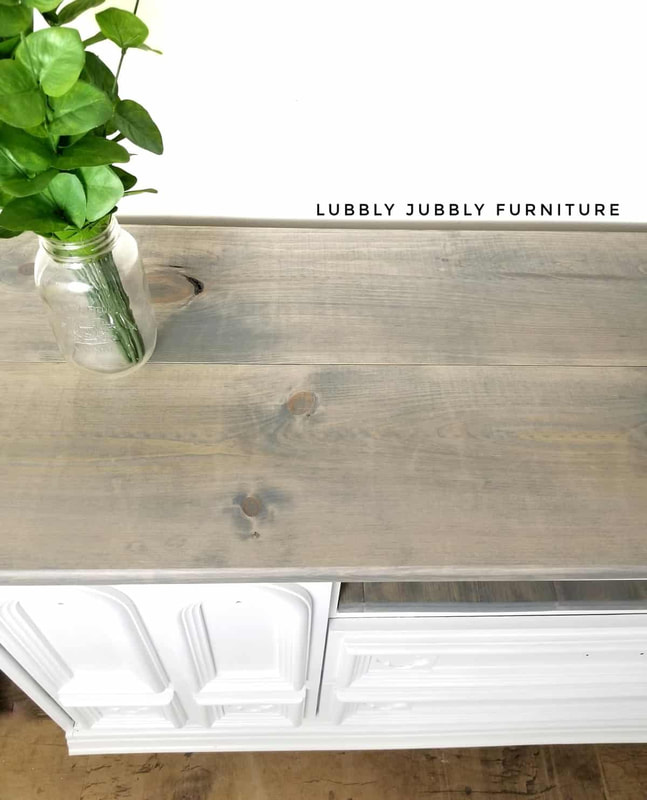 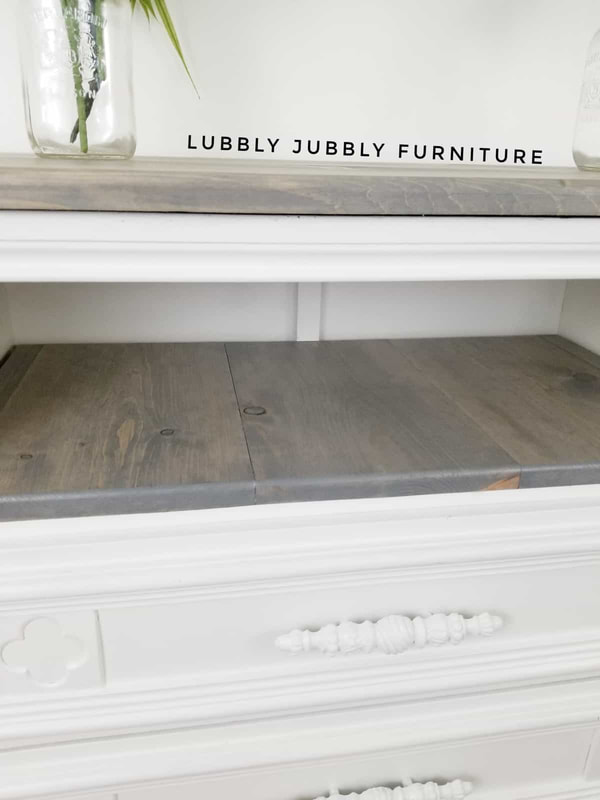 I also painted the hardware white. I wasn’t sure about keeping the original drawer pulls but they turned out perfectly! I painted the entire piece in 2-3 coats of Simplicity. Once dry, the top and shelf were glued and nailed securely. 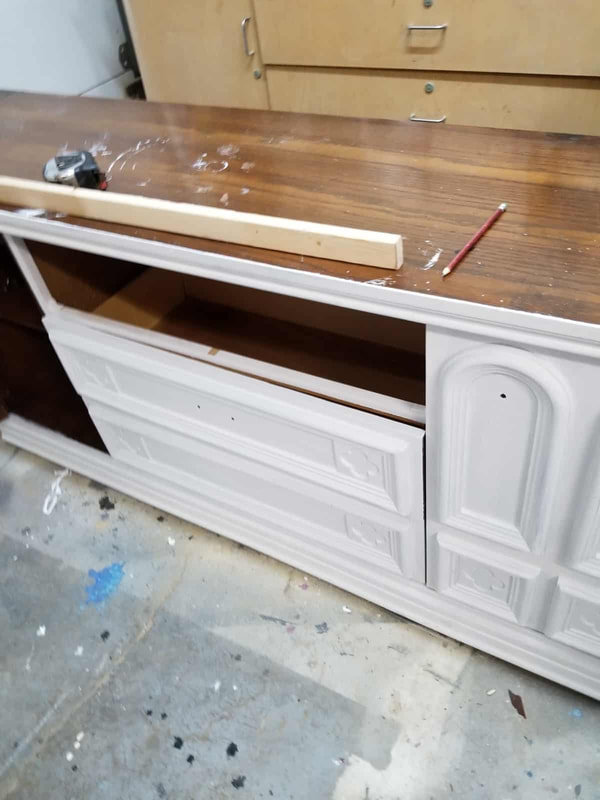 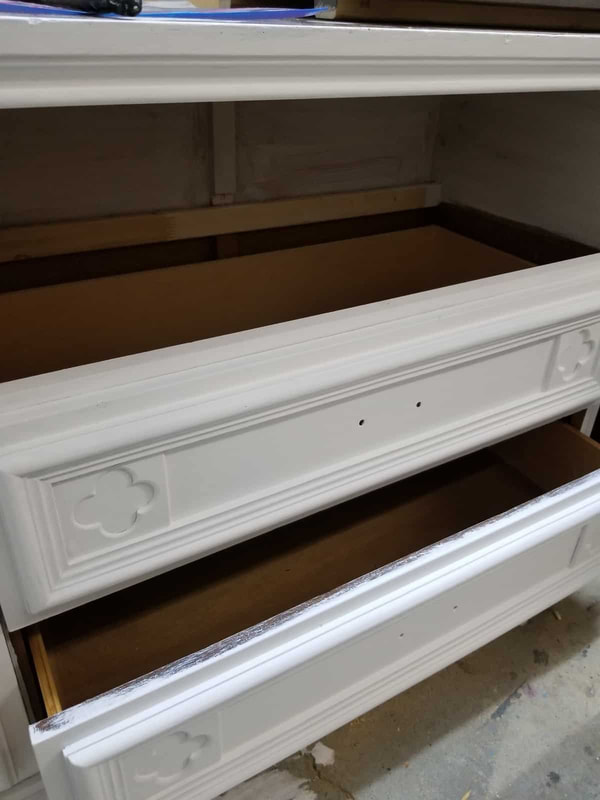 I sealed the entire piece including the top and the shelf in a clear top coat. 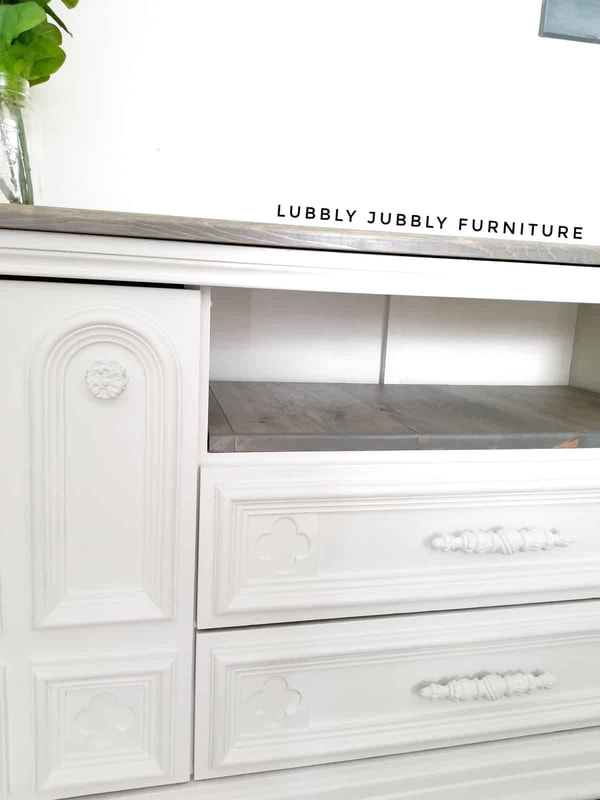 To attach the legs I cut two blocks of two by fours and glued and screwed them together. The legs came with metal plates that you attach on to the last piece of wood. Make sure they are secured tightly. 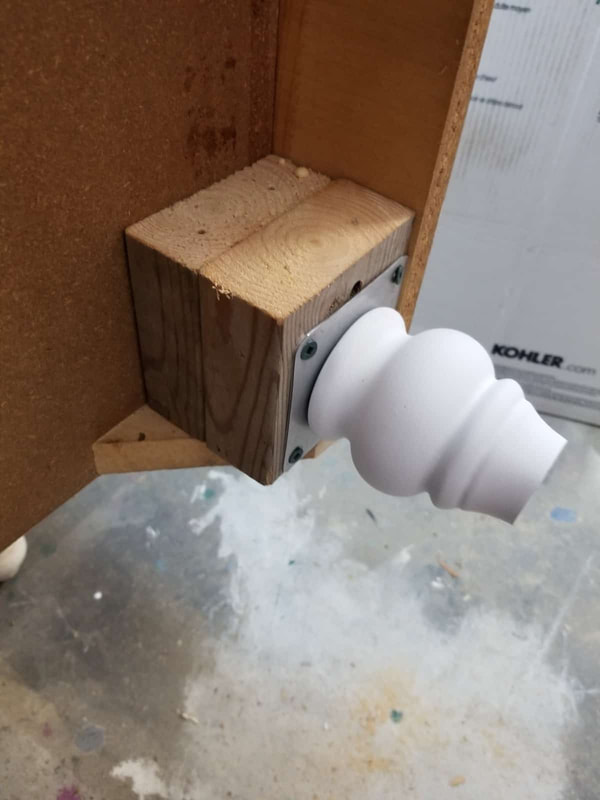 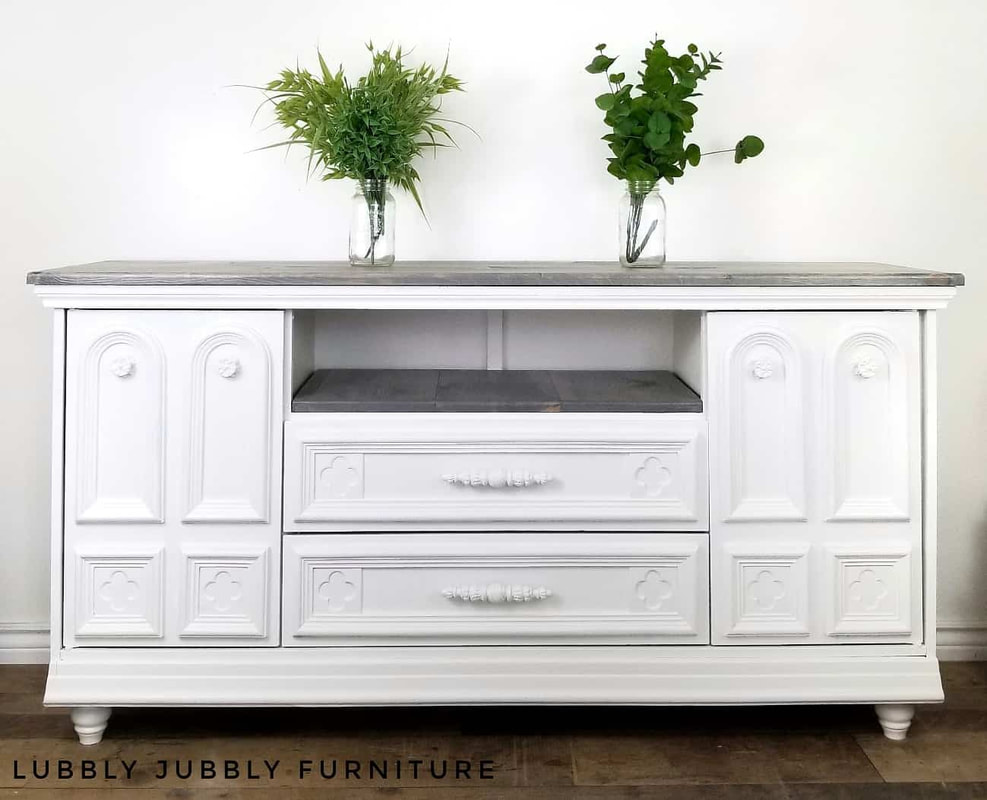 Thank you so much for reading!
 Next, I primed my piece with grey paint. You can use a grey primer or even a paint color like Hurricane which is a dark grey. The reason for this is that priming with grey first prevents you from having to apply 5 coats of red. However, Country Chic paint does have great coverage. 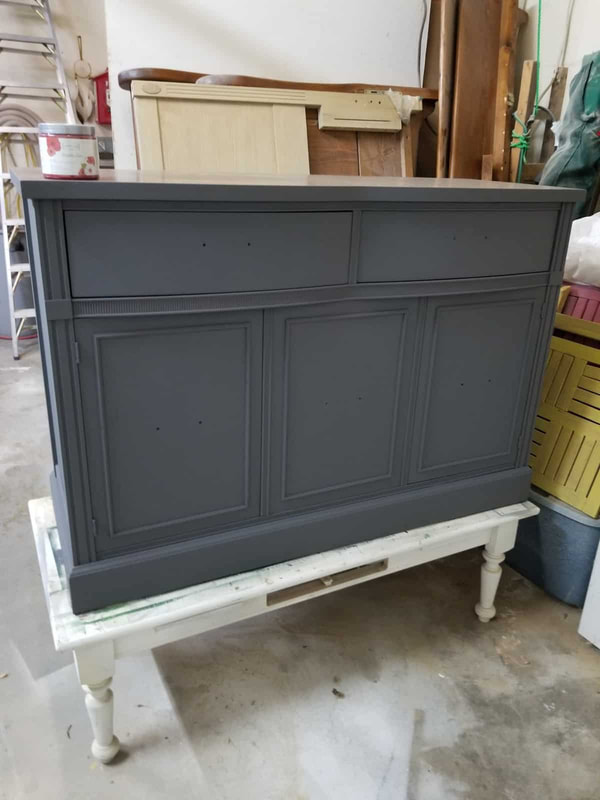 I then got to start the fun part which was paint this buffet in this gorgeous red. I did about two coats of red and had lots of paint left over which was a bonus for me. While the paint dried, I made a new top to add onto the original top because I love the wood grain that solid wood shows and I stained it with ebony stain, which paired beautifully with the red. 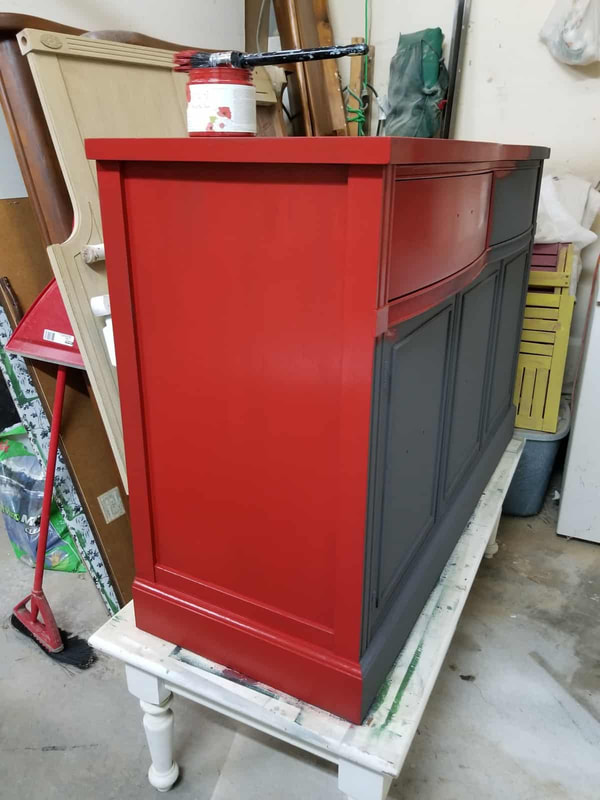 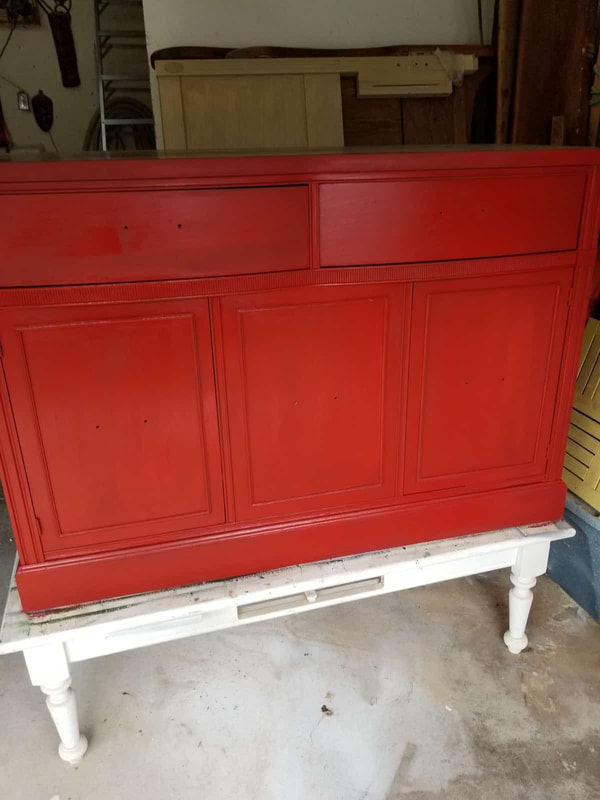 Once the paint was dry I sealed the paint with Country Chic Paint’s Clear Coat using a Painting Sponge. It was very easy to use and went on so smoothly. If you see that you missed a little or there are some streaks, don’t worry. You will get those areas with your second coat. I also top coated the top wood surface. 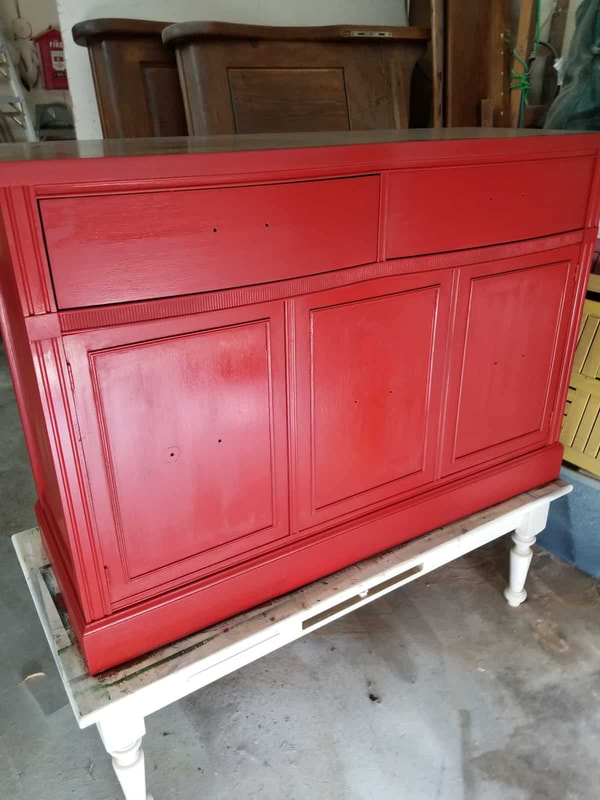 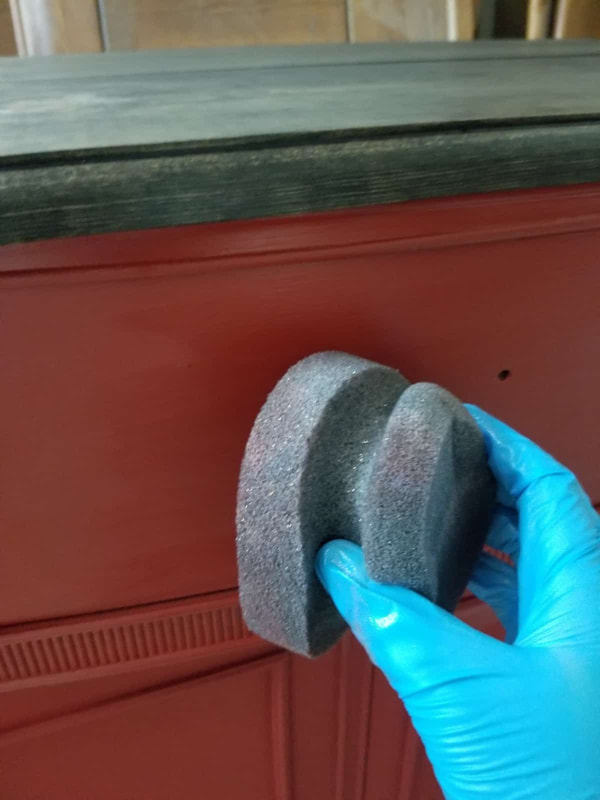 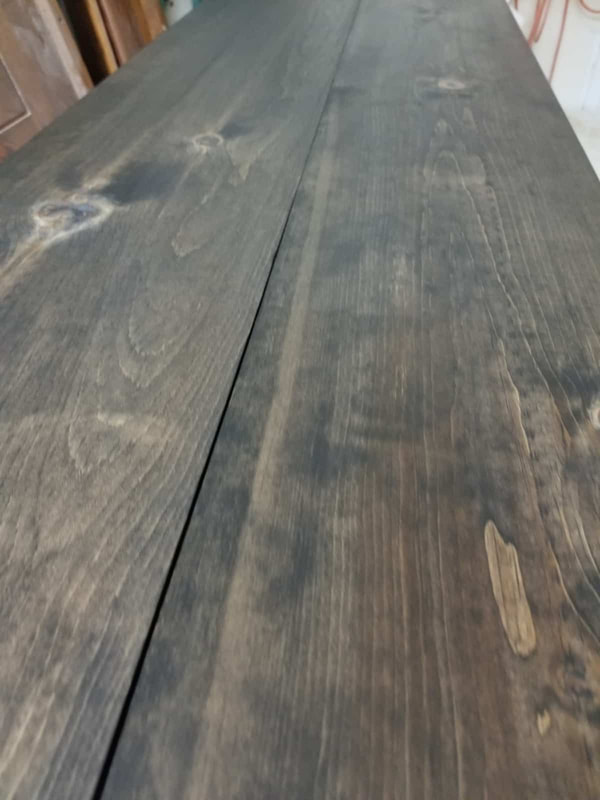 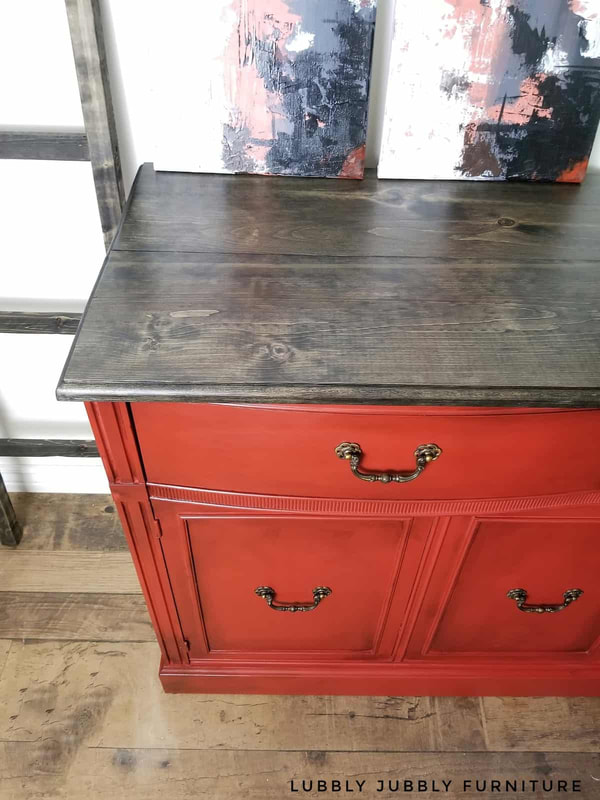 Once it had dried I added a black wax in the areas that I wanted shaded. Make sure to wipe the excess off lightly afterwards and buff it until it feels dry and no longer tacky. And that’s it for this piece. I absolutely love it and wish I had the space to keep it! leave a comment and tell me what you think 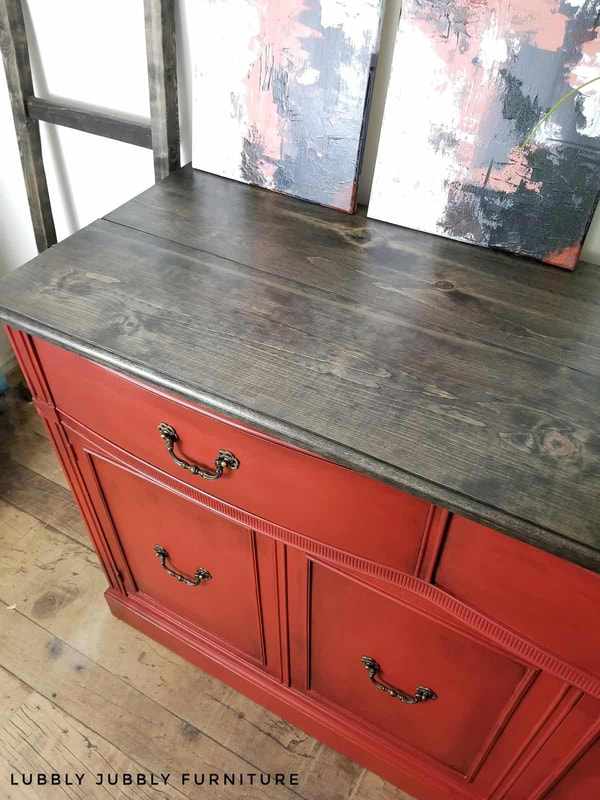 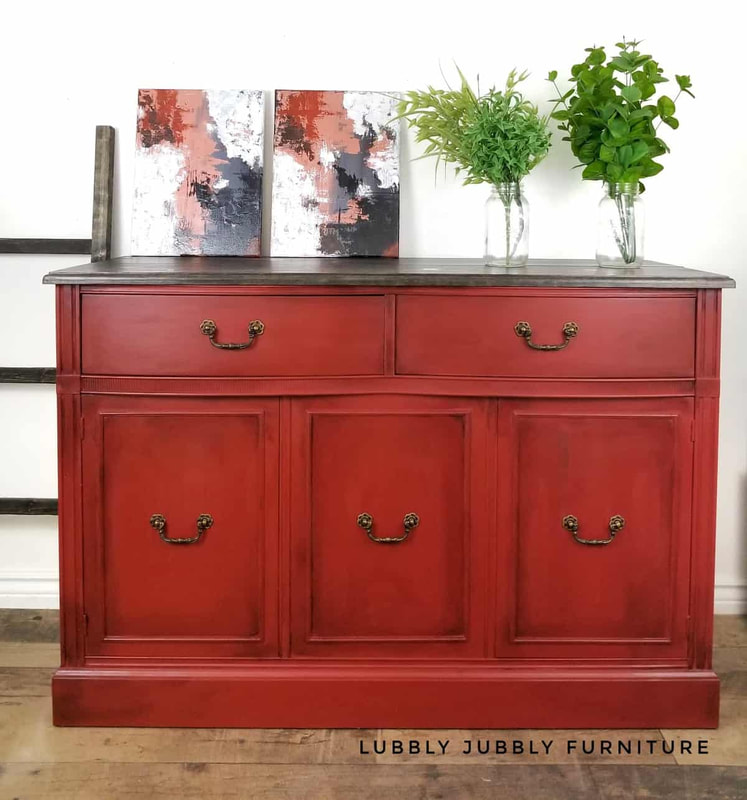 Hello everyone! I knew I wanted to paint a hutch as soon as I received the colour, Cut a Rug. I started by sanding down the top surface of the bottom hutch, and then used Ebony stain to stain the wood. Once I had the hutch sanded and cleaned, I took out the glass shelving and panels and got priming. I did two coats of primer and I painted about 2-3 coats of paint. 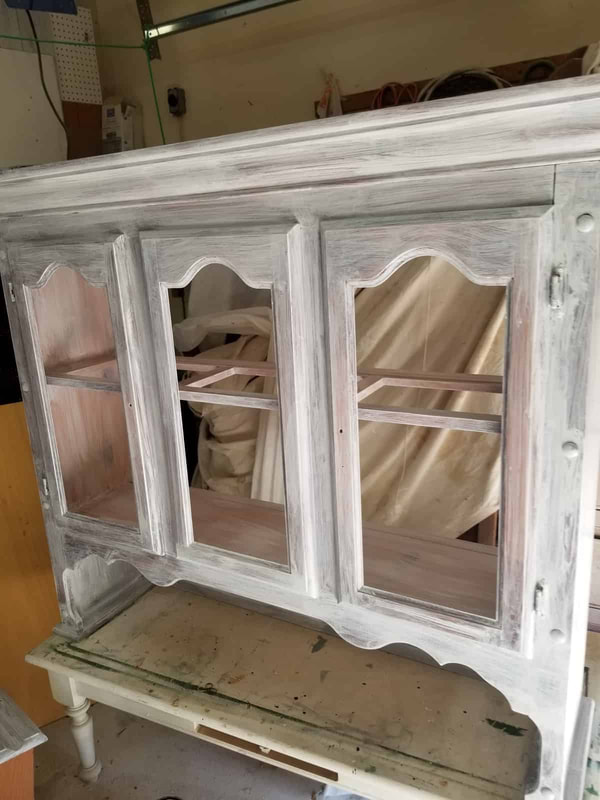 I used my spray bottle of water to spray onto the paint where I wanted darker shading and I used Rocky Mountain. I used my Country Chic Paint brush to apply the paint and blend in the colours. Once the pant was dry I sealed it with Country Chic Paint’s Clear Coat which I found very easy to apply and durable. You can use a sponge or brush to apply it. 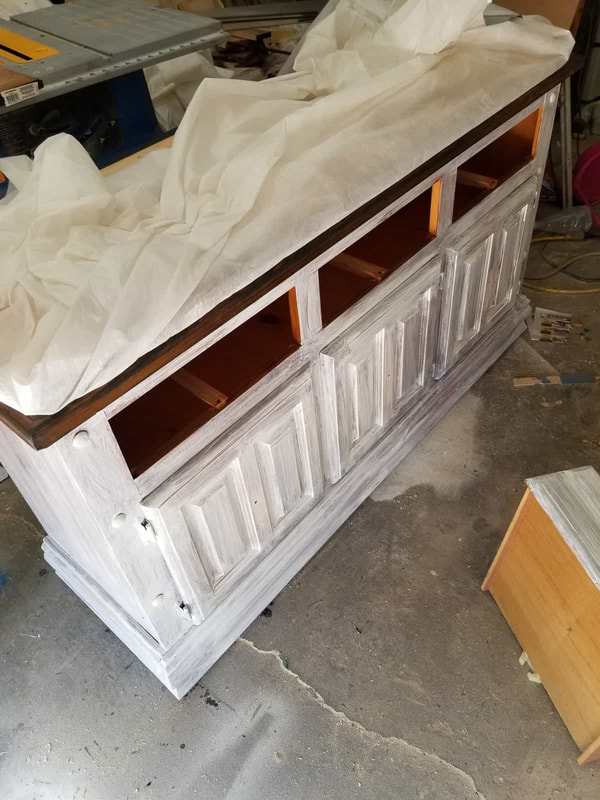 For the back wall, I used Elmer’s spray glue to stick the wallpaper sheets to the back. Make sure you wait at last 24 hours for the clear coat to cure before you place the top hutch onto the bottom part.  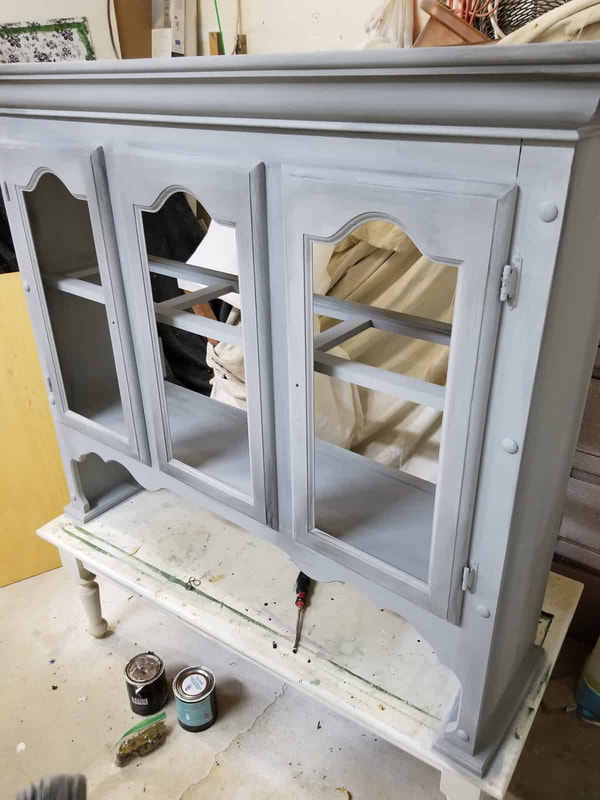 At the end I painted the hardware in rocky mountain and sealed with Clear Coat. Overall this hutch turned out so beautiful and I love it! 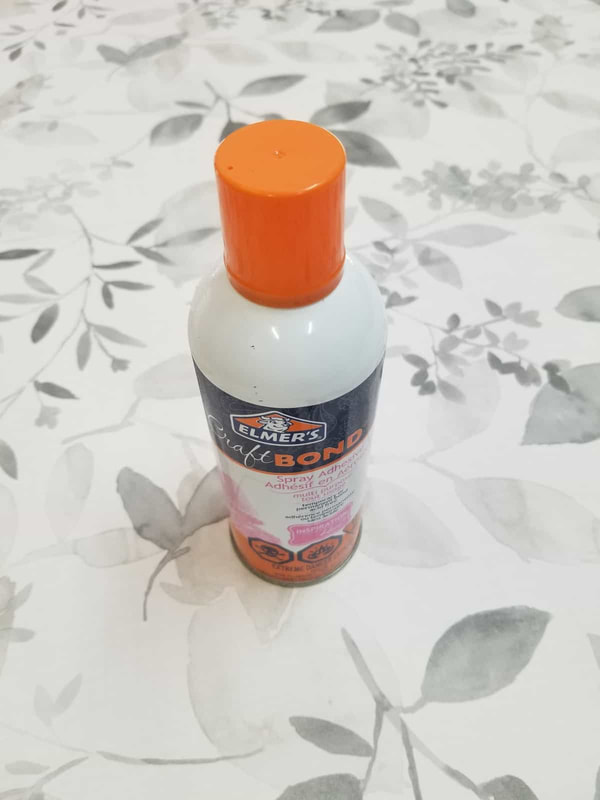 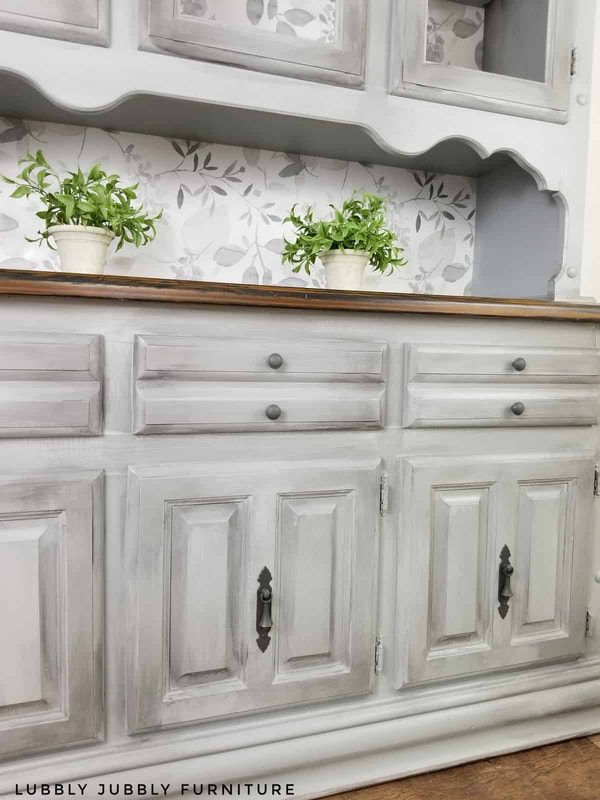 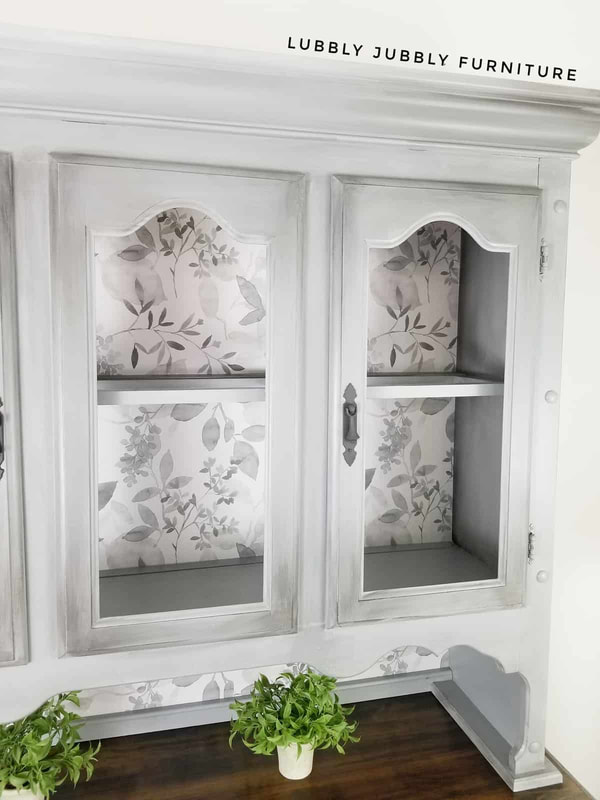 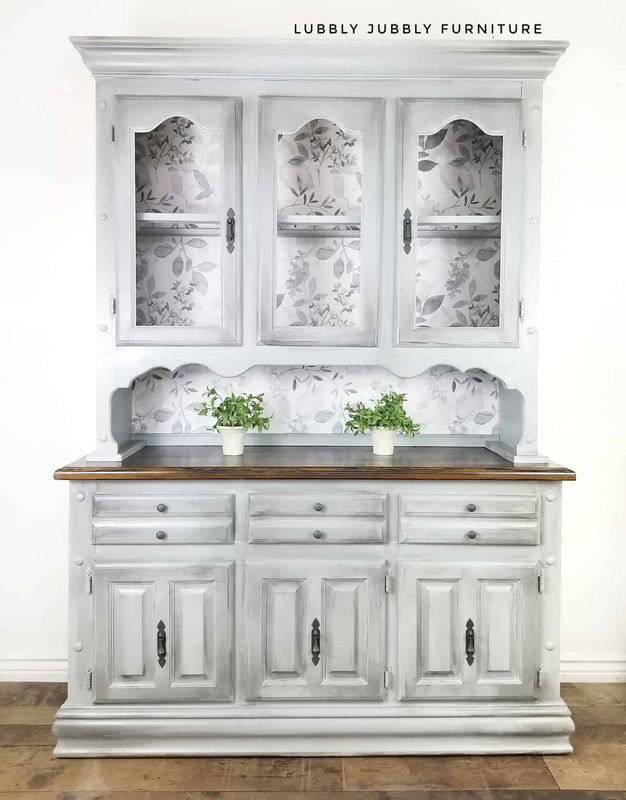  I am beyond excited to announce that ill be in the November 13th Showcase at the Toronto Mod Club Theatre at 7pm. This is beyond exciting. If you would like to purchase a ticket please click the link below. There will be so many artists show casing their work and its going to be an awesome fun night. If you can't make it I would very much appreciate it if you could support me and the show by purchasing a ticket. I can't wait to see you there.
Here is the link to purchase under my name Rawartists.com/meganreddenart Look for my name and this picture to make sure the ticket goes under my account. Thank you again everyone. Hello everyone, i am sharing here my short video on the process of the two new dressers i just painted in Wise Owl paint black and peppercorn. I sealed them with Wise Owl satin varnish using my Homeright super max sprayer. Take a look and see what you think. Wise Owl available on my website
YOu can fix it!! Have you ever seen a cabinet or dresser that doesn't have a drawer and you loved the rest of it, but thought you couldn't buy it because it has no drawer? well I saw this cabinet and it had no drawer , but I immediately thought wait I can put a shelf there and that's what we did. With the help of my husband we made a new shelf to replace the missing drawer. We used Ryobi tools and Wise Owl paint. Below is the picture of the cabinet and the headboard we used to make the shelf. If you have solid wood headboards or pieces of wood you haven't used yet, use them to make the shelf. 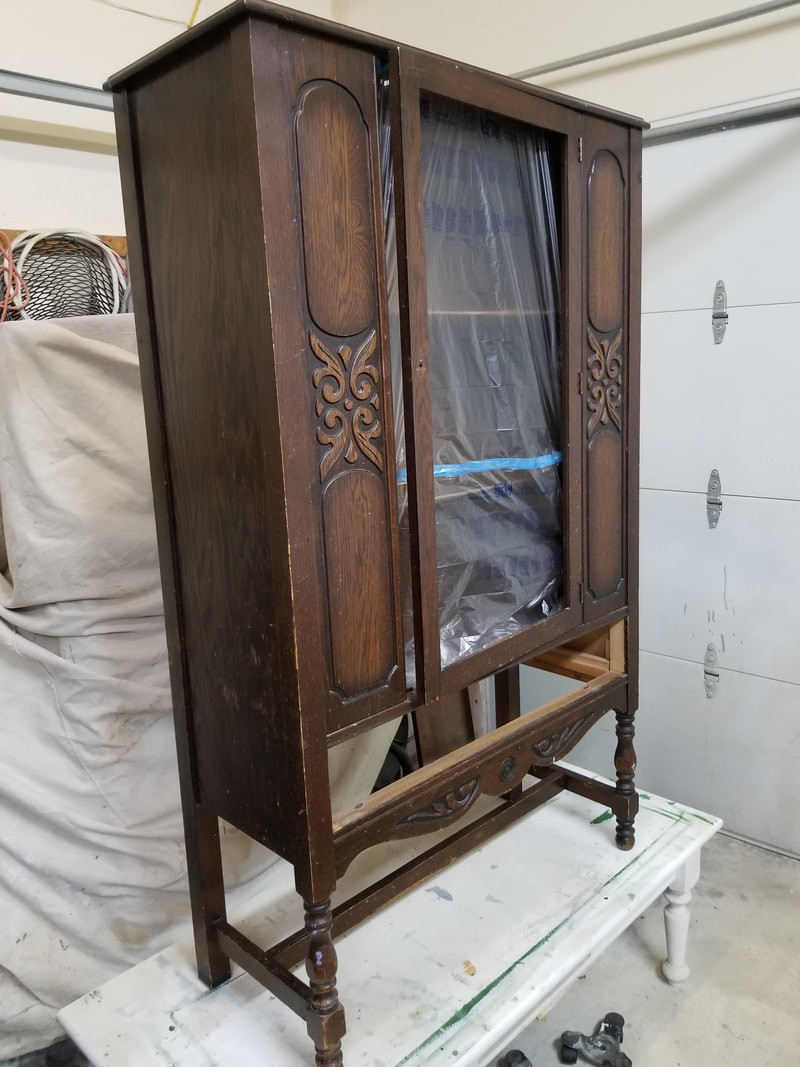 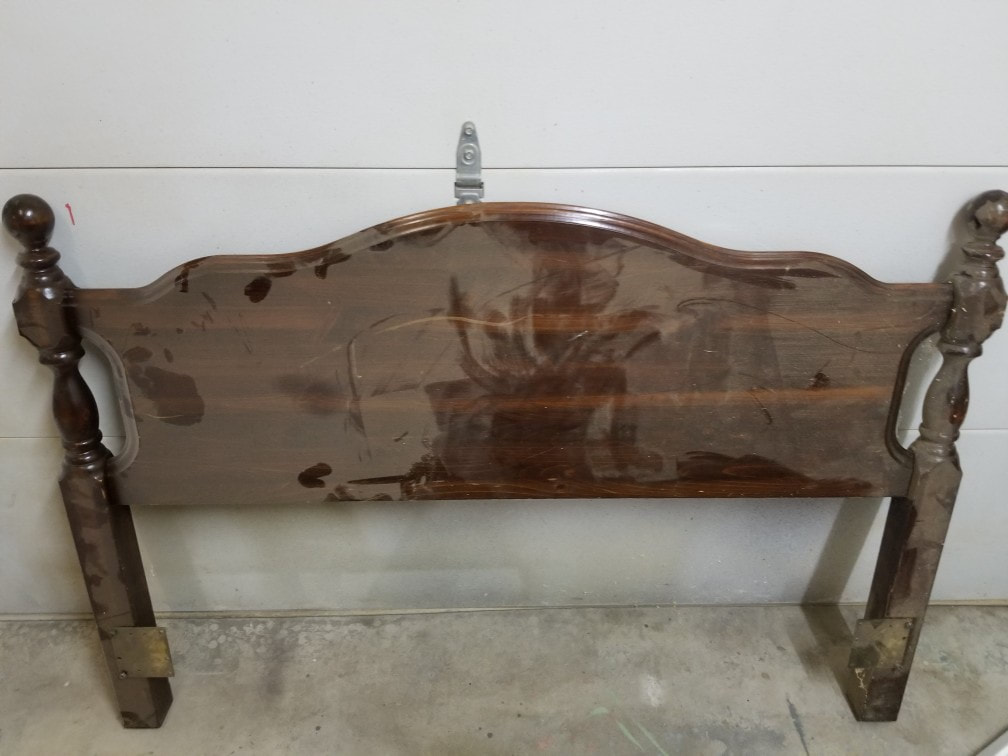 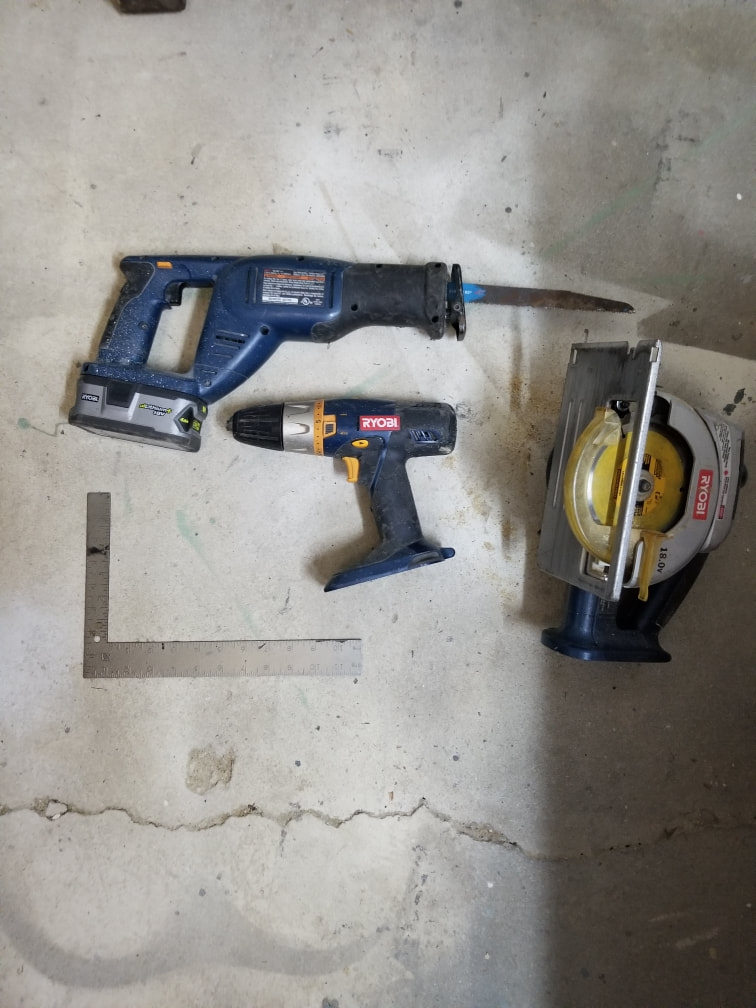 This is the headboard we used, we then used a sawsal to cut the posts off. 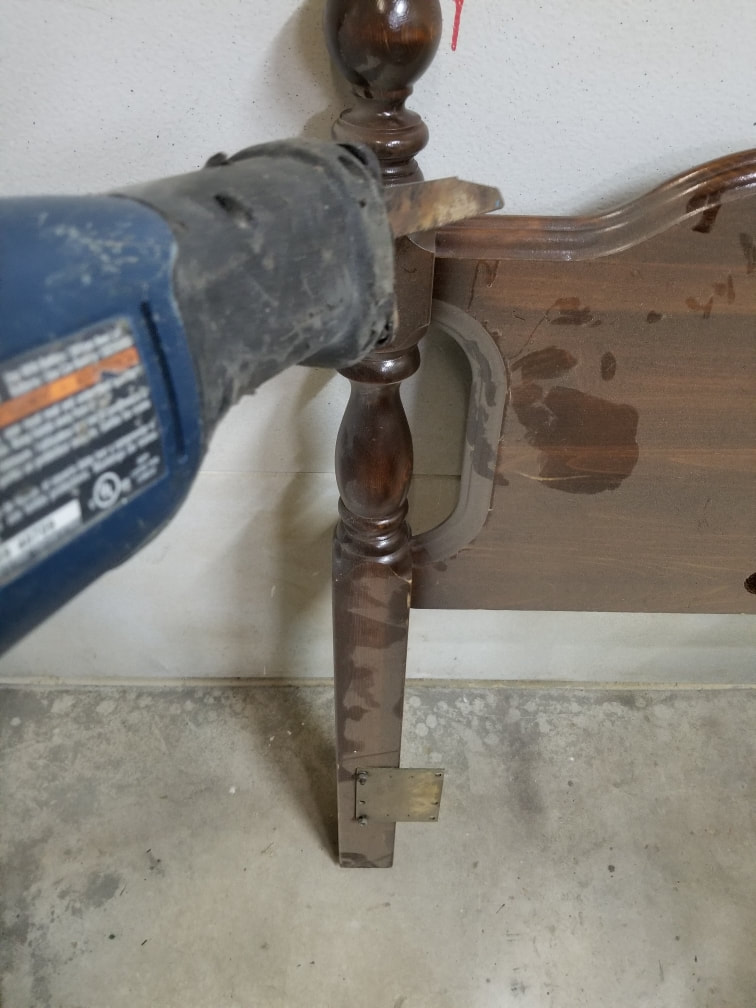 You are going to then use a square to line off where you are cutting, make sure you have measured the size of shelf you need for the inside of your cabinet. 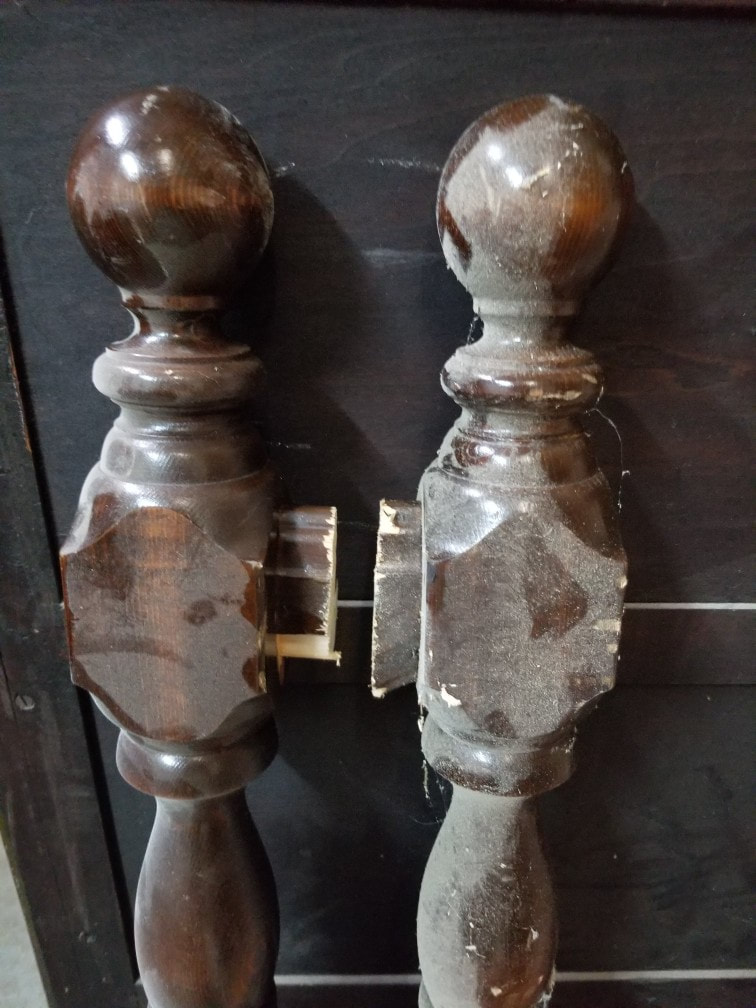 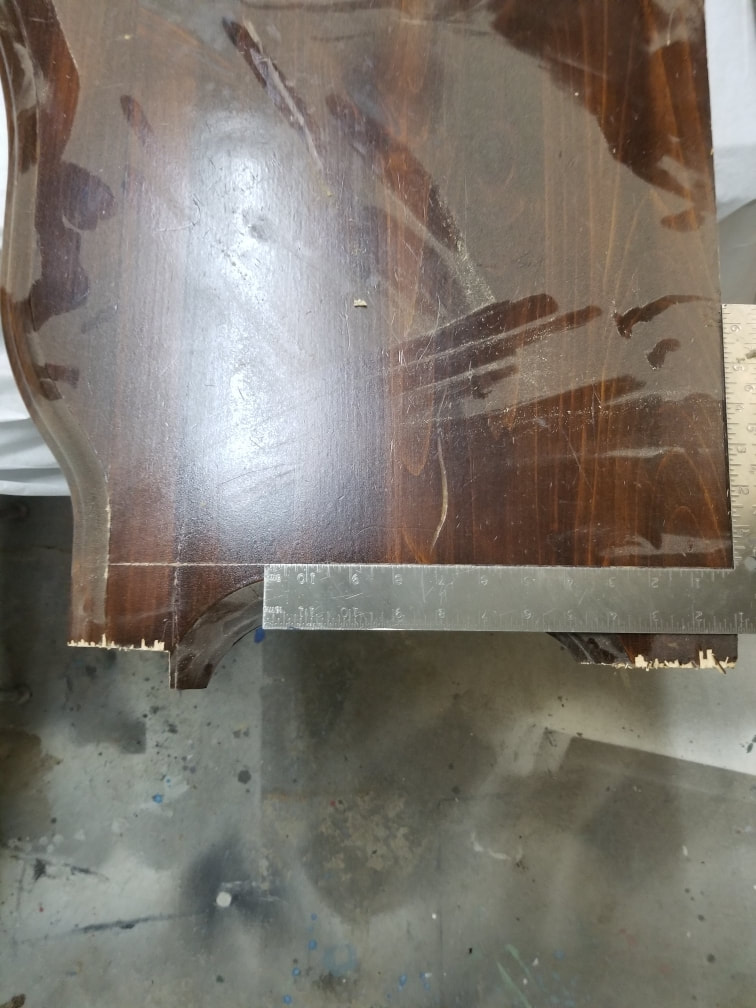 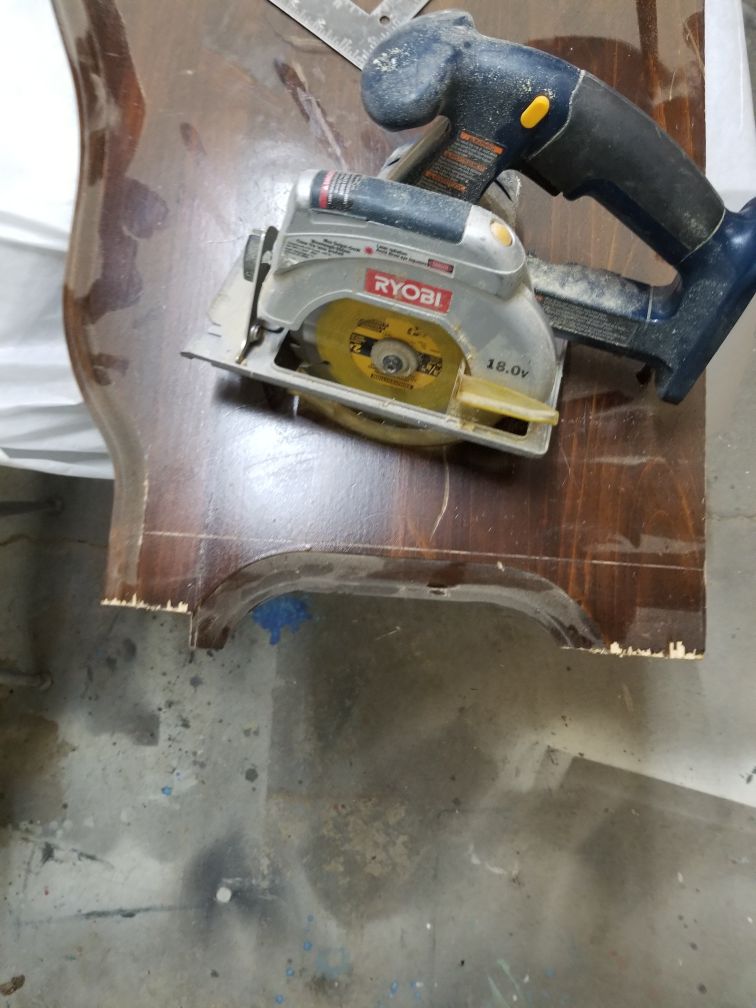 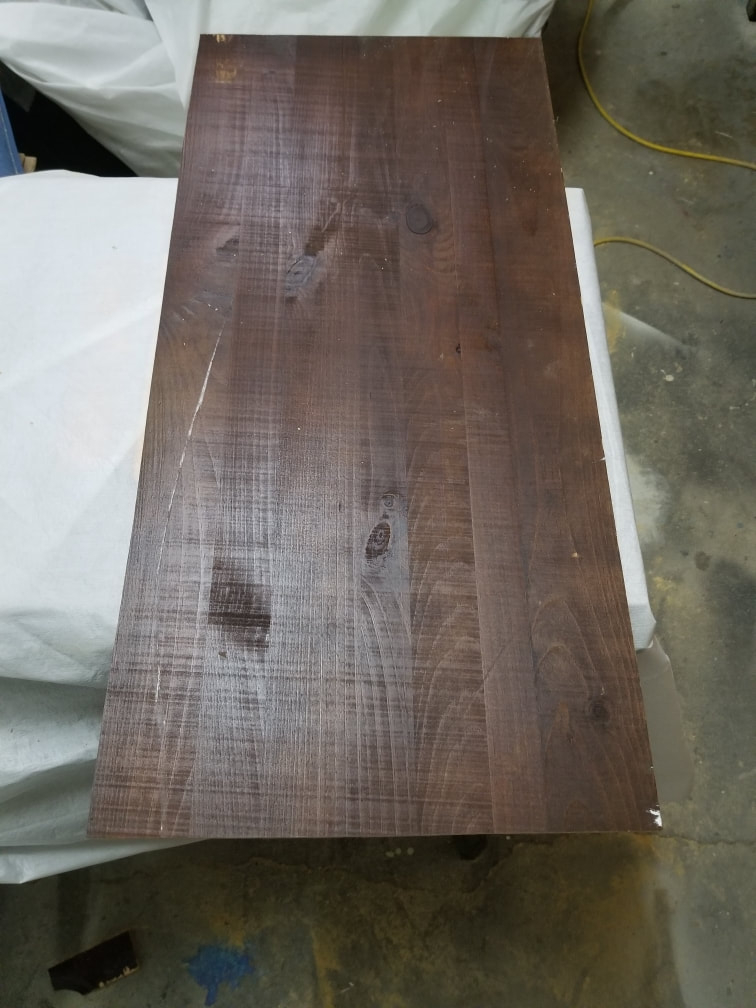 You then have cut your board to size. You can sand it down if you want and re stain or leave as is if it matches what you're creating. 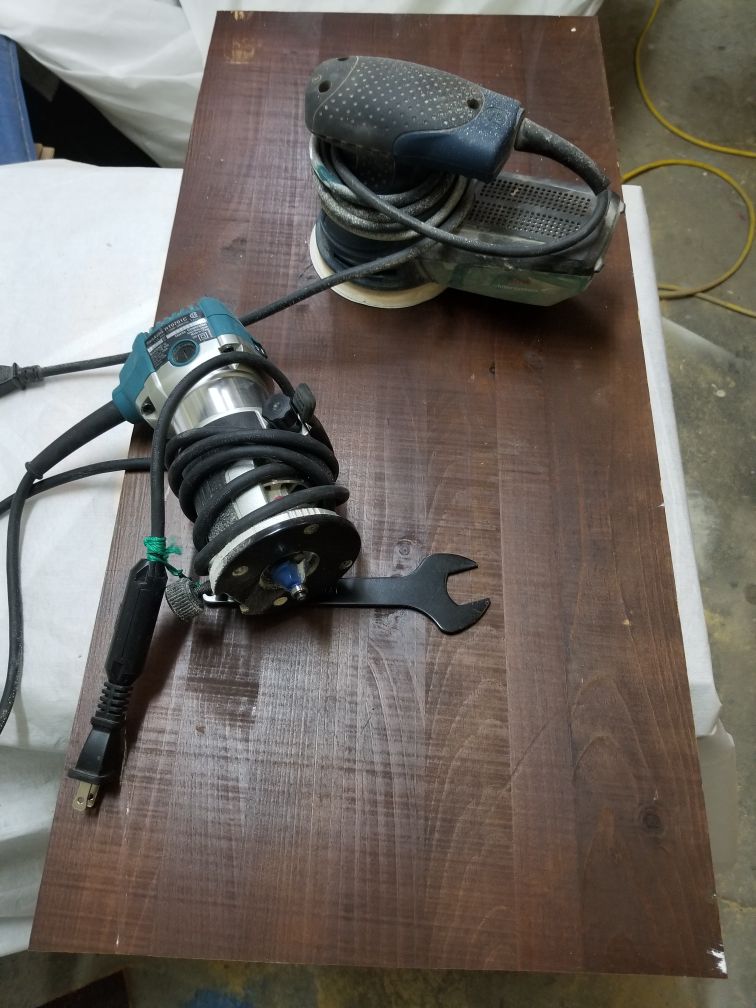 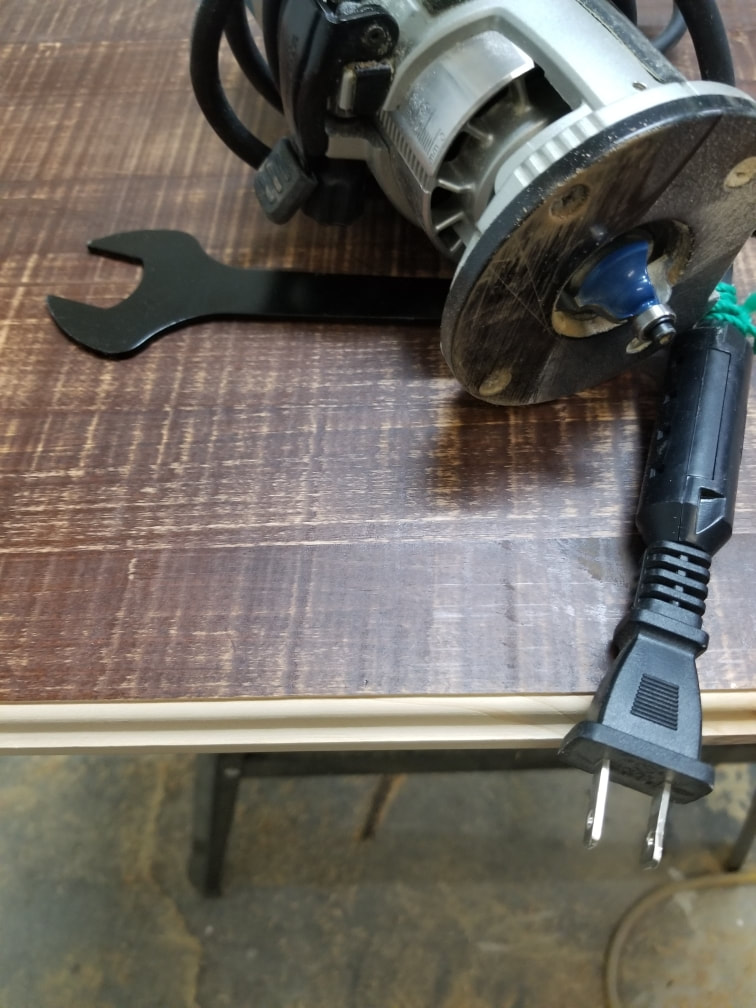 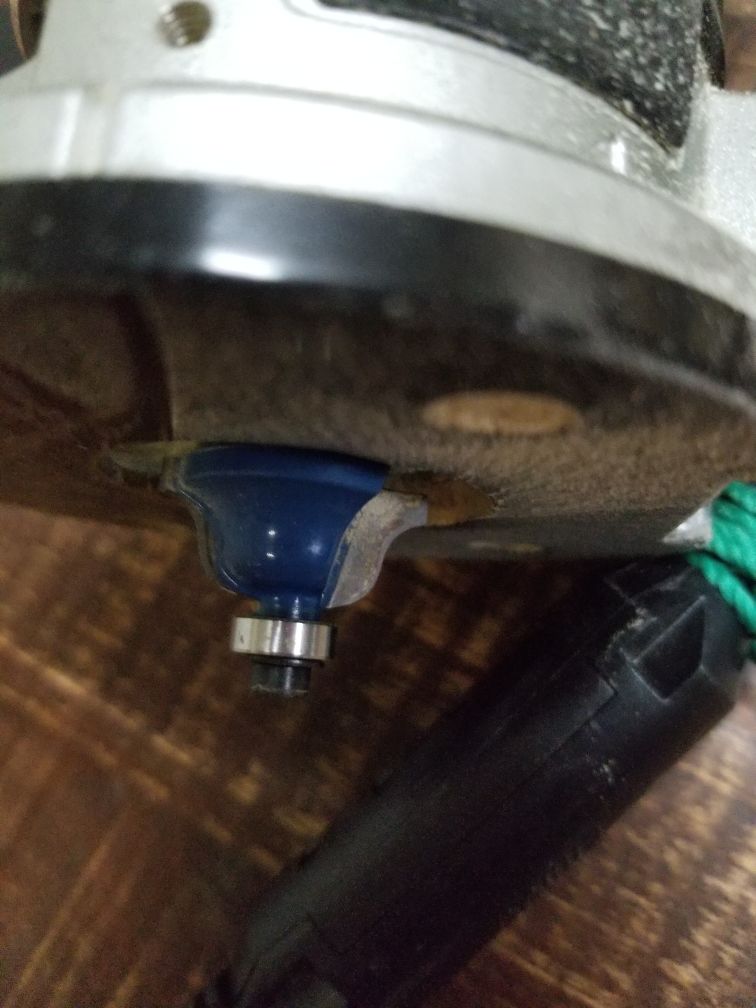 You can trim your edges and shape them with your router. The bit used was roman ogey. I think thats how you spell it lol. then you can stain it like i did to match the inside above. There were two previous drawer stoppers where the drawer used to be so my husband added two divets in the shelf so that we could hammer it down and the stoppers would go into the wood. Then you seal and let it cure. I made sure i had painted the whole inside of where the shelf was going. I used Wise Owl white primer, Wise Owl paint in Citron and Wise Owl satin varnish. Wise Owl products are here on my website or my Etsy shop. Thank you for reading 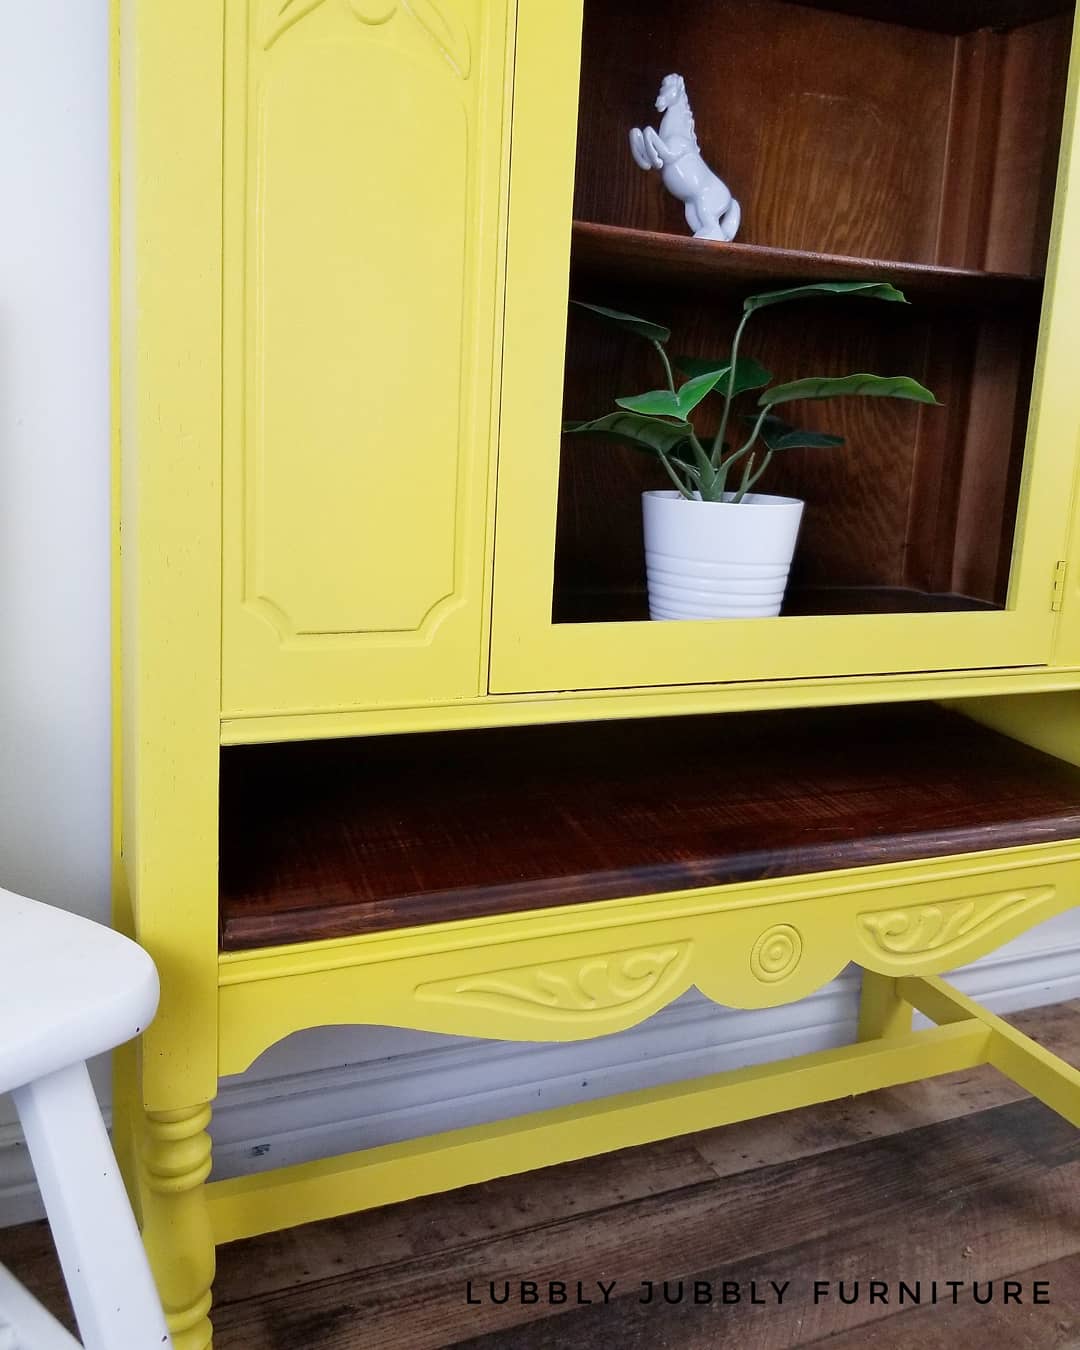 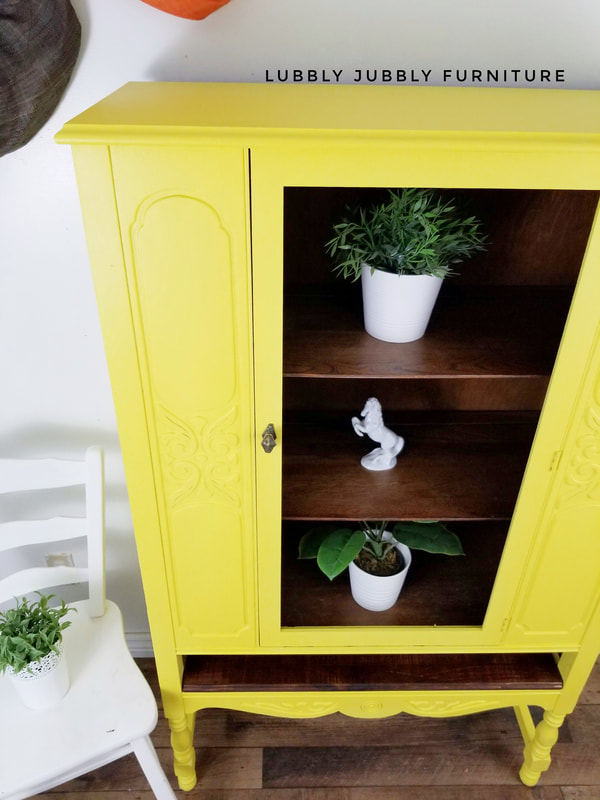 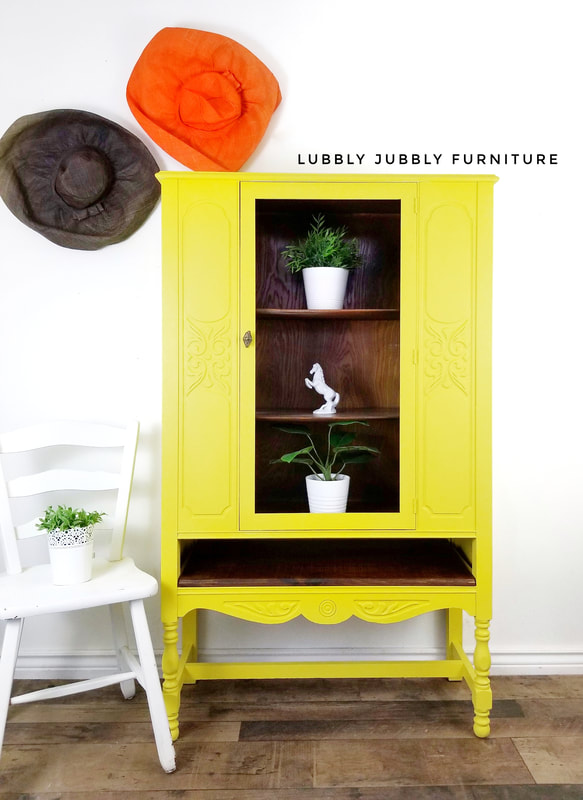 HOW TO CREATE A HUTCH INTO A CABINET  Hello everyone. Lets get started with this cabinet. First of all you do not need to have a cabinet that looks like this one, you could have a hutch top that is any style, but it does need to be flat on the bottom. It cant work if it’s a top of a hutch that doesn’t have the flat bottom and only has the wood arms at the sides. That won’t work. So if you have the flat bottom top then you can start working on it. Second thing you need to do is take out all the glass panels. This is so you aren’t painting on the glass. This is how it looked when I had painted it years ago..... So the picture below is when I first started painting it green, it was originally brown wood and then years ago I painted it white with wax. It has been in my living room for a long time and I decided to switch it up. 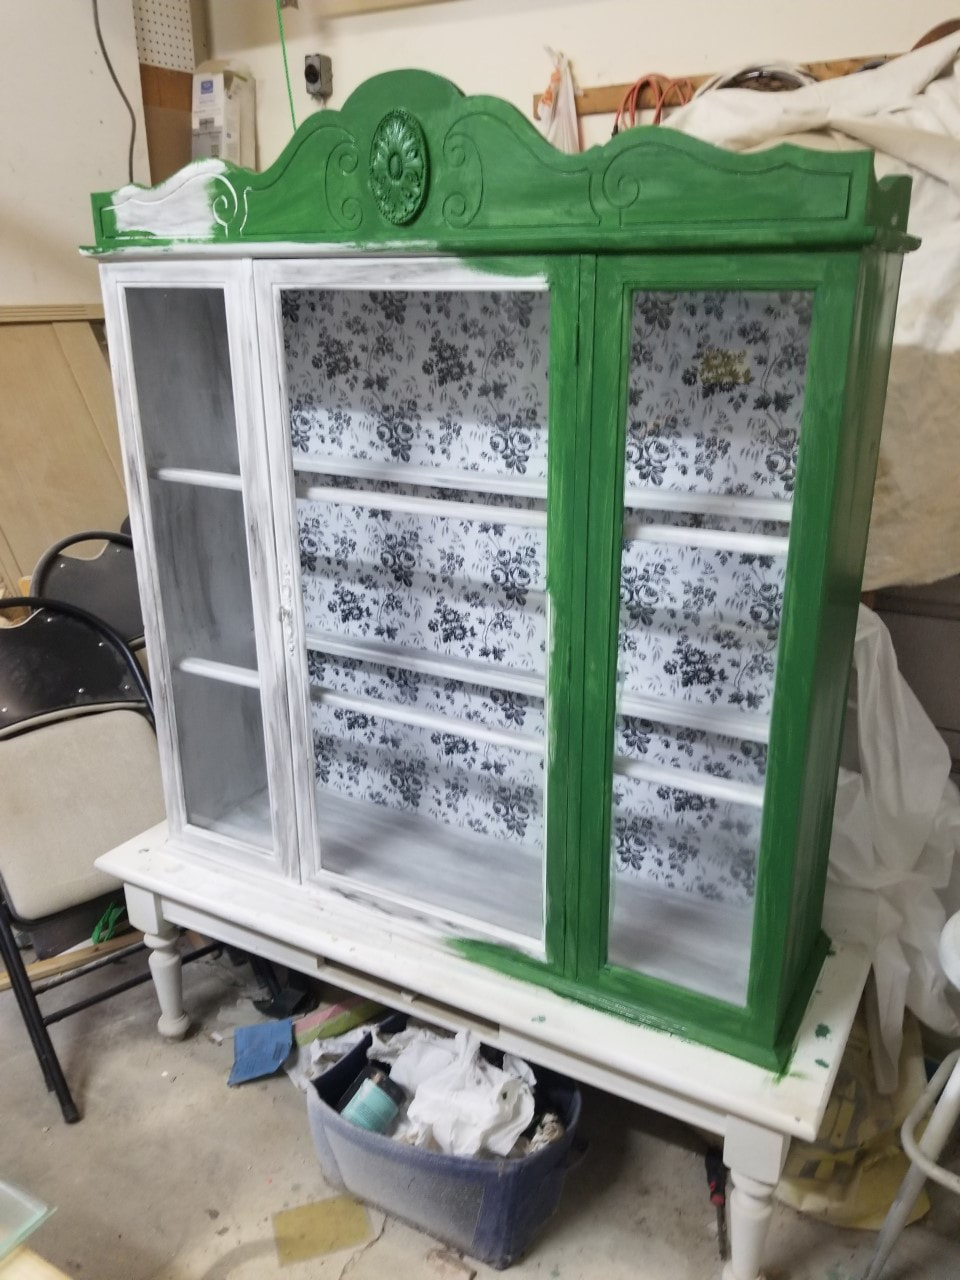 Now I wanted to have it higher so it needed legs of course so that it could a functional cabinet and cute looking. It's gotta be cute right? Once you take the glass panels out you are going to prime your piece if its original wood. I suggest clear primer or you can use white. This white paint was my base coat. Yes you can paint over years of a wax finish without sanding, but give it a little scuff. Once you've done your prep work, ( you can learn about priming and tips in my tutorial) You paint the entire piece in your choice of colour. I used Country Chic paint in Fireworks and a touch of sparklers. You're probably going to do about 3 coats of the green which is what I did. 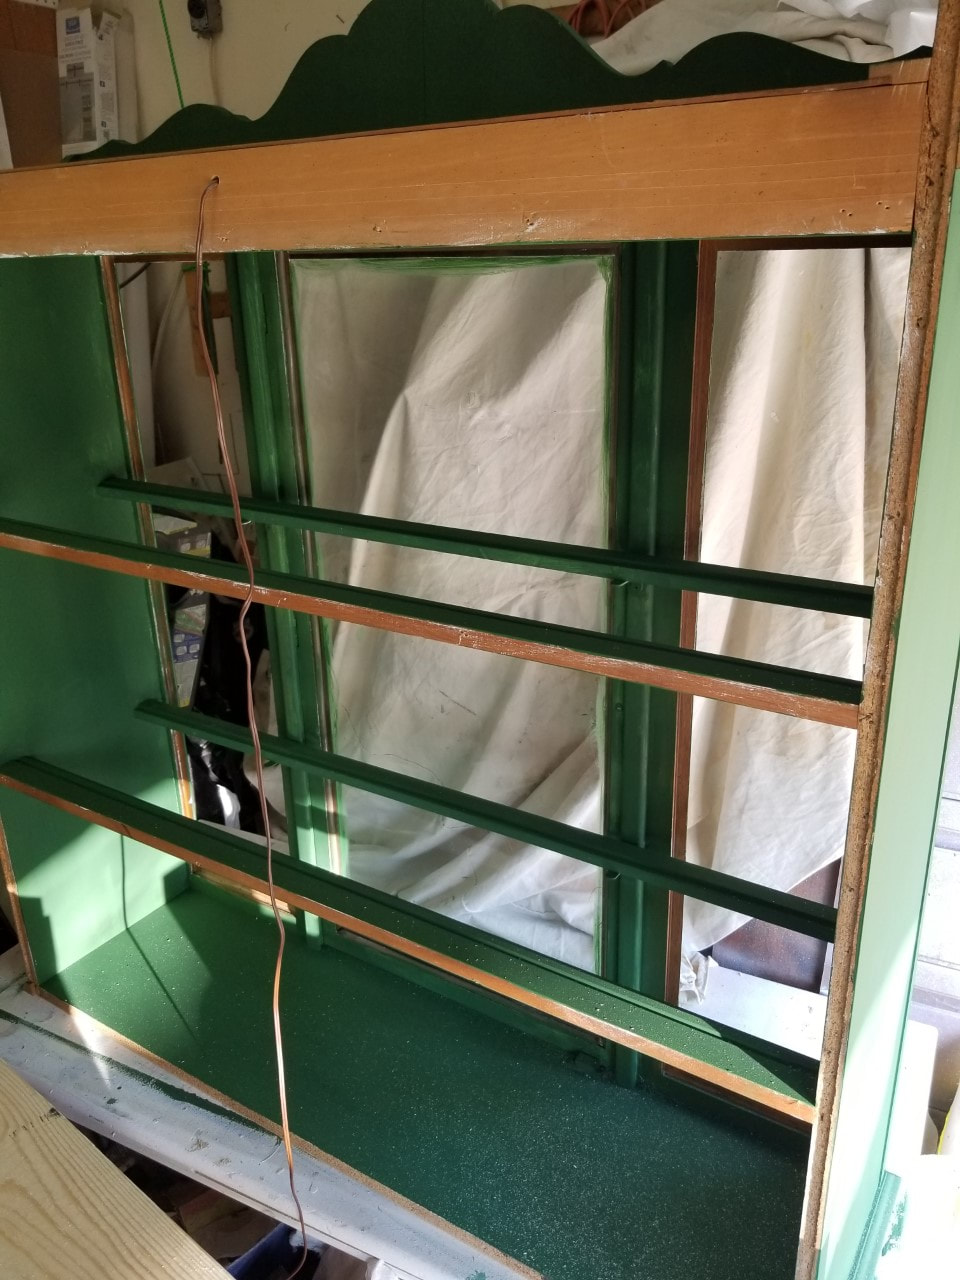 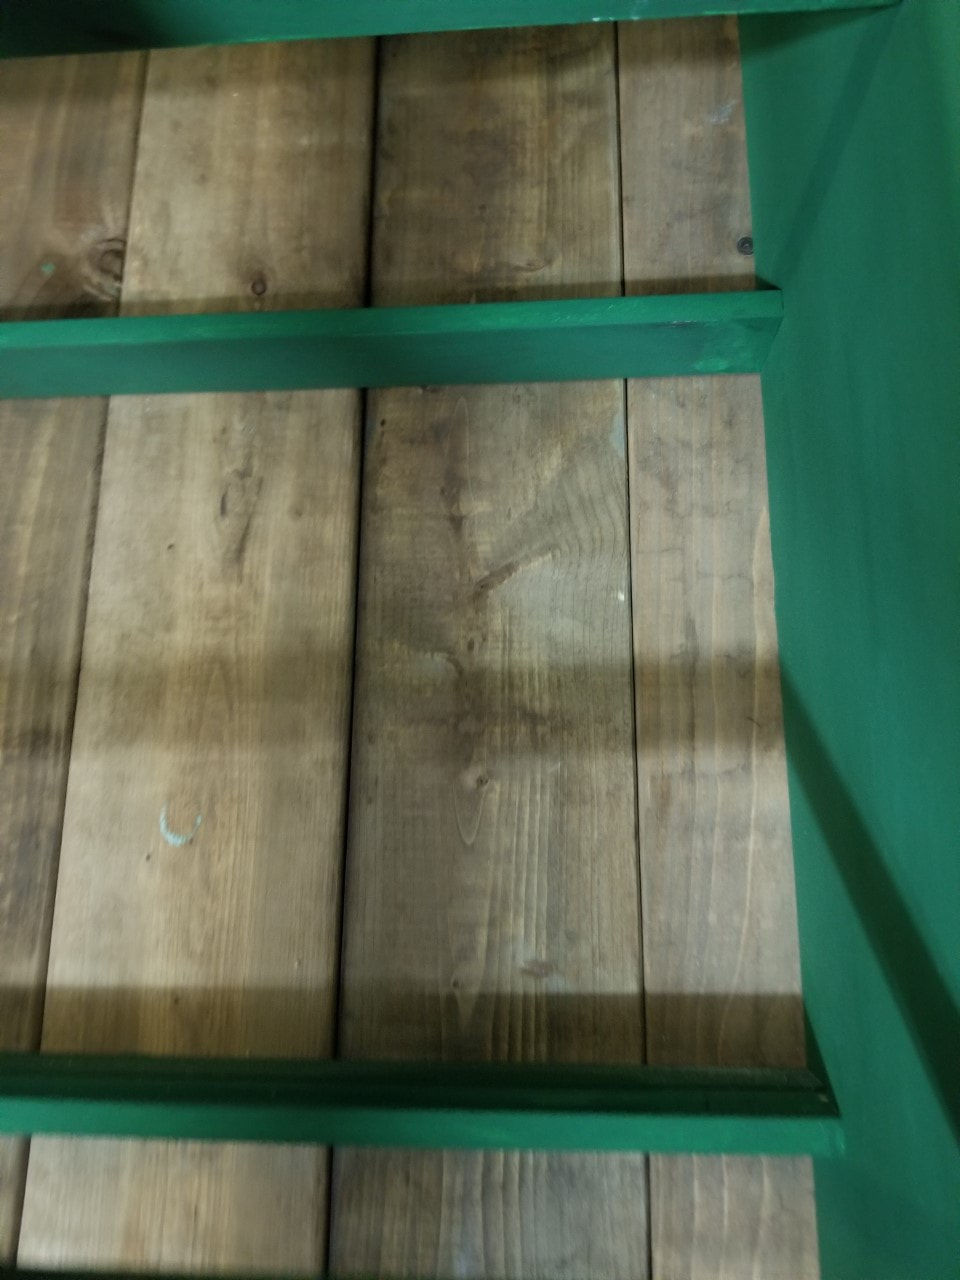 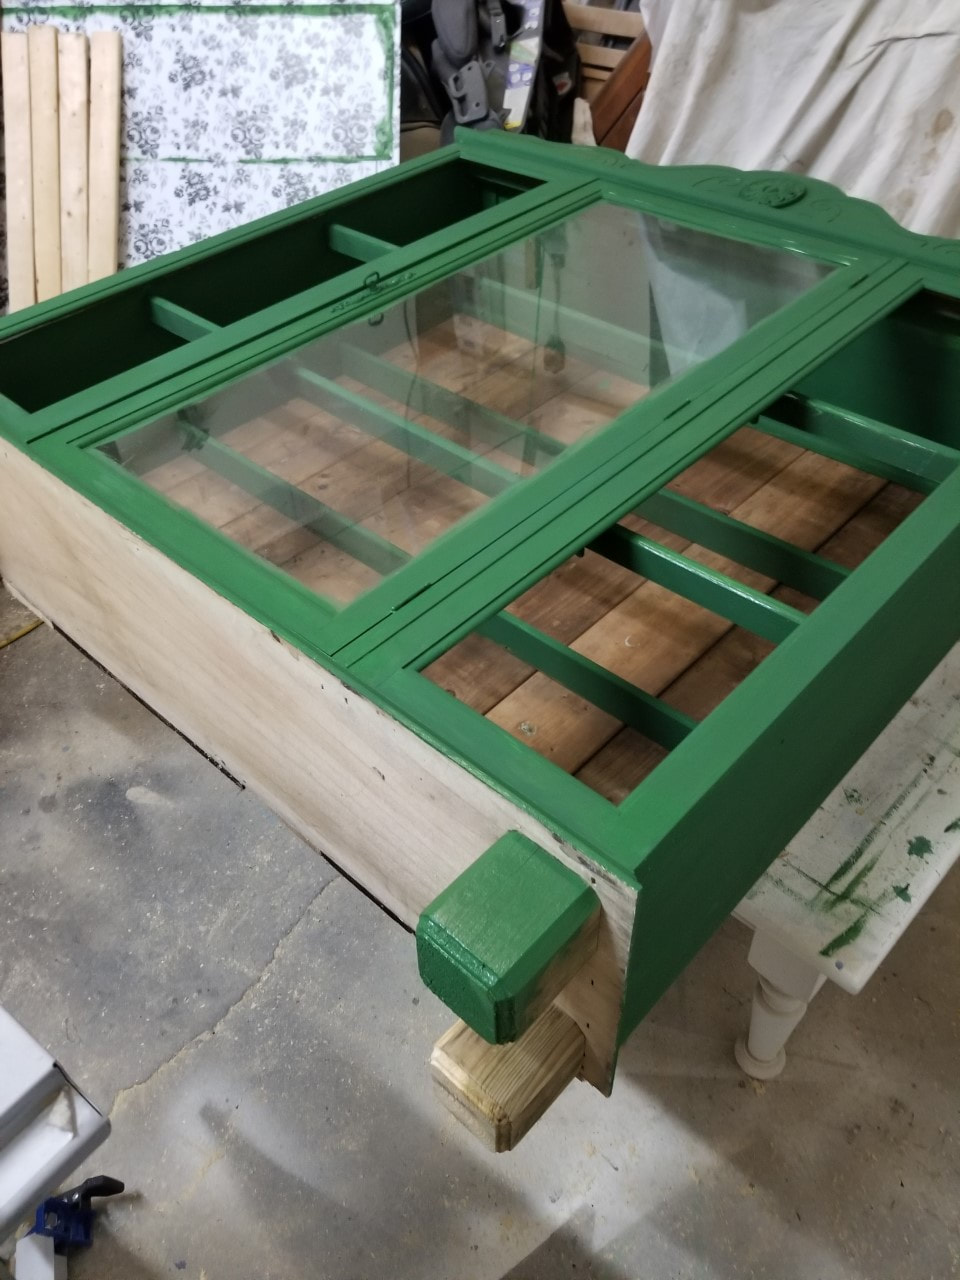 Remove your inside light and make sure you have the back off so you can paint behind and in front of the cabinet to reach all areas. You will then make your back by using wood boards, you can use any wood from Lowes and they have wood that is already stained. if you have an open top like mine did and you don't like it then you can also cut boards to fit the top. see pictures. Once you've put the back on and created the top you can start to make the legs. Here is where my Husband helped me and he made the legs for me. Depending on what tools you have you can router the wood to create round legs or different shapes and sizes. If you don't want to make them Lowes sells table legs but I found them a bit pricey and that is why we chose to make them. The legs we decided on are more square with a rim. Attach your legs and paint them. Once you've done this your cabinet is ready to seal. I sprayed my Wise Owl satin varnish on using my Homeright super max sprayer, but you can brush it on with a Cling On brush F40 or F50 if you don't have a sprayer. You let your topcoat settle and then place all the glass panels back in. Your cabinet is ready to rock and roll!!!! . 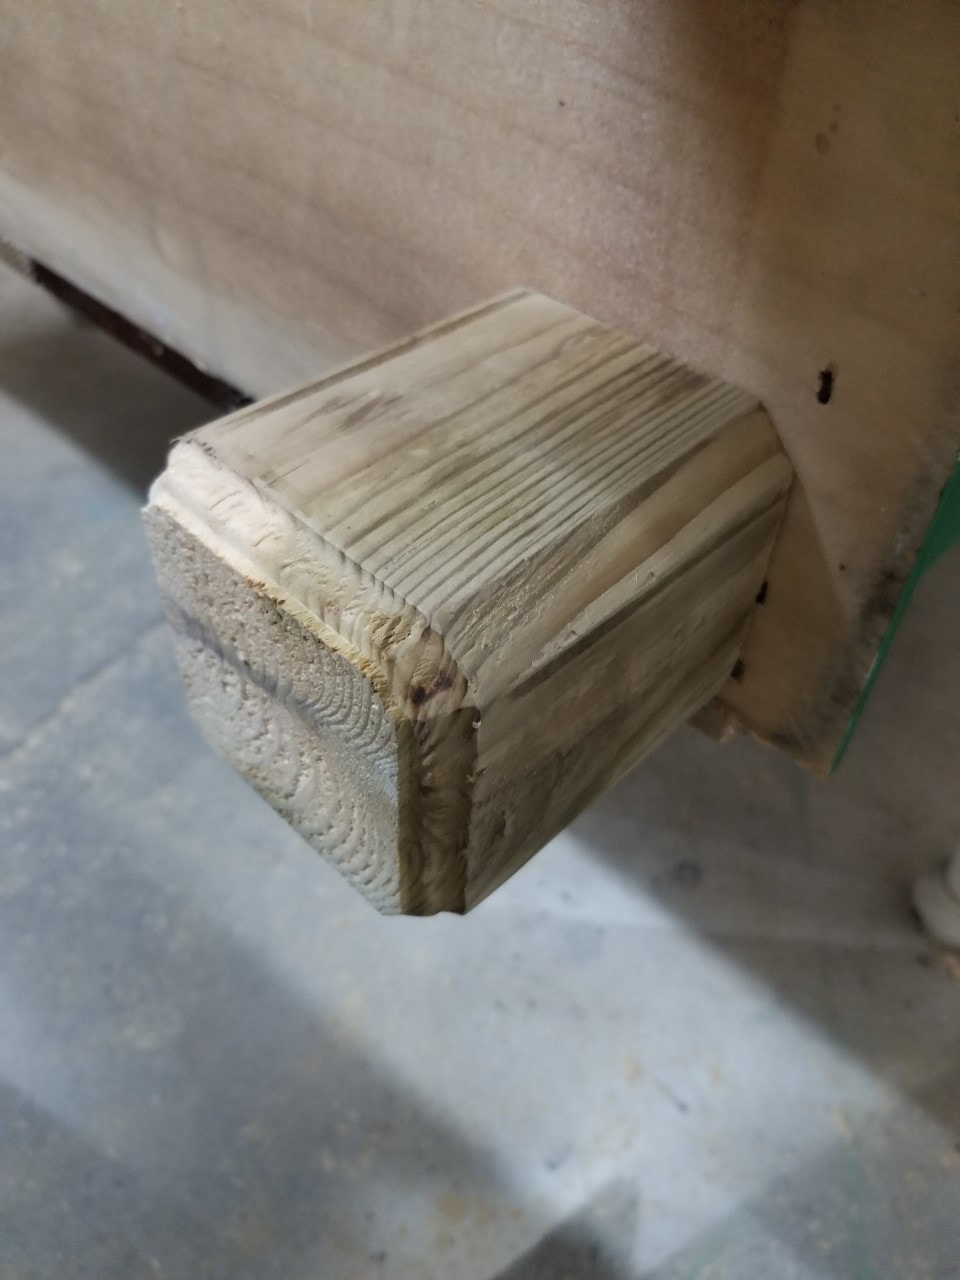 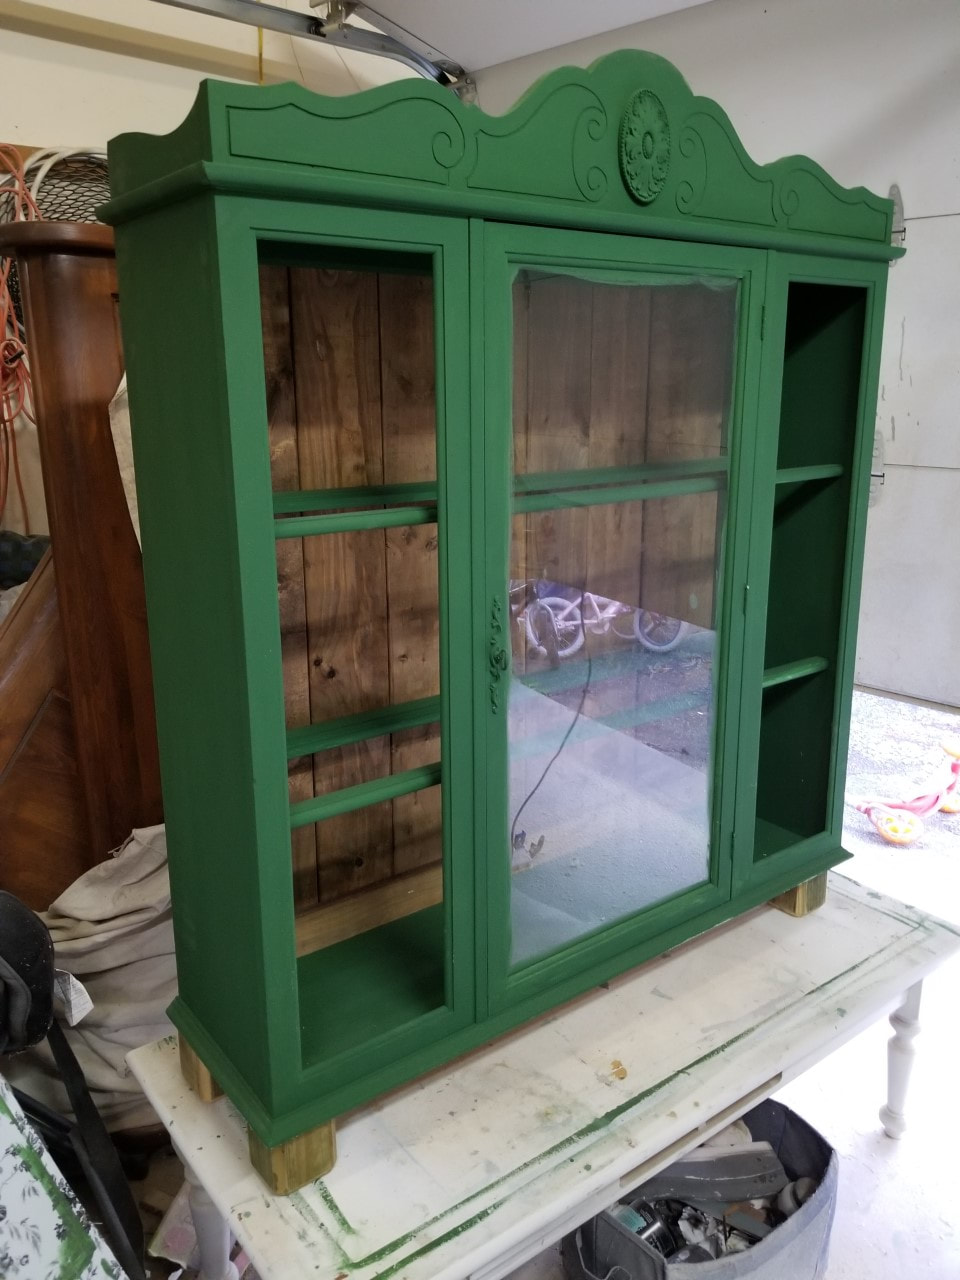 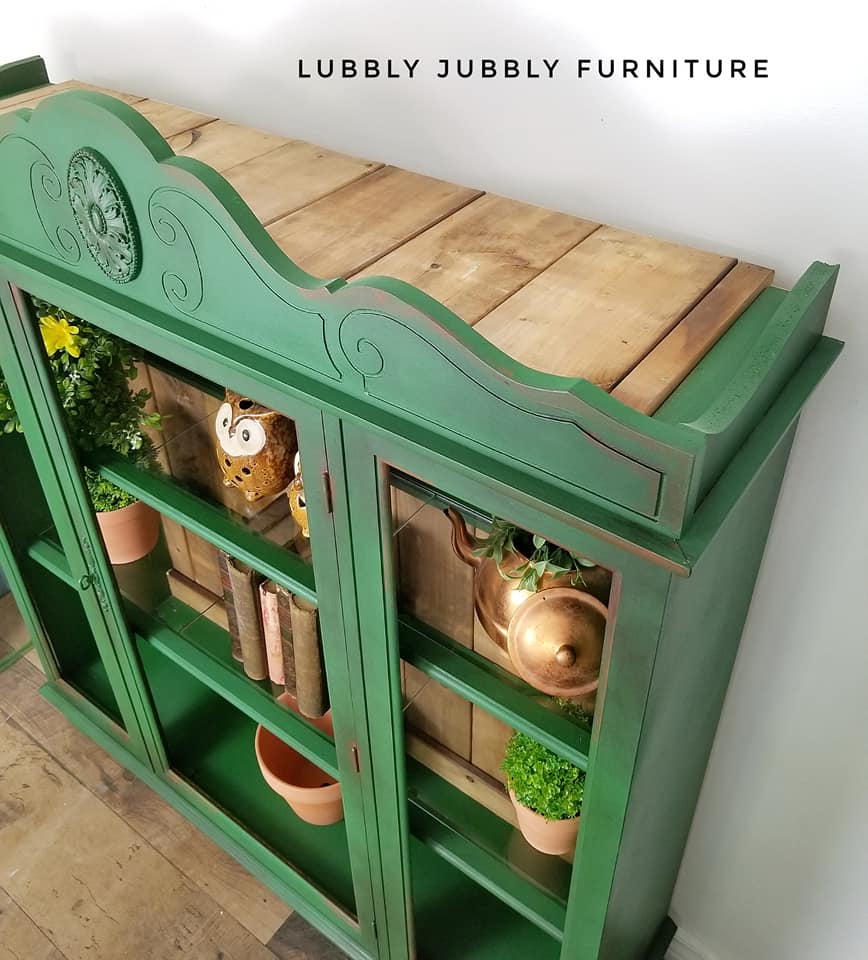 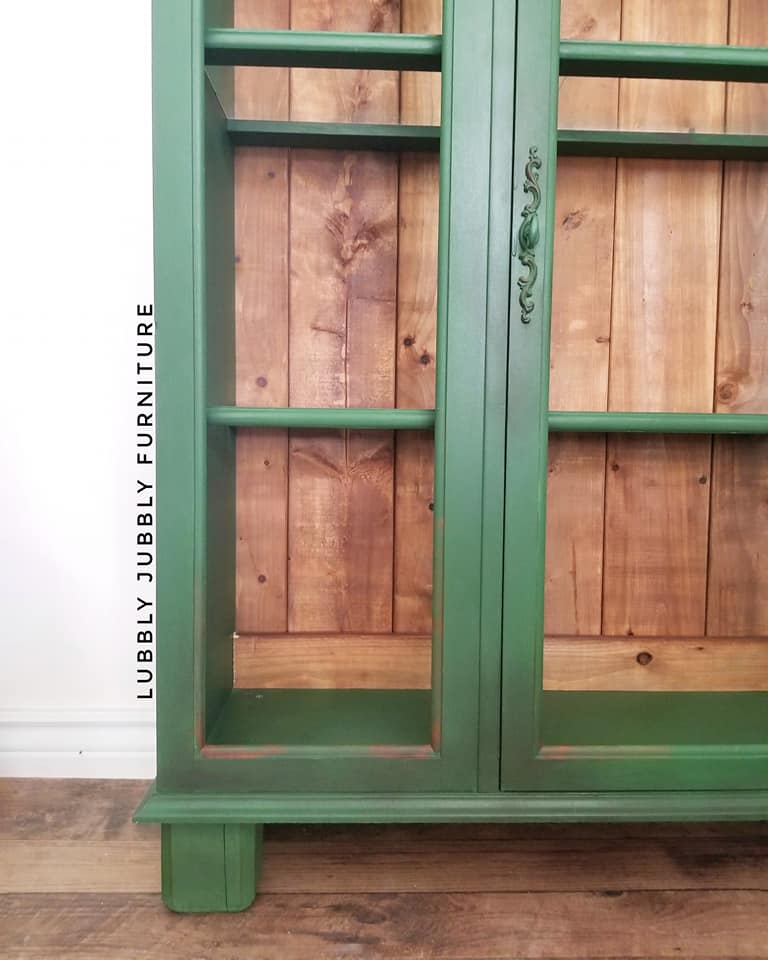  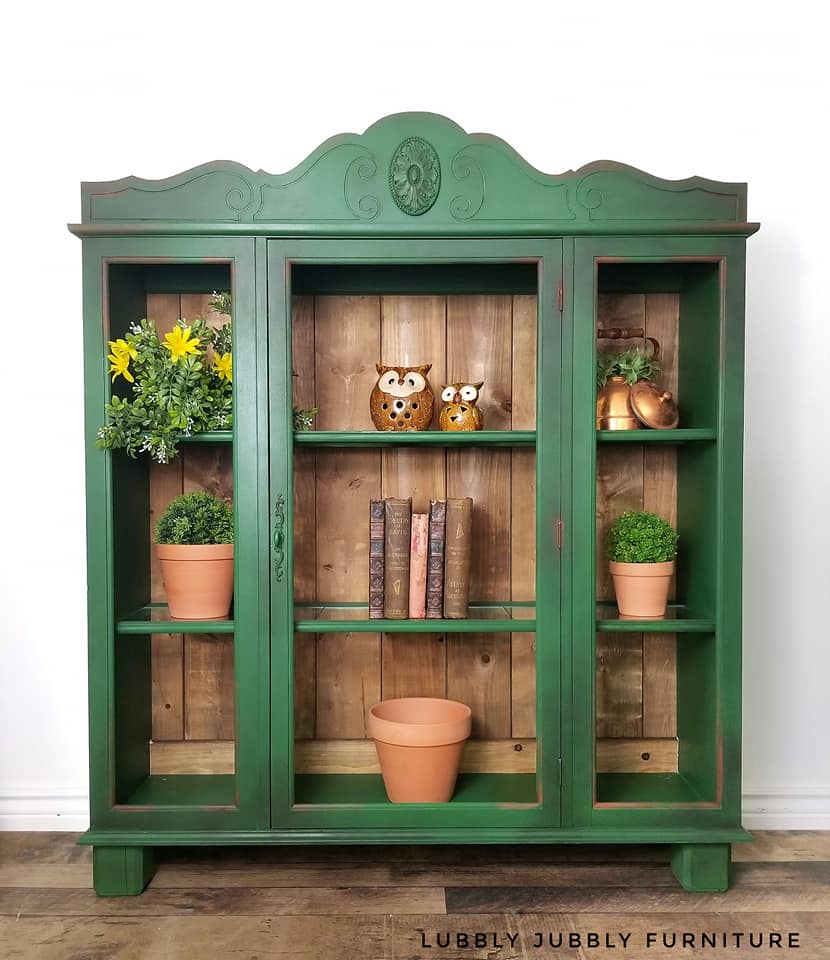 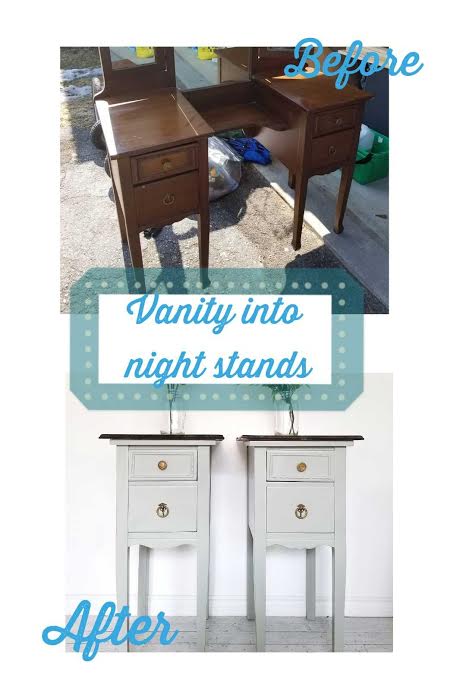 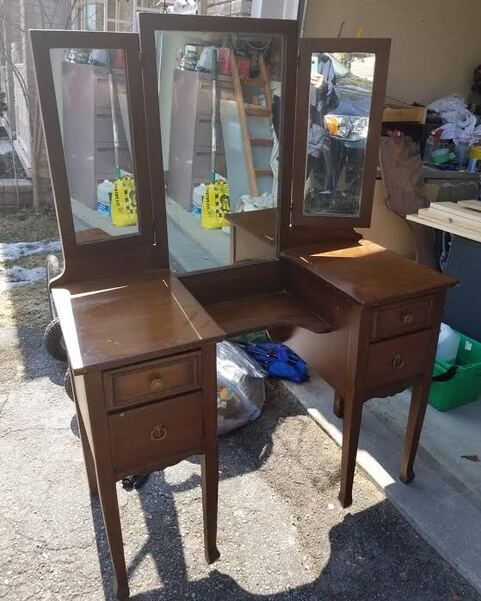 Hey guys, hope you are all having a wonderful week. I finally have this blog post up yayyyyyy. Summer is still busy and going strong here in our household. All camps are done for July and we are free for August fun to do what we like. For me that's mostly painting he he he but also lots of cottage time for the family. We had an awesome long weekend at the cottage, how about you? How was your long weekend? Let's get started on this transformation shall we, I'm sure that's why you are here right? well I picked up this vanity and I can't remember from where as we had picked up several pieces and one being another vanity around this time. I was finding lots of vanities to transform to tables during that month which was an odd thing as they are hard to find especially when you really are looking. Lucky me though I managed to snag this one and i visioned night stands because the sides were nice a tall and that is what everyone wants these days. 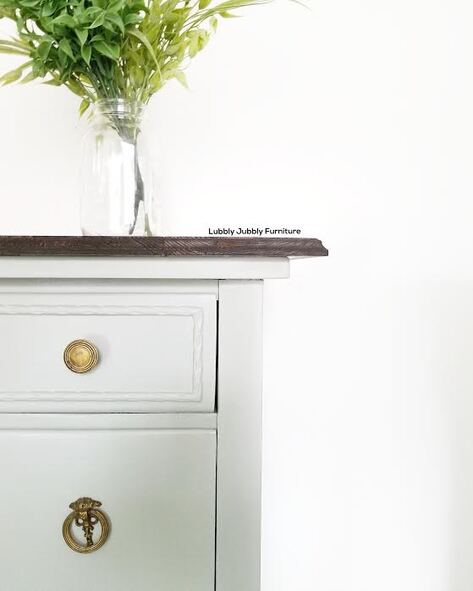 To start of with we removed the mirror and the middle section, WE meaning Mr Lubbly Jubbly and I. This was easy because the back part and middle had screws so it just had to be undone but it did leave gapes in the sides, which we filled in using wood filler. The sides were then sanded down to a smooth finish. Now once the vanity was separated each table needed a fourth leg, now this is not my expertise area, this would be Mr Lubbly Jubbly but he did tell me what he did and I watched to see how it went. He took two pieces of wood and measured the other two that were attached at the back so that they would be the same height and smooth finish so that the tables wouldn't be wobbly. luckily they fit right into the empty slots where legs would go and they were glued and nailed in. 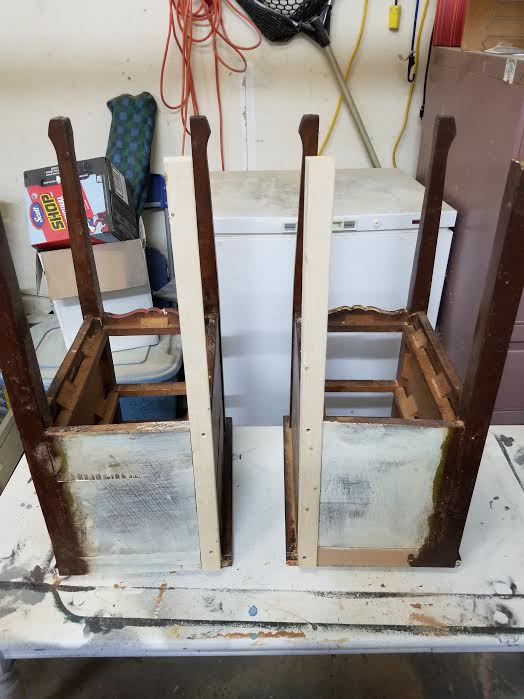 For these tables i wanted a little extra height so Mr Lubbly Jubbly made two new tops for them which were sanded and stained. 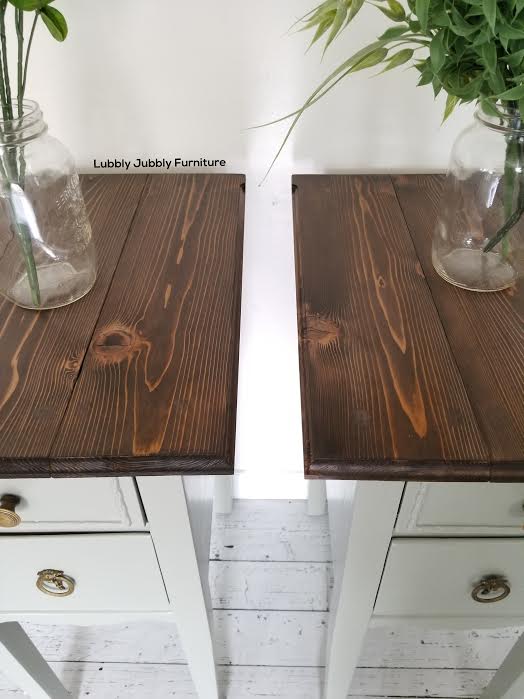 It was time to paint them and I used Jolie paint for these two in Eucalyptus which is a soft green almost beige. I painted the original tops because they show underneath still. 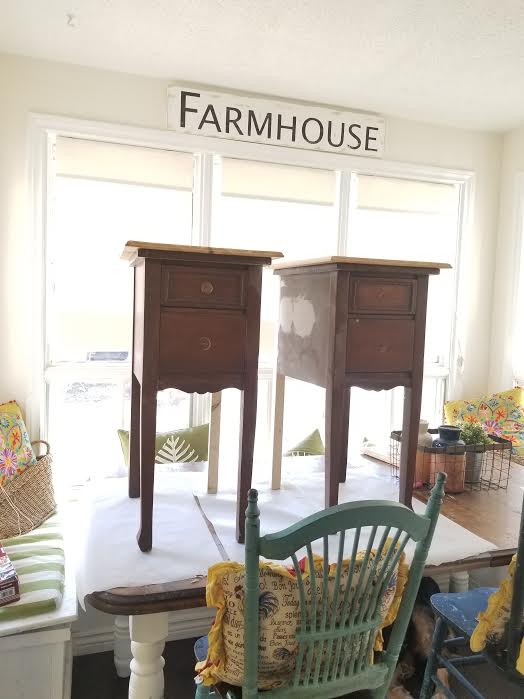 You can see above I was painting them on my dining room table ha ha. That table certainly needs a redo that's for sure. Ok back to the night stands. Once painted I brushed General Finishes high performance topcoat in satin on the entire tables. Once the table top stain was dry i sealed with the topcoat I used on the tables. I then staged and lined the drawers with paper and that is how you can turn a vanity into night stands. I understand it can be overwhelming and if you don't have help with them like i did, so you can ask me anything and I will advise you in what to do. Have a lovely day guys Megan 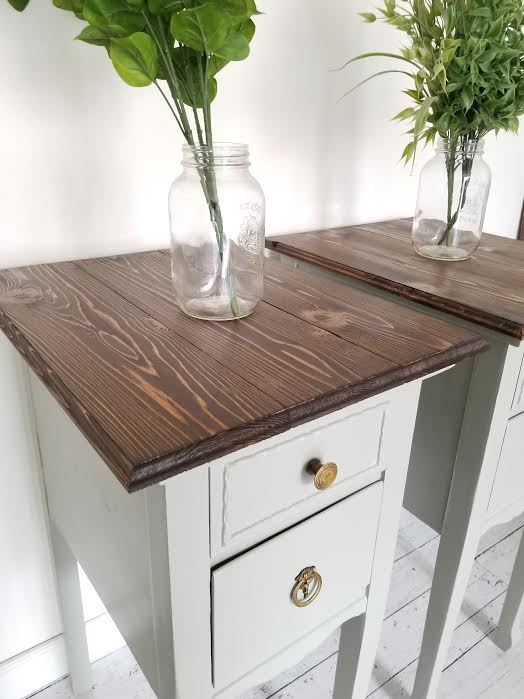  |
|
 RSS Feed