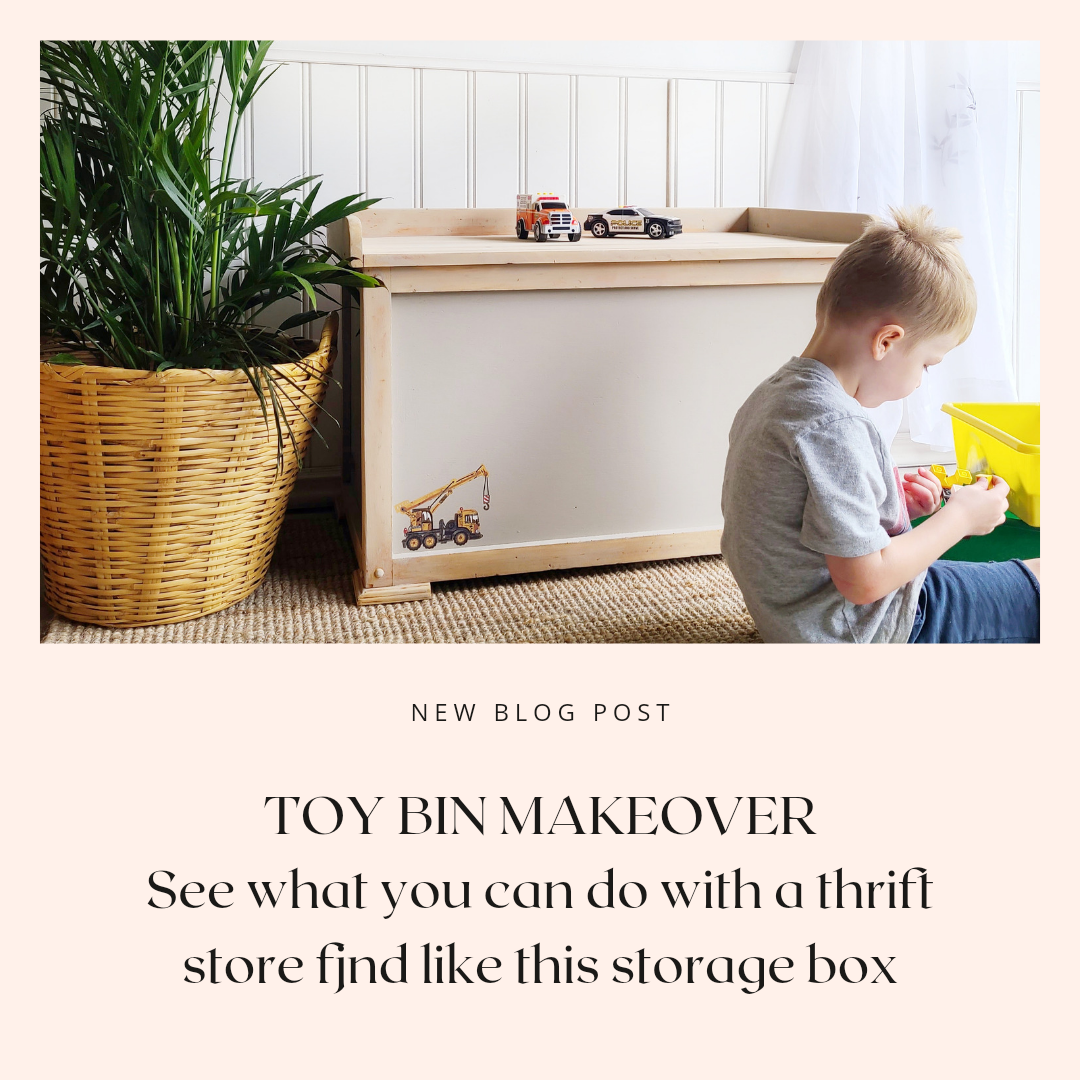
 Who doesn't need a toy bin or storage box? I think we all do. I found this wooden box with a lid from the thrift store, as soon as I saw it I knew it would be the perfect piece for the transfer I needed to use. Now you don't have to use the construction transfer I used you can use so many of the other designs available at Redesign With Prima. let's get started!! 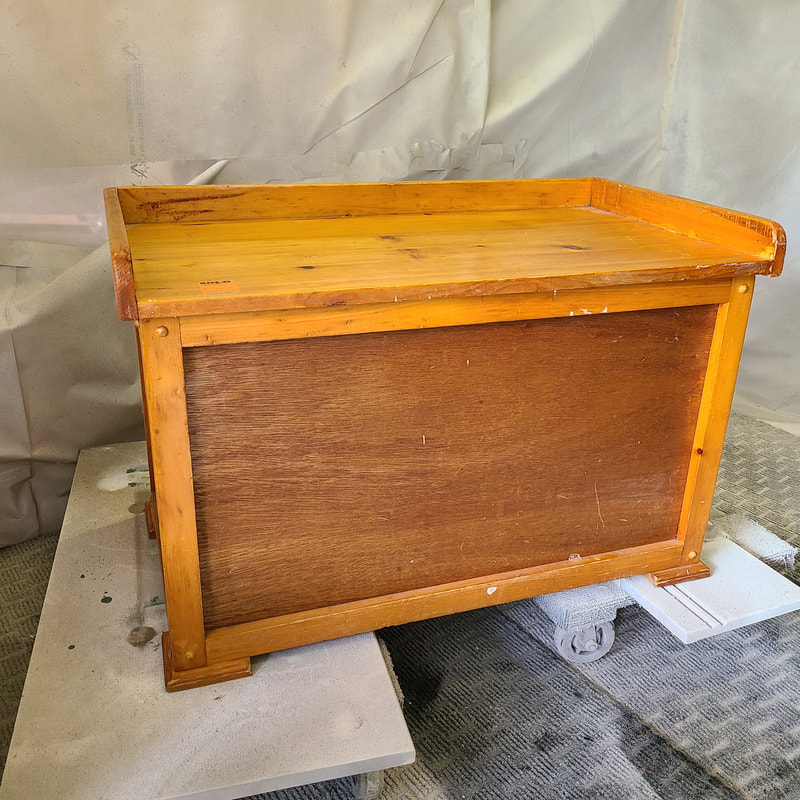 Like I said I found this bin at the thrift store and I wasnt planning on looking for a toy bin at all, I was looking for other pieces for other projects. First I sanded the piece, I scuff sanded the panels and sanded down to raw wood the trims. I then cleaned the entire piece inside and outside with Krud Kutter. 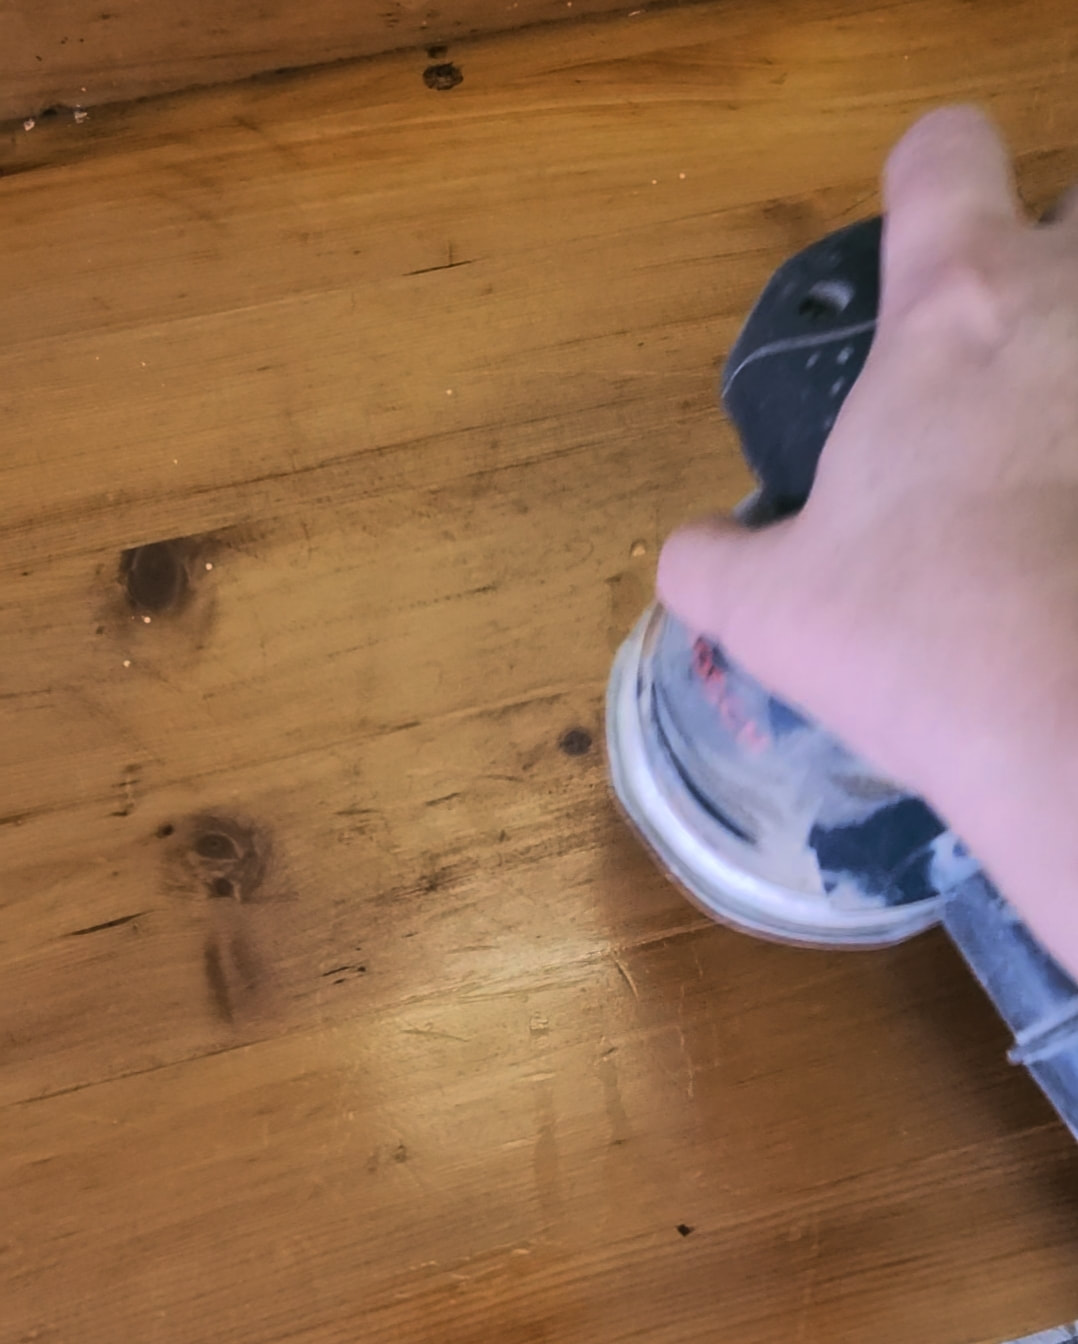 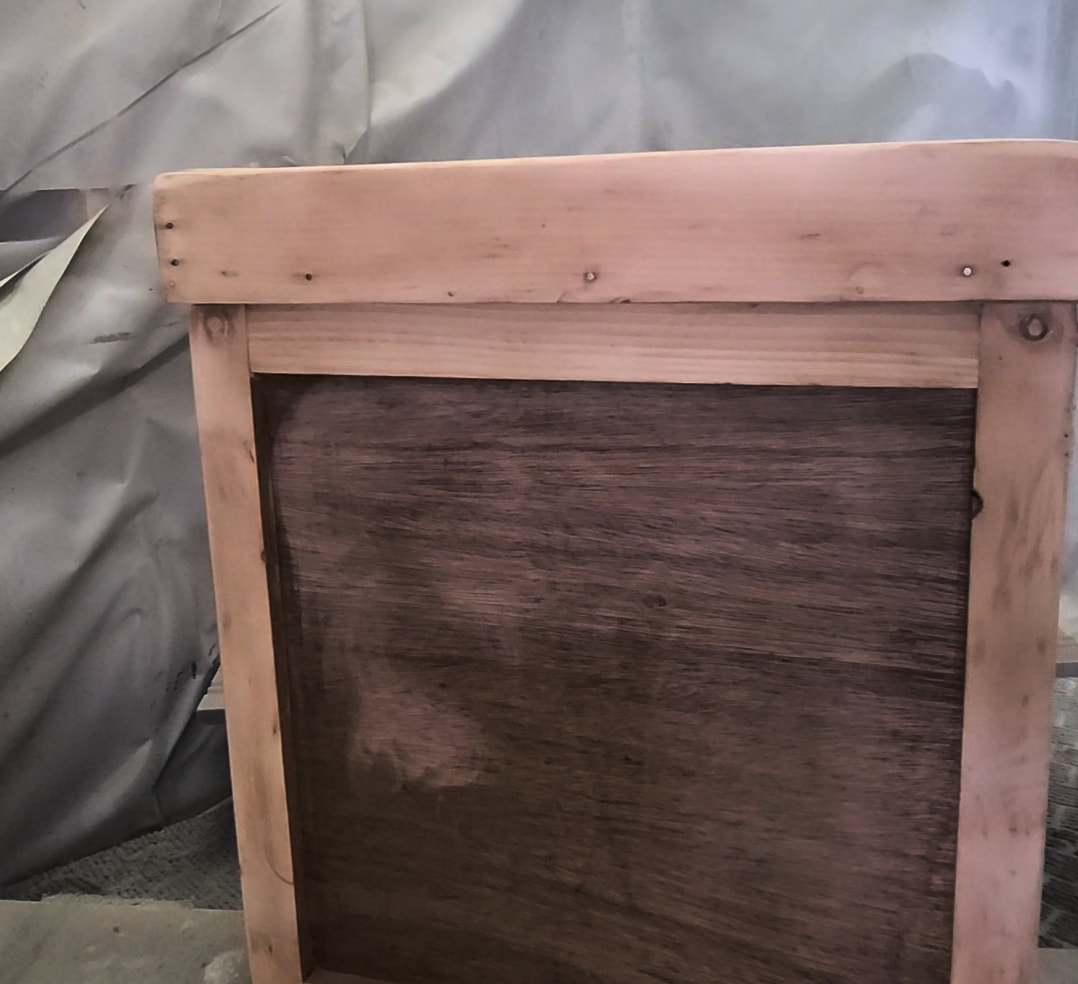 Once that was done I got my paint out and started painting the panels on all sides with Country Chic Paint in Soiree and using my Country Chic Paint angle brush. I did about two coats. 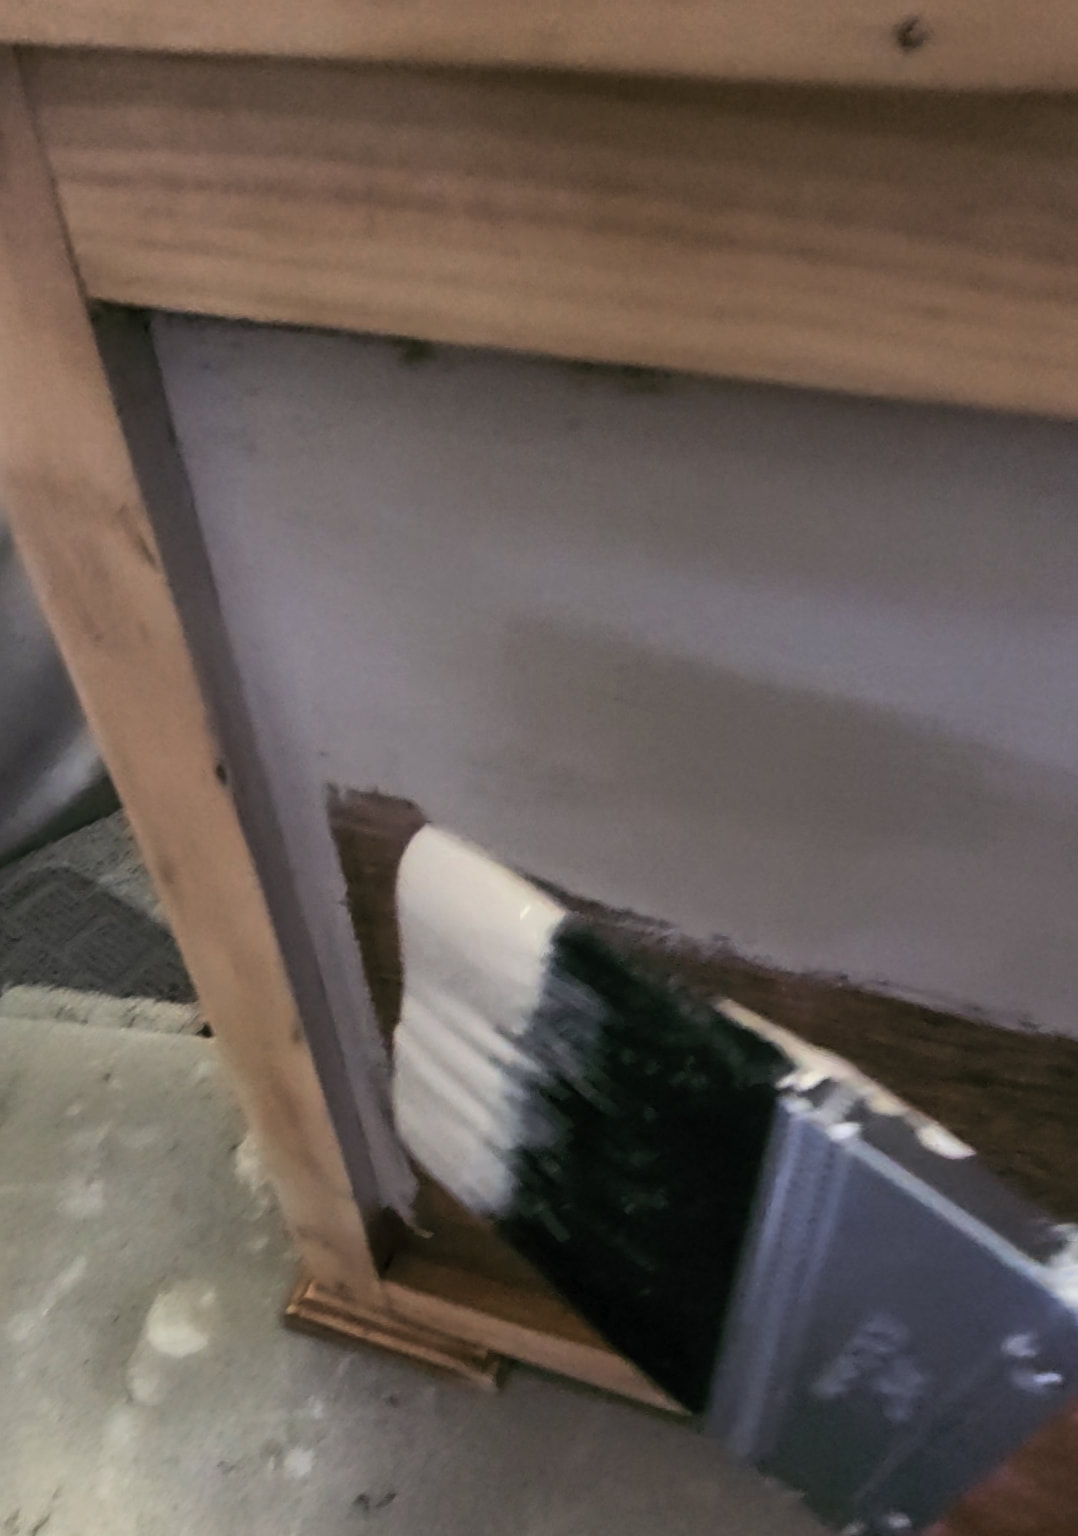 Once I did two coats and they were completely dry I added the transfers, figuring out where I wanted to place them. I also added some tissue paper in the inside of the box. I brushed Clear Coat on the inside panels and placed the paper on top and then brushed the clear coat again to seal. I sealed the entire piece with Clear Coat. To keep the wood trim the natural wood colour brush a soiree paint wash over the wood and wipe excess with a cloth. That way when you seal the bin the wood won't turn orange. Paint wash is spraying water onto the wood and brushing paint over it and wiping, or you can add a little water to your paint in a separate bowl. 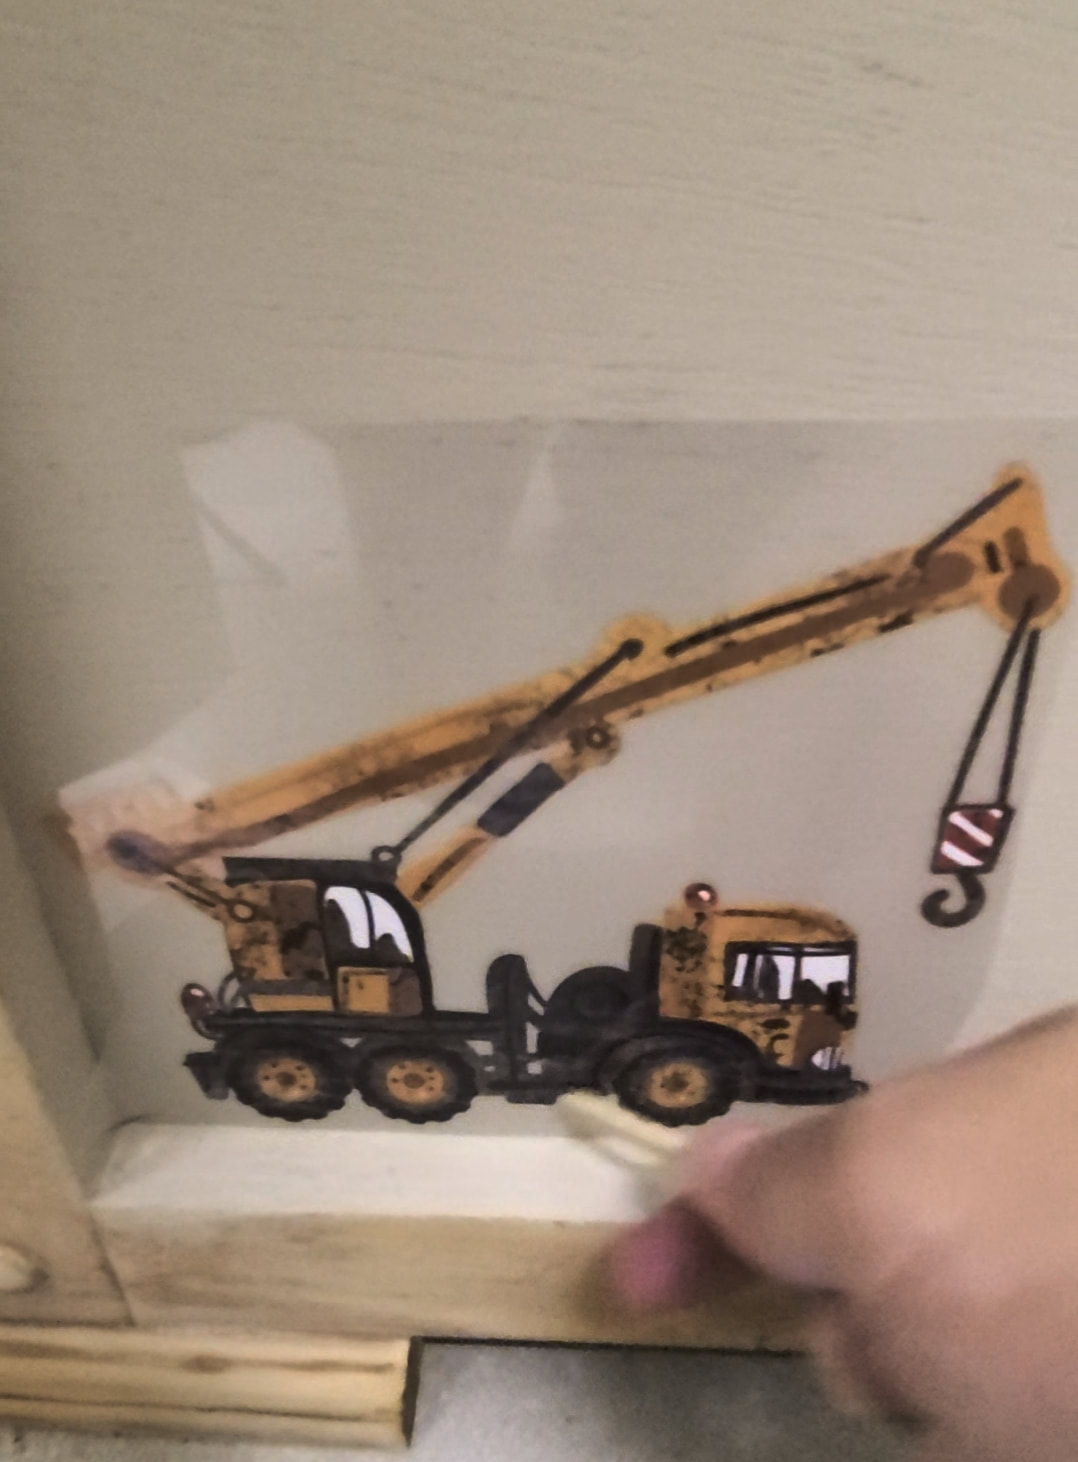 With the transfers you place it on the surface, rub with the tool or popsicle stick it came with and peel off the clear plastic and rub the transfer lightly with your fingers. Below are the final pictures, its really that easy and quick if this is the look you want, you can get very creative. I hope you enjoyed this Blog post and project and next weej ill be posting a brand new project, something for home decor that I love. Dont forget to check out my new Youtube video Take care Meg 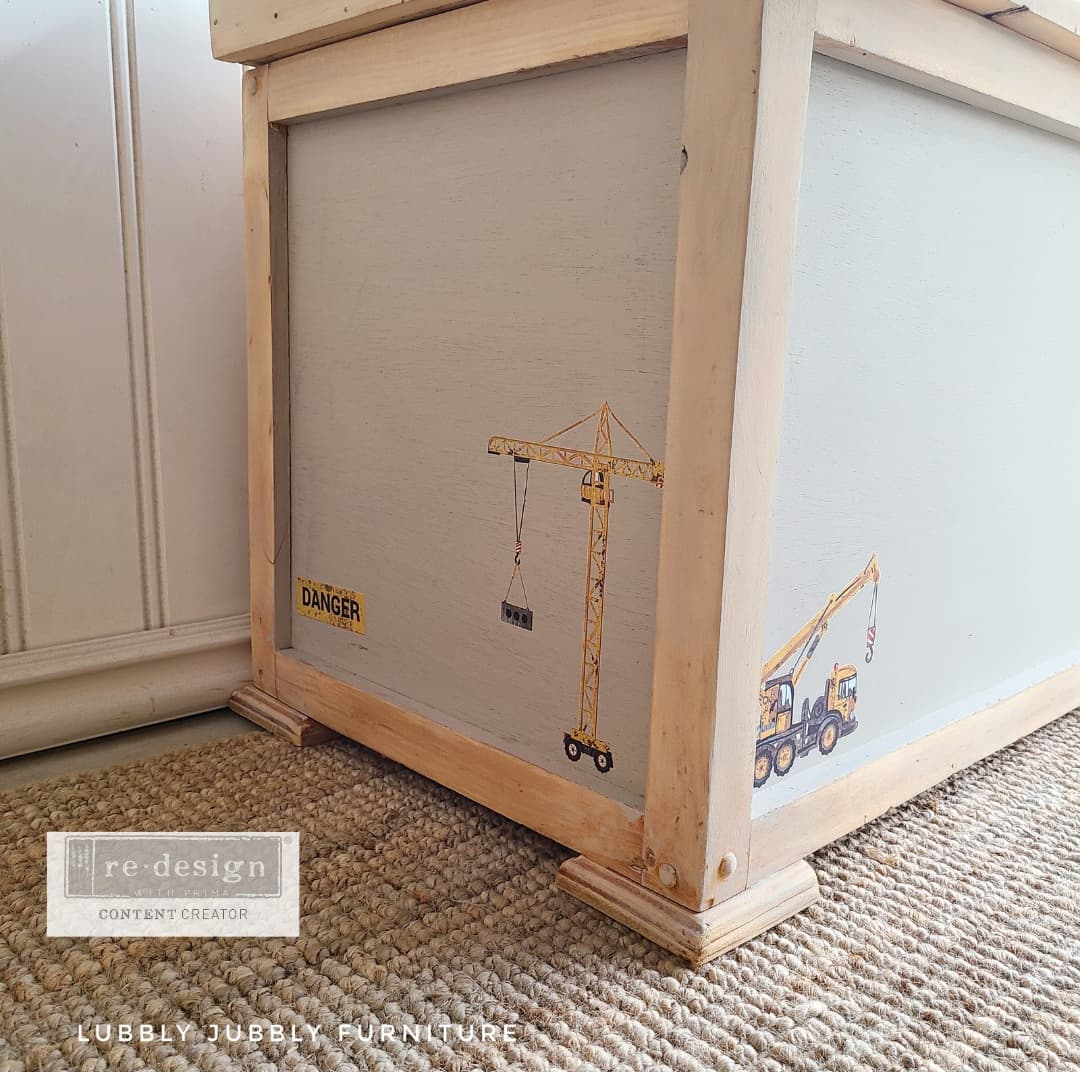 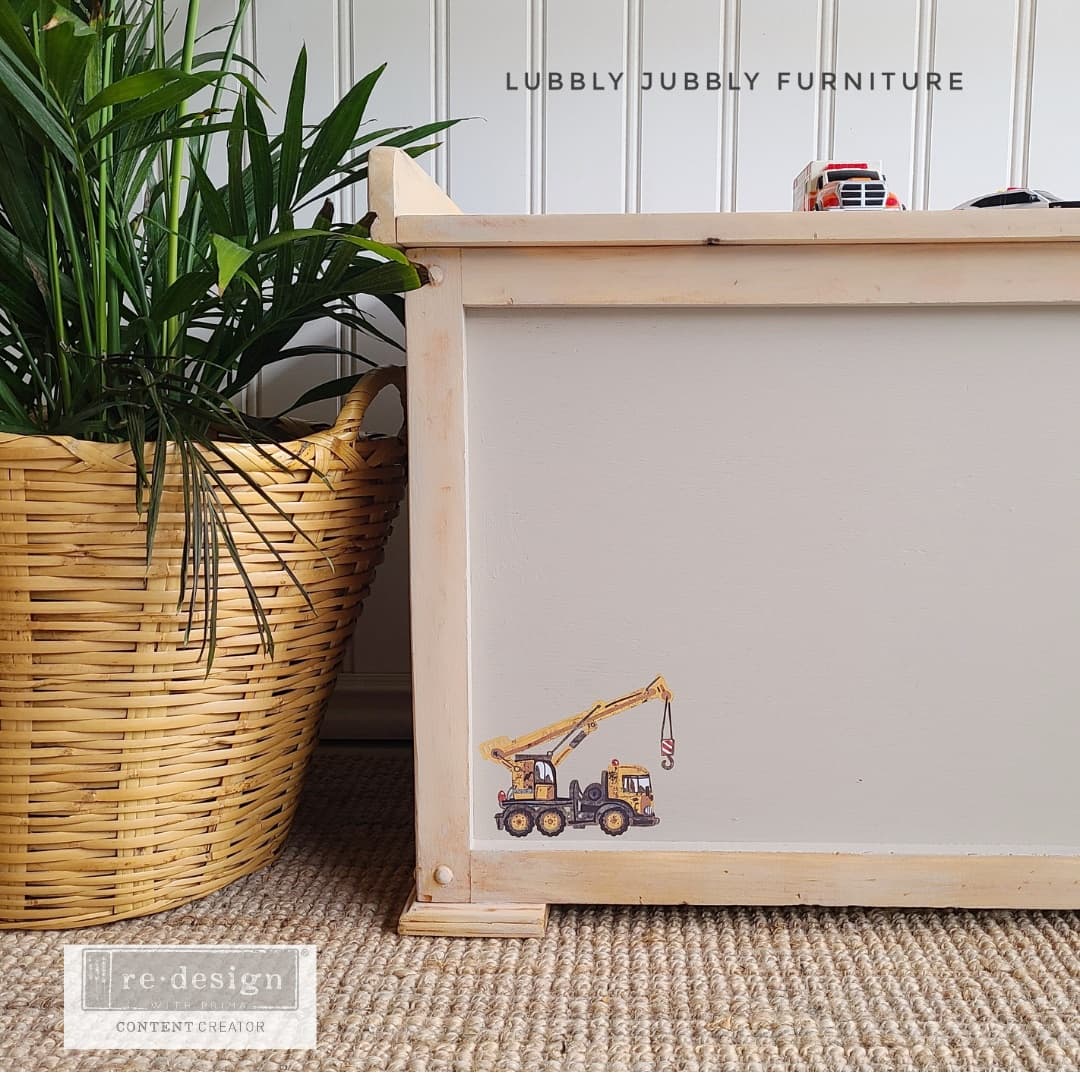 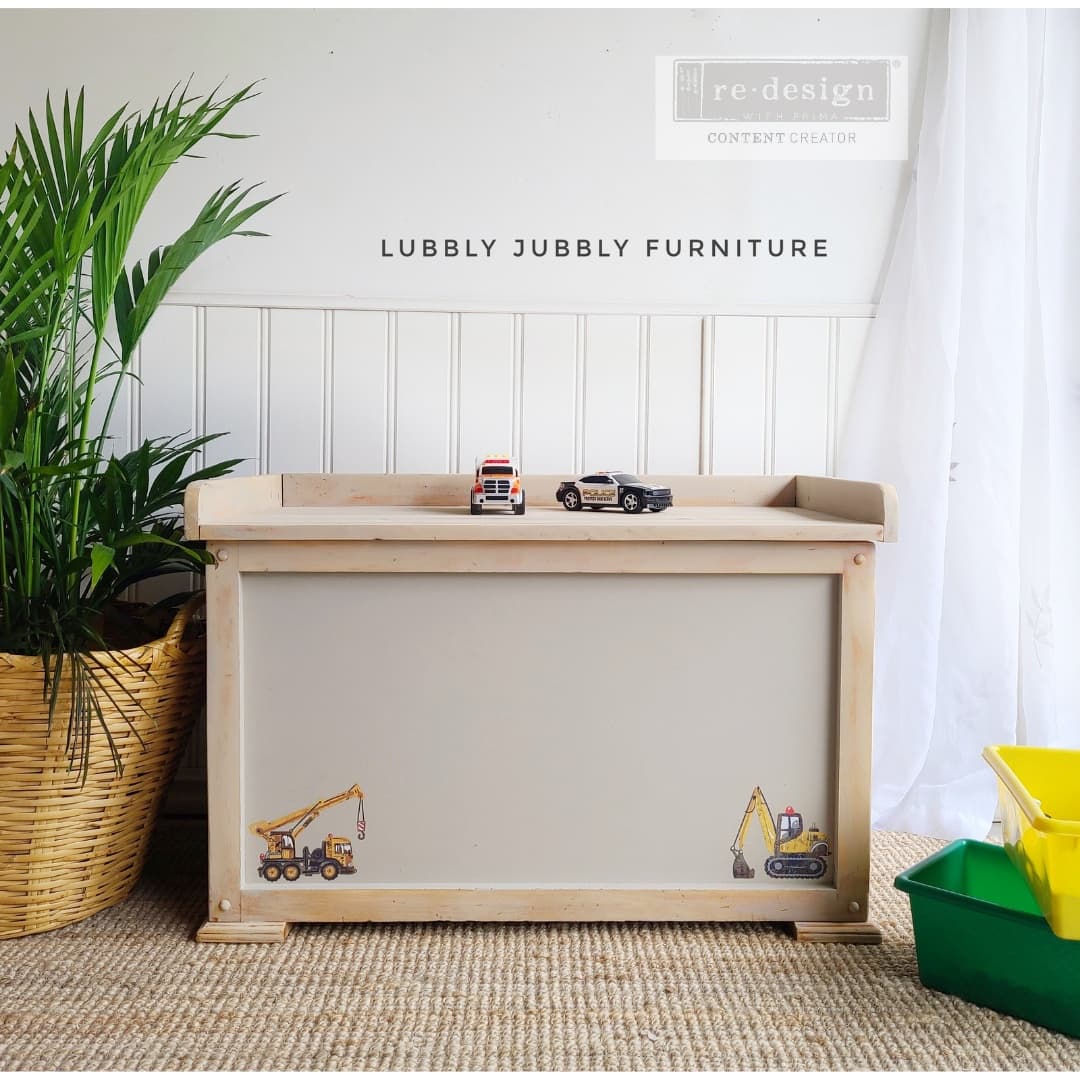 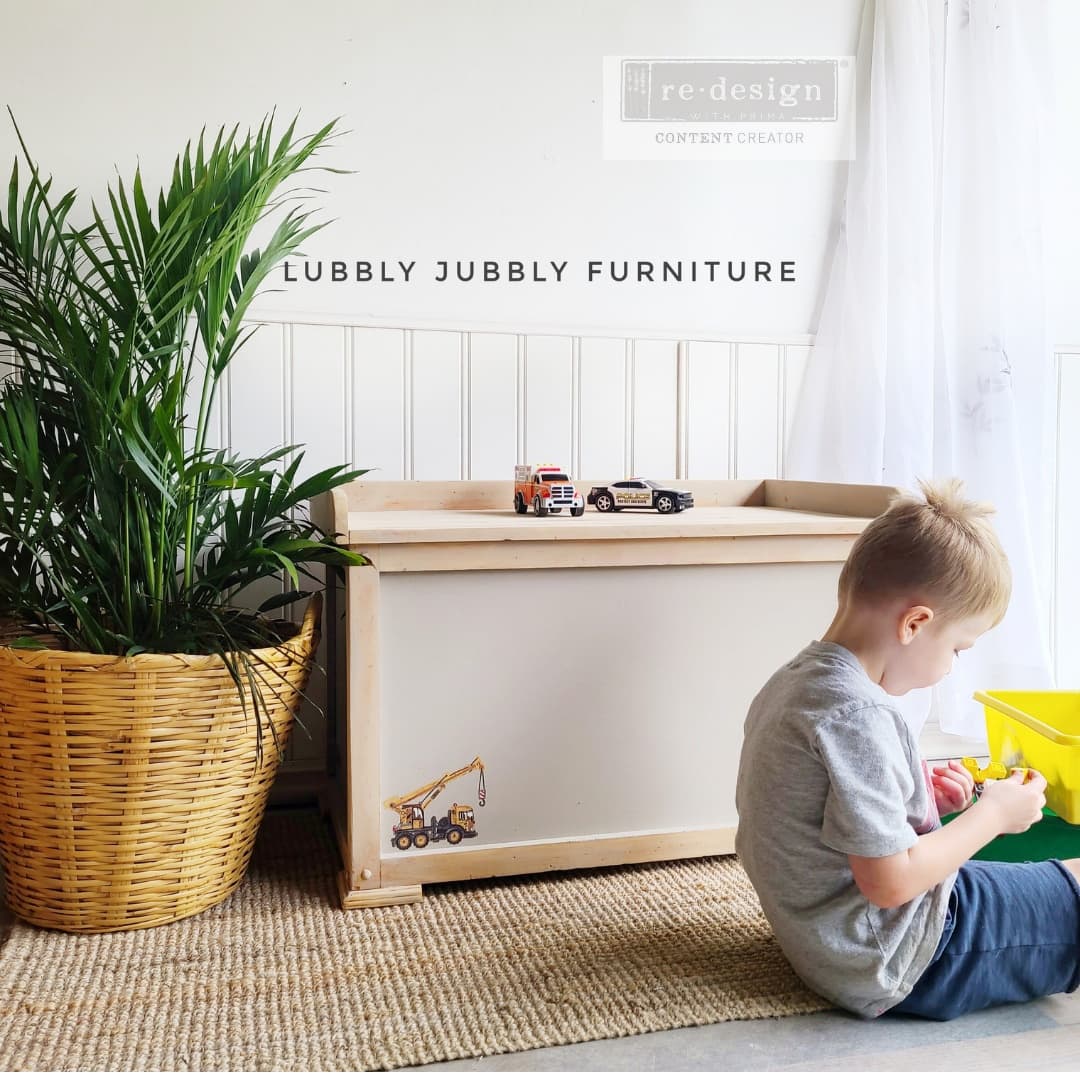 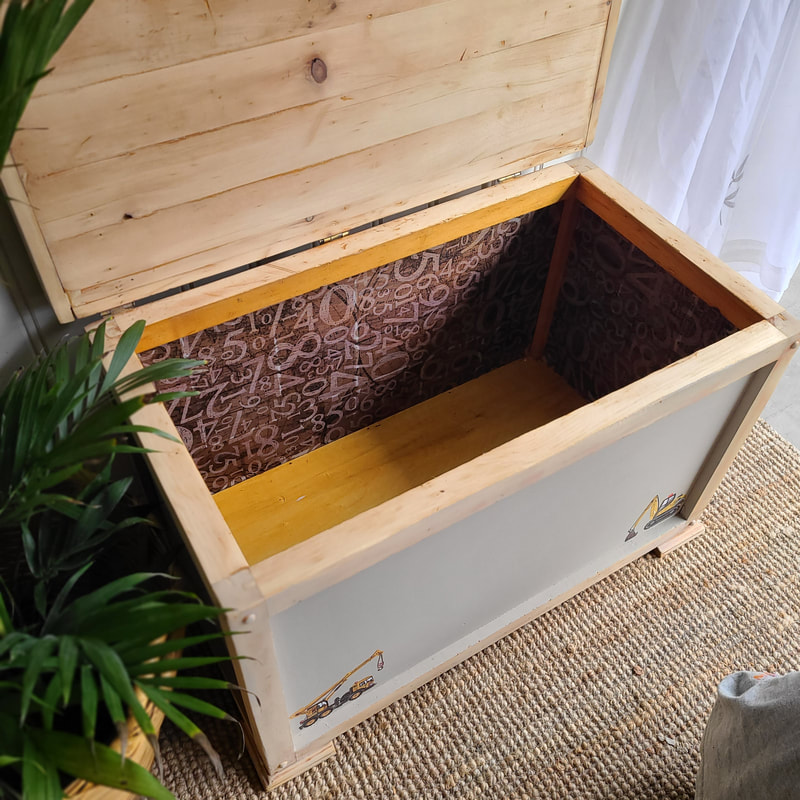 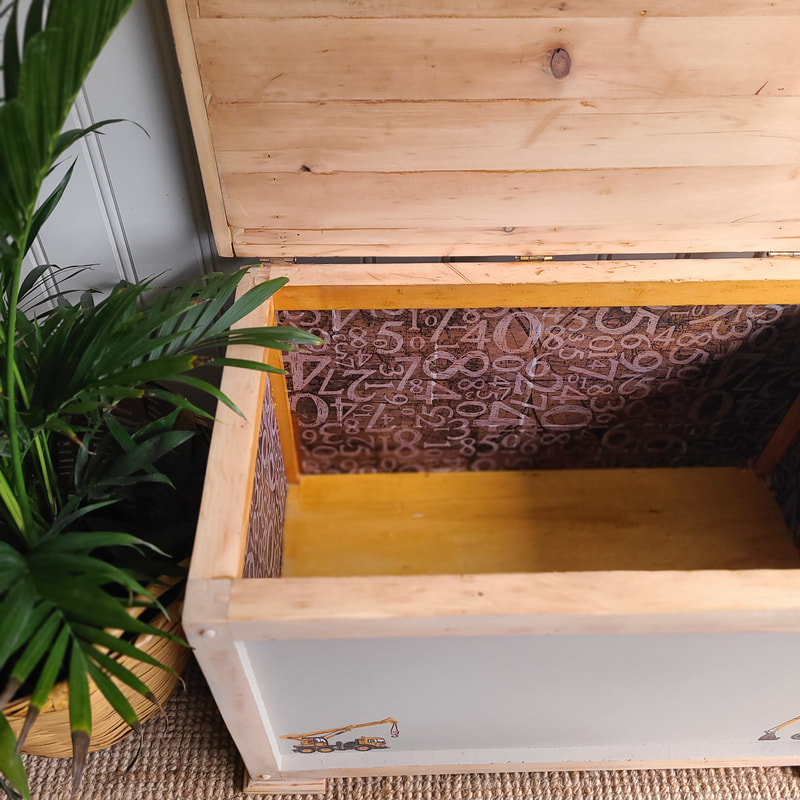
0 Comments
 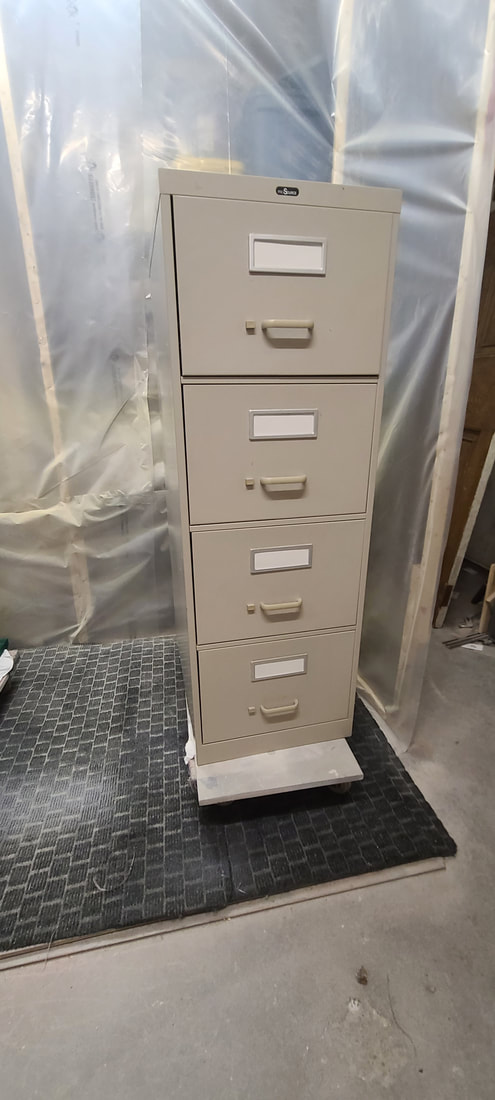 Hey Everyone, welcome back to my blog. I hope you enjoyed last weeks DIY post on how to add texture to a jug or vase. Definitely a fun project to do and budget friendly. In this blog post I am sharing on how to paint a metal filing cabinet. I have a YouTube video on the entire process if you are more of a visiual person and find videos a better way to learn, ill add the link below so you can take a look at that. The before of the filing cabinet is above and thats what i started with, a boring metal cabinet that needed some love and life. Let's get started....... 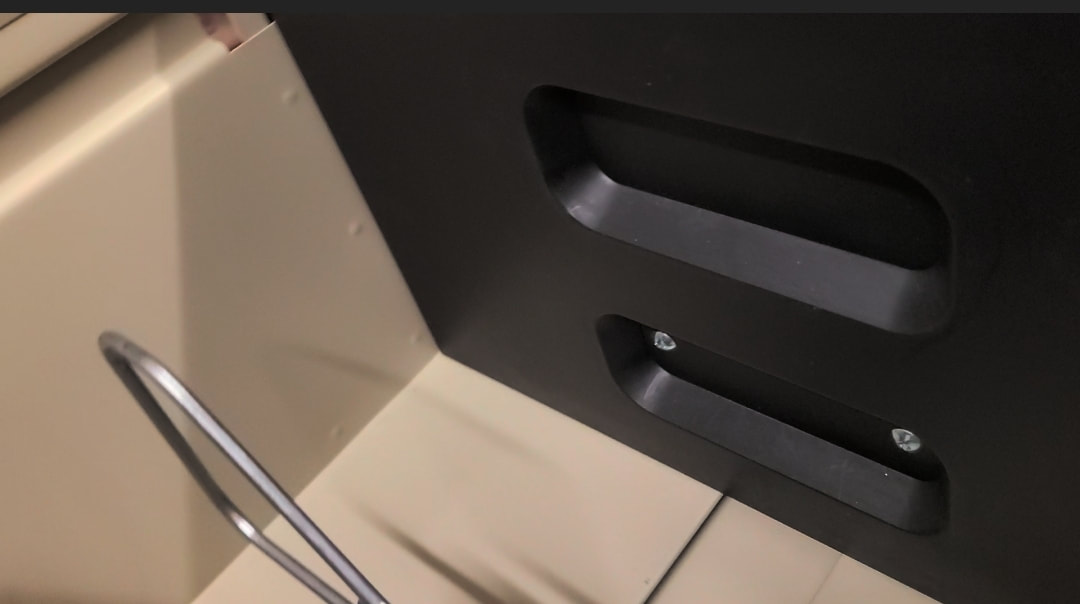 First things first, take off the hardware and place in a bag so screws and handles don't get misplaced. We don't want panick mode. If your filing cabinet has the letter slots take those off as well and store in a bag. 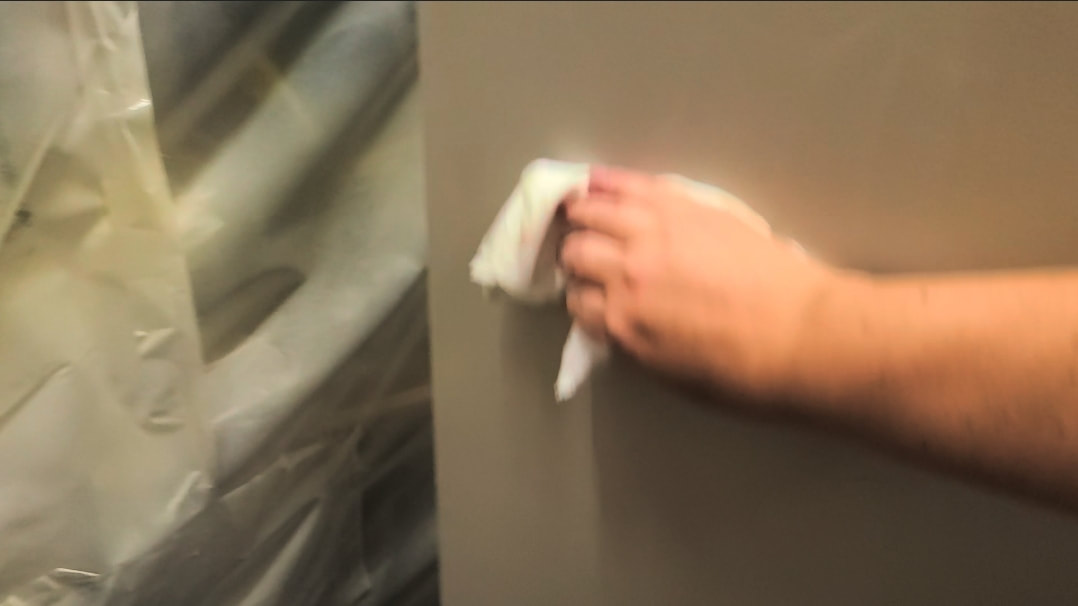 Scuff sanding metal you need either your orbitol sander with 220 grit sanding discs or 220 sanding paper to scuff sand by hand if you choose to do it that way. I used my orbitol and went over the entire cabinet. After I was done that I used a cloth and Krud Kutter to clean it. Making sure it was completely dry afterwards. 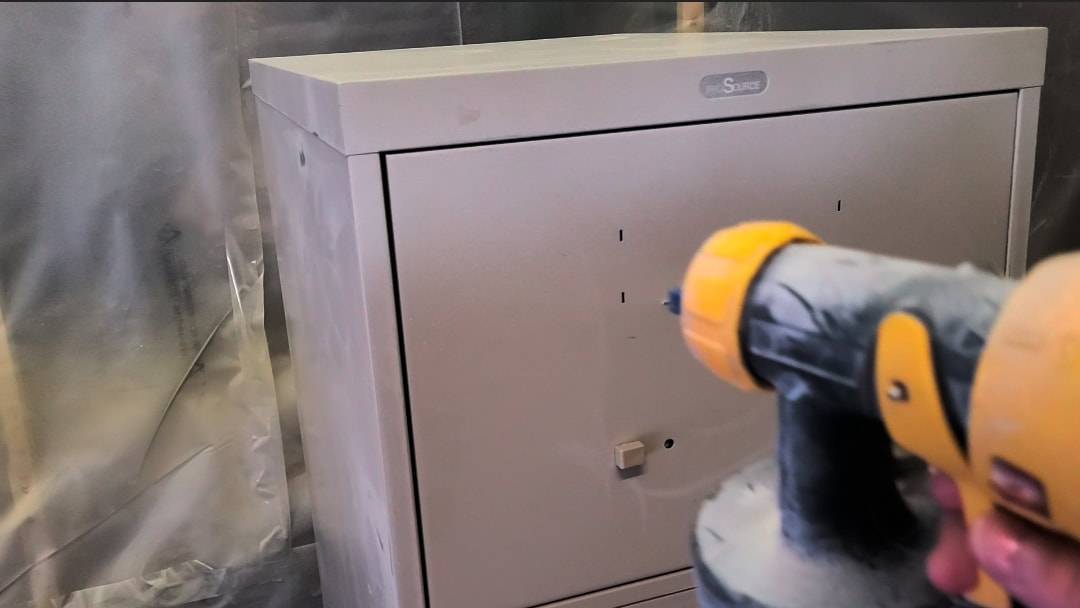 Next up is prime time, always prime your pieces including metal. I used Zinzer Bin 123 in white with my Wagner Flexio 5000 sprayer. You can use a brush as well. I did about two coats of primer. 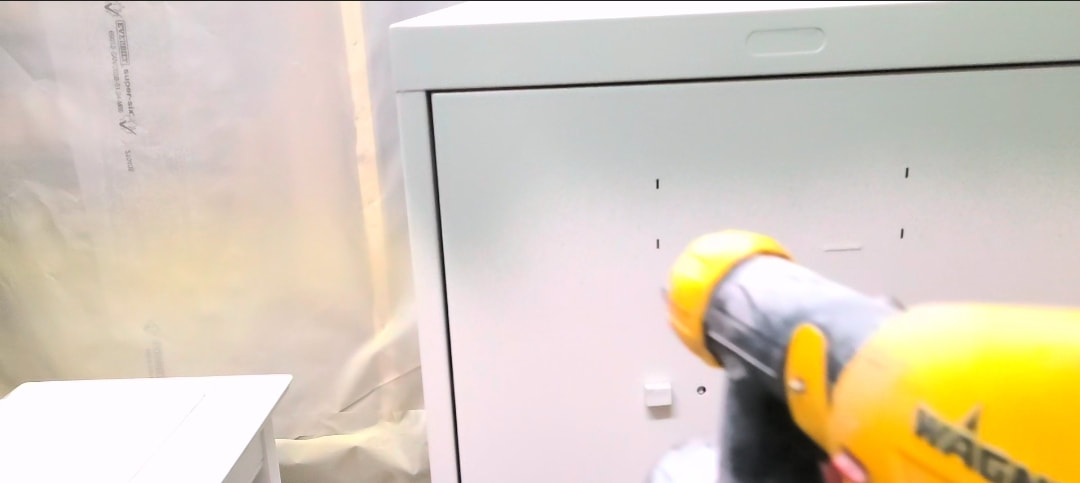 I sanded in between primer coats with 400 grit sanding paper, then got to the fun painting part. I sprayed Country Chic Paint in Elegance in 2-3 coats and sanded in between with 600 grit sand paper for a smooth finish. 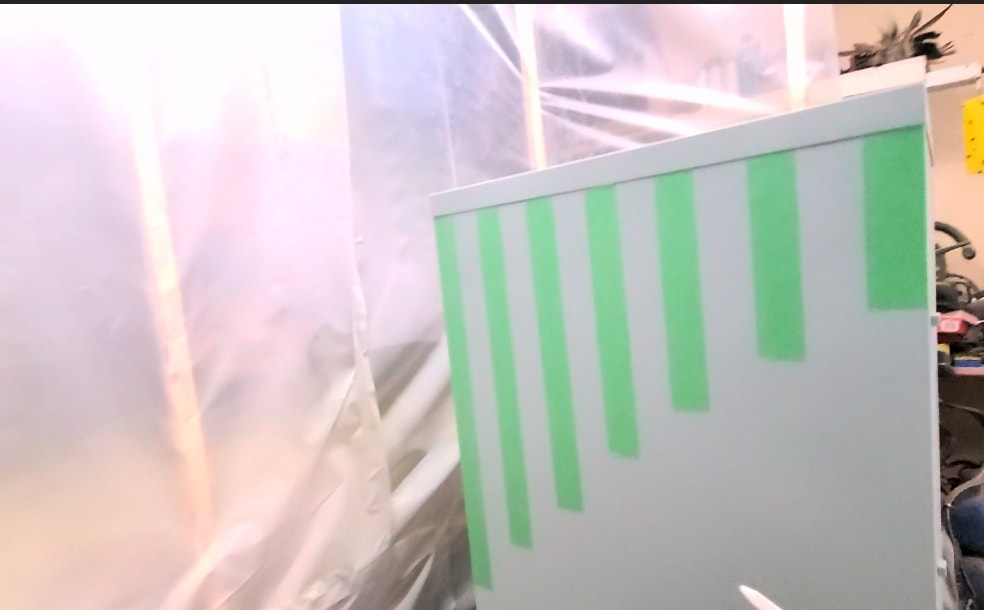 Once the paint was dry I wanted a design so I created stripes at different lengths with green tape on the top and bottom on both sides. You can do a different design or not have stripes at all. 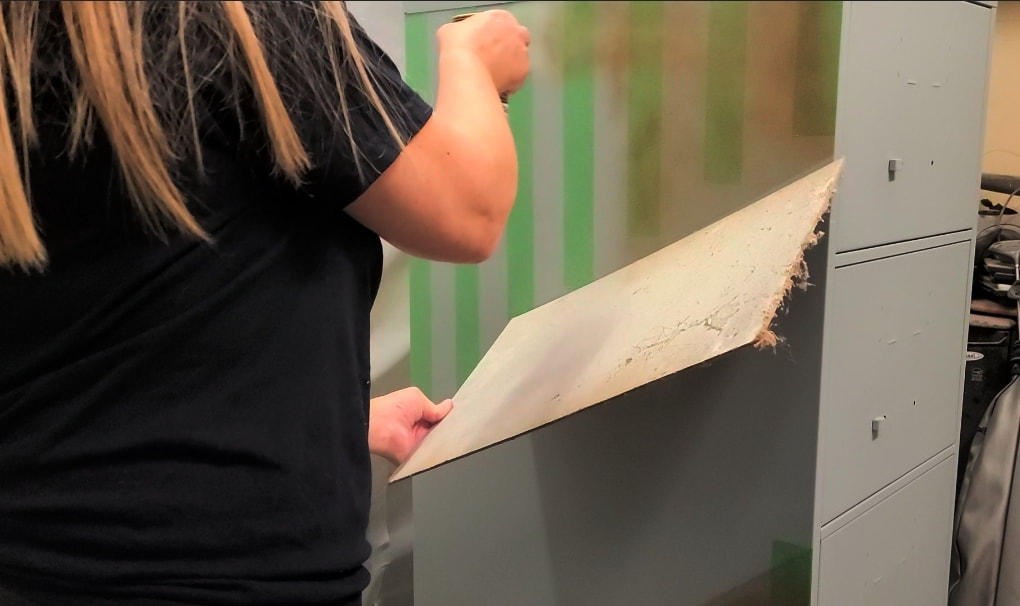 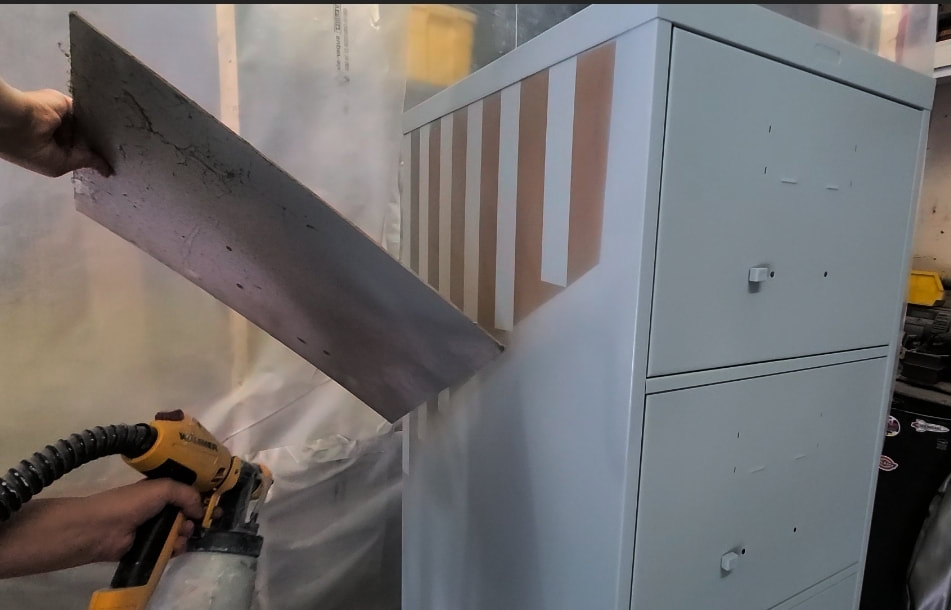 What i did was sprayed the stripes with rustoleum spray in champagne mist using a cardboard sheet to contain the spray where I wanted it to go. I realized after that there was a line from the cardboard and needed to remove that. I got my sprayer with the paint in it and sprayed along the edges to hide the sharp gold lines and created a mist and faded look which I really liked. 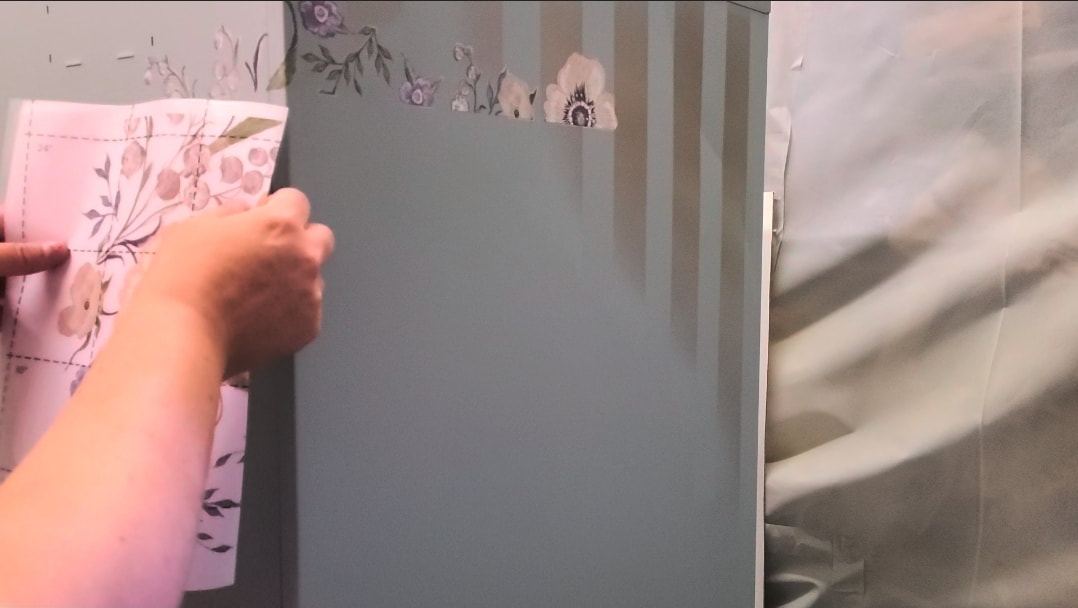 Once the stripes were completely dry to the touch I added a Redesign With Prima transfer called Goldenrod Florals to both sides. It was really starting to look so pretty. 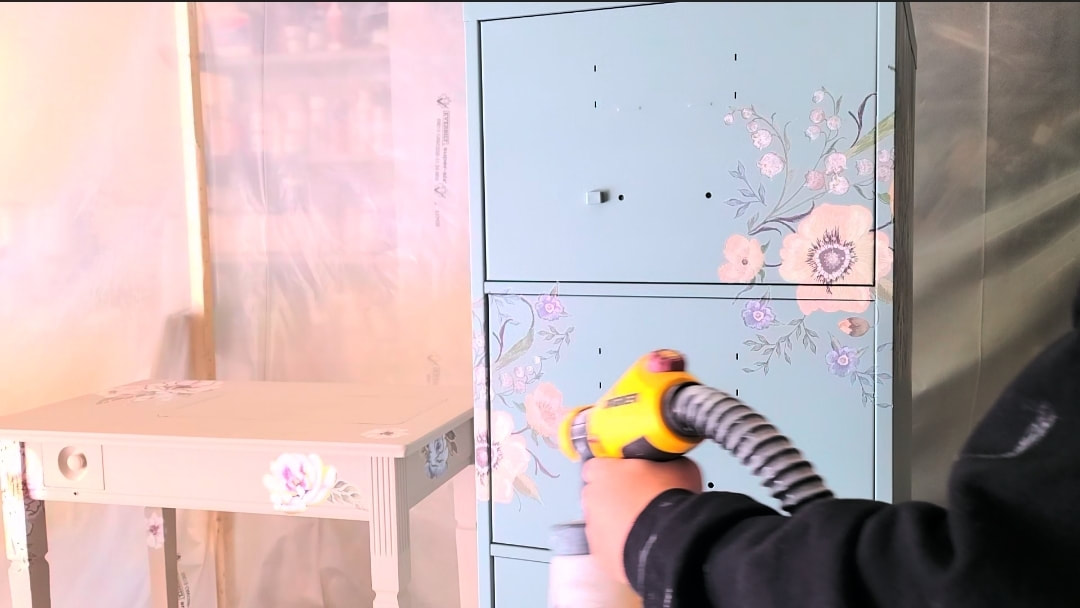 Last thing to do was to seal the entire cabinet with Country Chic Paint tough coat. Tough coat repels water and chemicals and is very durable. Here is what the filing cabinet looks like in the end. It turned out so beautiful, this is something anyone can do and you can turn something boring into something fun and pretty to liven any space up. Don't forget the Youtube video is below at the end. Thanks for reading and watching and I hope to see you back here on my blog next week. Take care Meg 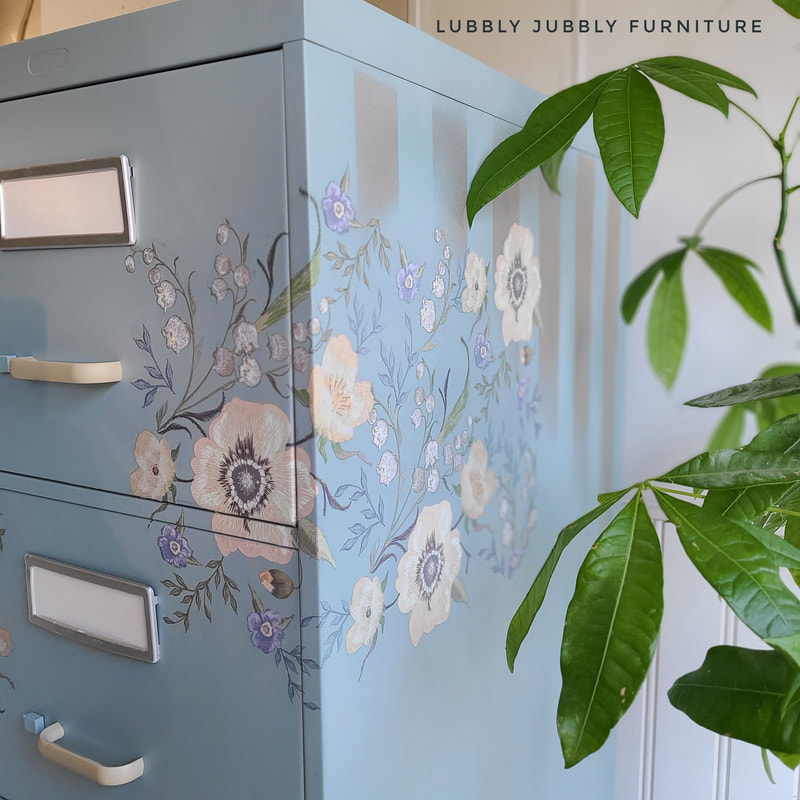 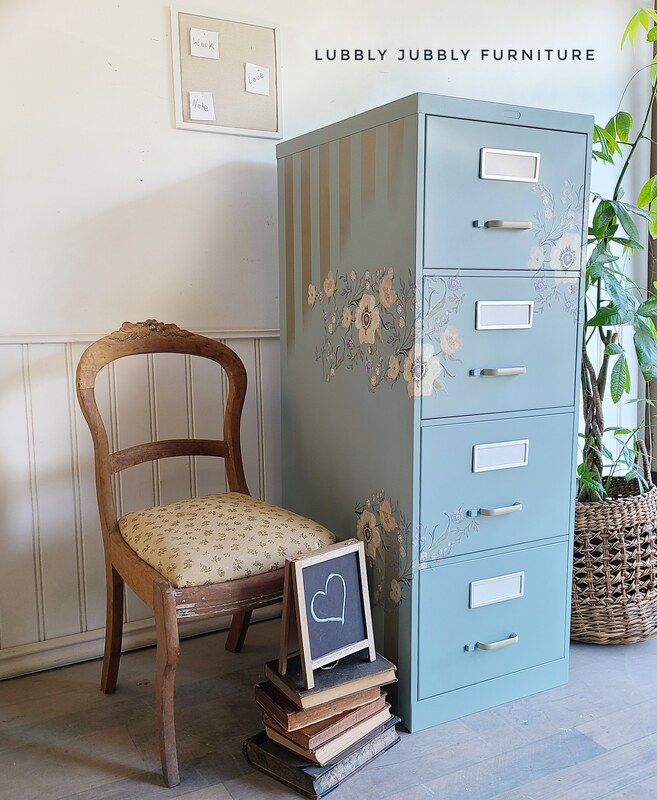   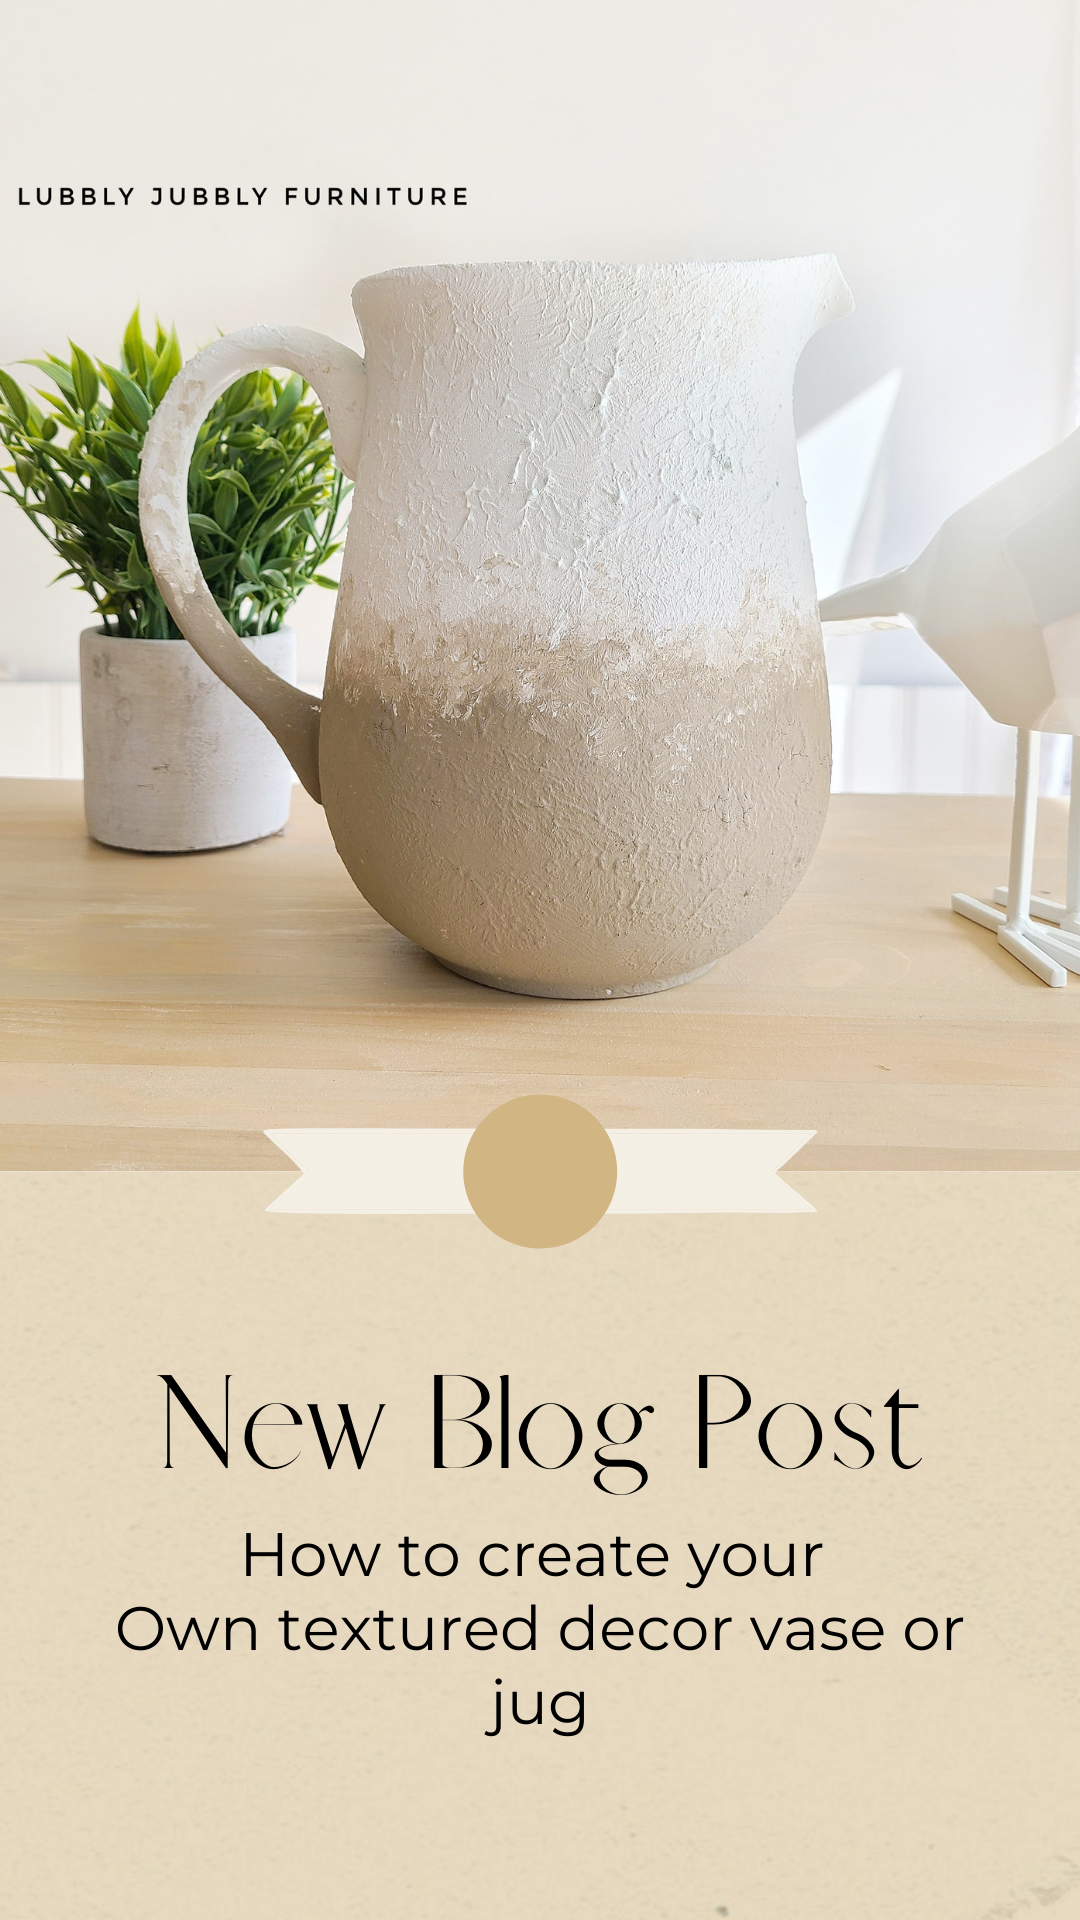 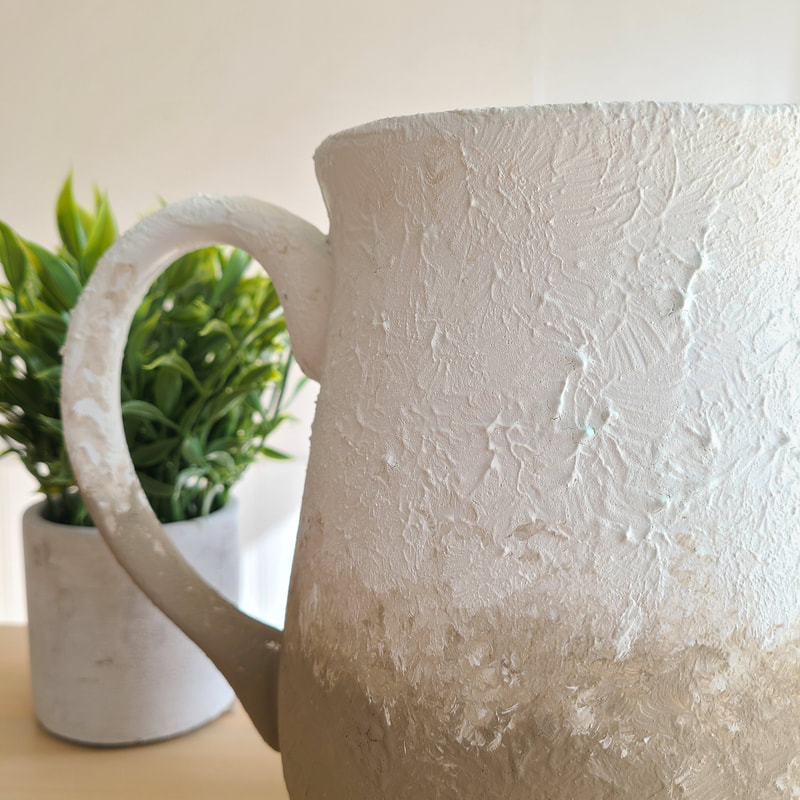 ITEMS NEEDED FOR THIS PROJECT: VASE OR JUG PAINT IN YOUR CHOICE OF COLOURS CHIP BRUSH AND A SMALL BRUSH RUSTOLEUM SPRAY IN WHITE BAKING SODA OR SEA SALT WASH OR COUNTRY CHIC PAINT TEXTURED POWDER 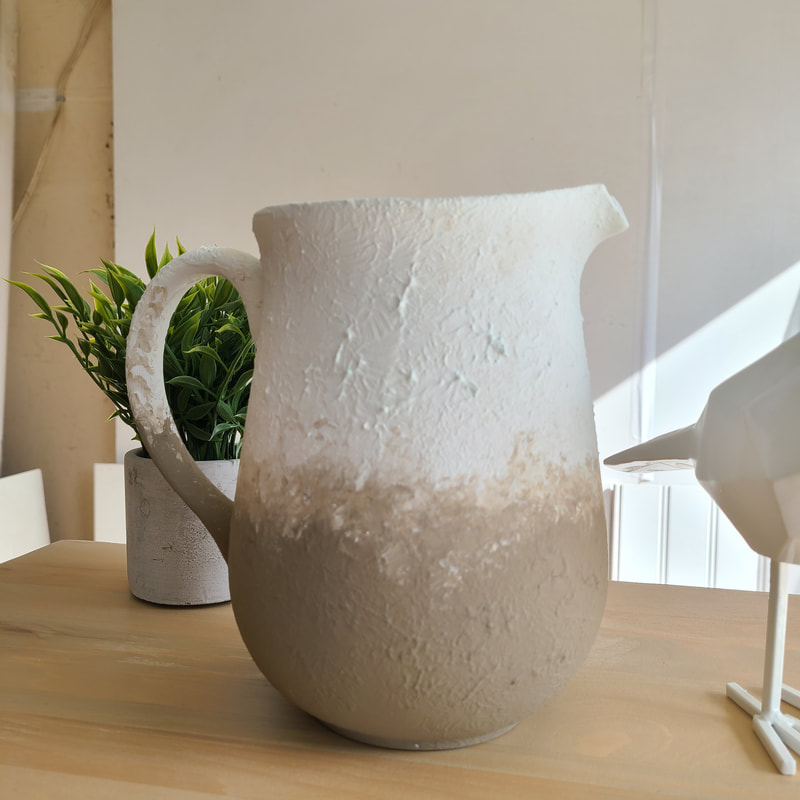 I Created this jug that I found at the thrift store because I needed some staging items for my Furniture and this was the perfect thing to do and I get to keep it on my fireplace mantle. It looks store bought as though I got it from a fancy place and in fact I made it myself. I now want to create more jugs and vases in different colours and textures, its so much fun. Lets get started... 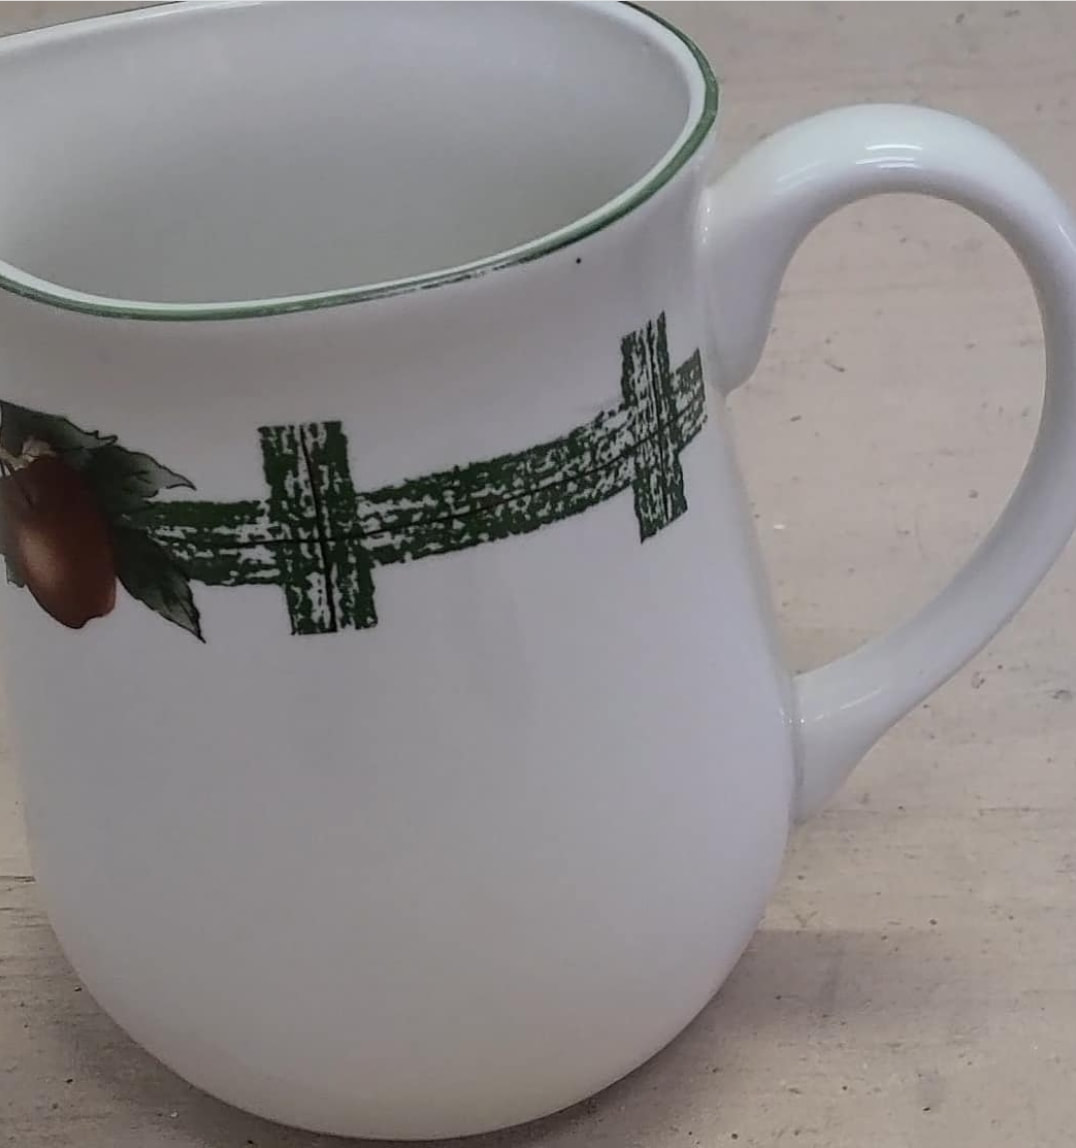 This is not the greatest BEFORE picture but you can see what I started with. To cover up any graphics or designs on a vase or jug it needs a primer and that is where the rustoleum primer spray or white spray comes in to play. Spray the jug or vase with the Rustoleum spray, you may need several coats. Let each coat dry for a few hours so that it doesnt appear tacky to the touch. 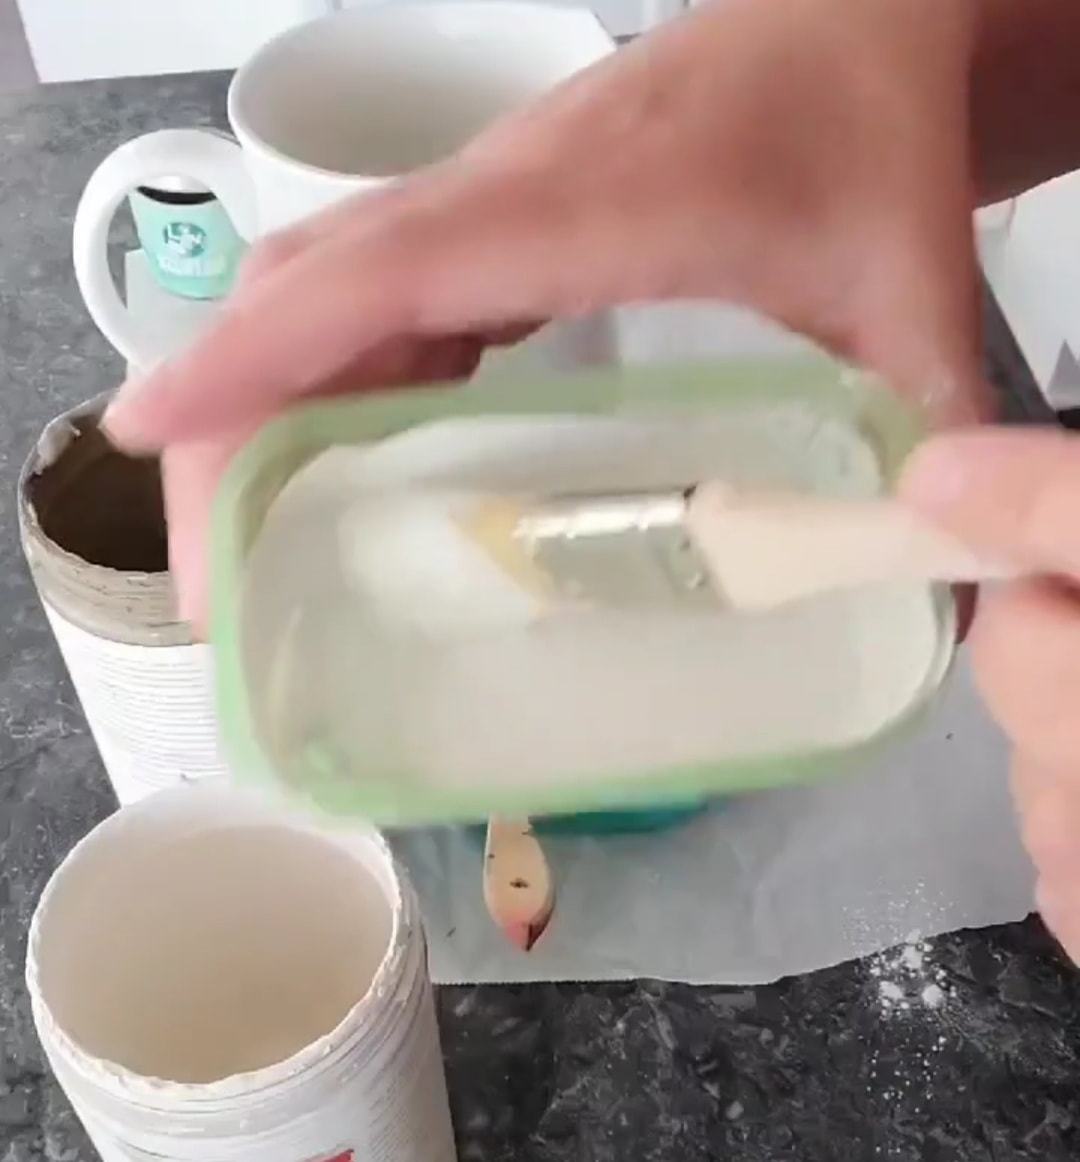 Mix up your paint colour that you are using for the top half of your jug/vase in a container with the textured powder/ baking powder 1:1 ratio. You want it to be thick. Mix in another container the second paint colour you want on the bottom of your jug/vase. You may need several brushes. 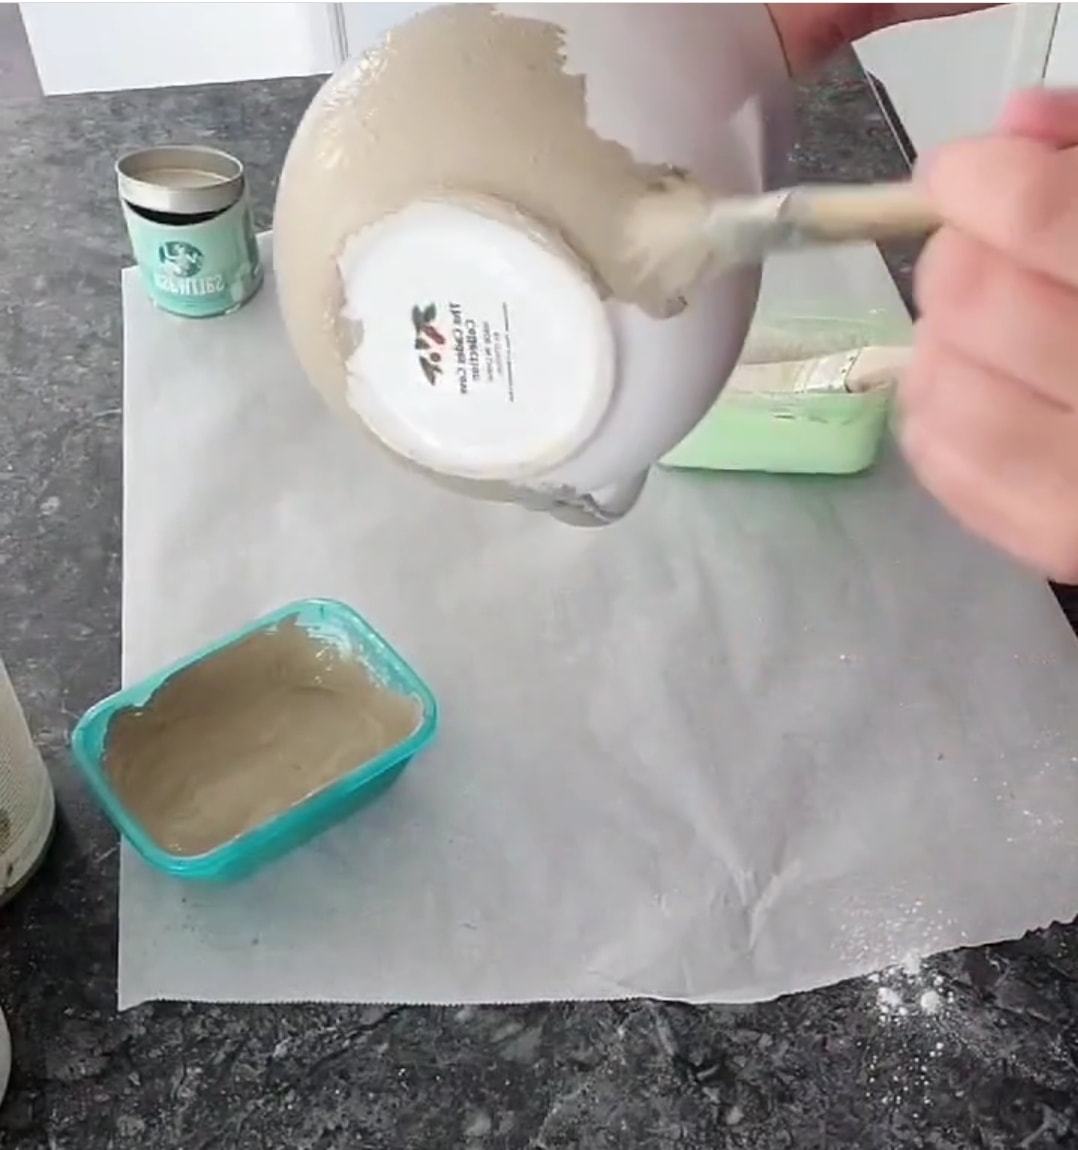 Brush and dab the bottom colour on to the jug/vase making sure the entire bottom half is covered in that paint colour, creating a dabbing effect, creates the texture with the thickness of the paint. Make sure that you can see the texture coming out. Once the bottom half is done, start on the top half, dab the paint almost over the lip of the jug/vase so it appears more natural. Again creating texture. Use a seperate clean brush to blend in the middle, in between the two colours. You'll want to move your brush around and see how you can blend the two so that they are combining into each other naturally. 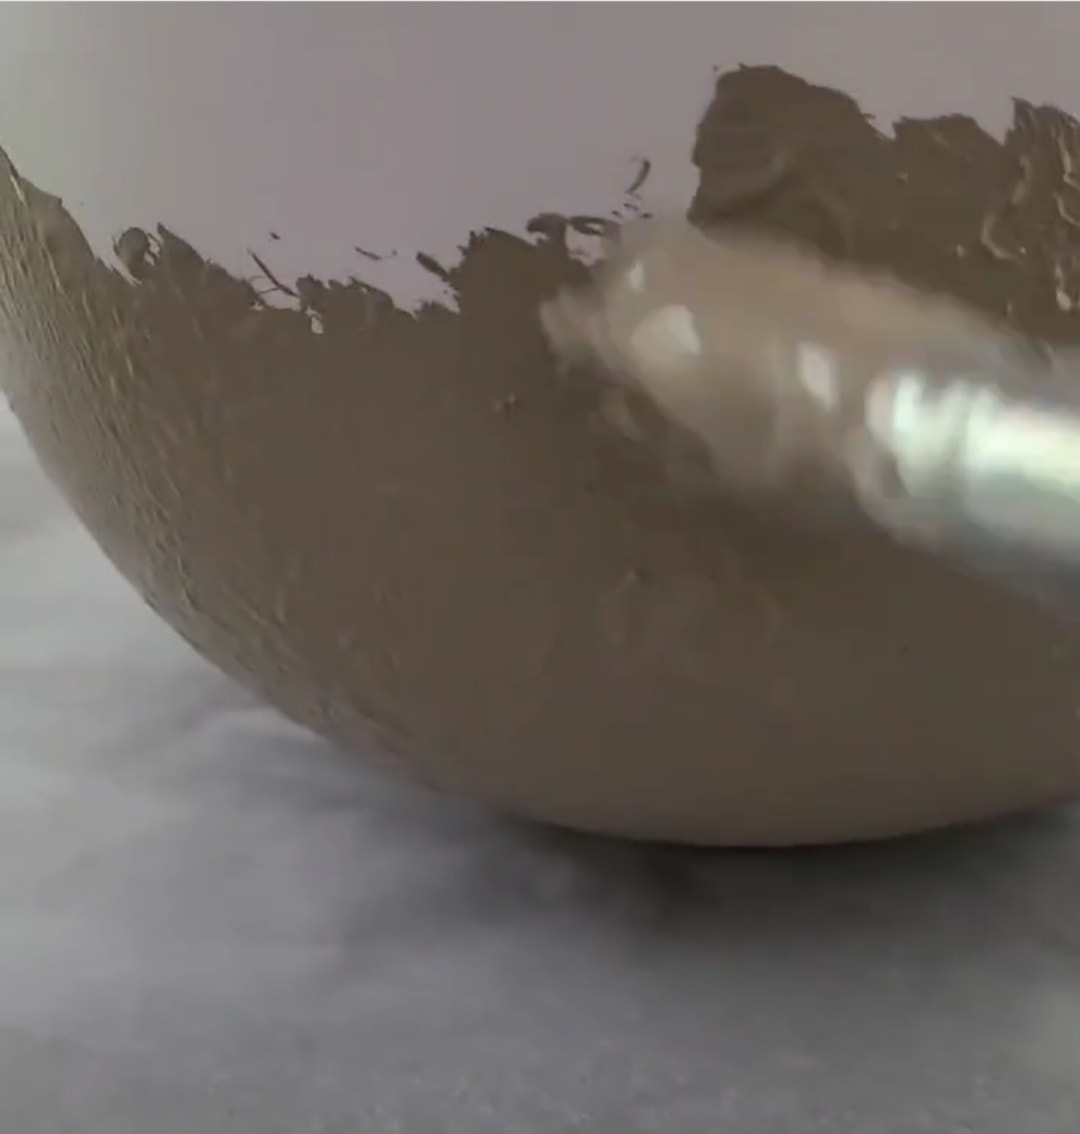 Once you have completed that make sure if there is a handle that you have painted that also and you don't have to seal it, I didn't seal mine, but it is up to you. If you choose to seal it then you can use Country Chic Paint Clear Coat or a water based topcoat. Use your jug or vase for staging anywhere in your home and you can use any colours you'd like. I hope you enjoyed this DIY project and will return here for more projects in the future. Have a wonderful day and weekend! sincerely Meg 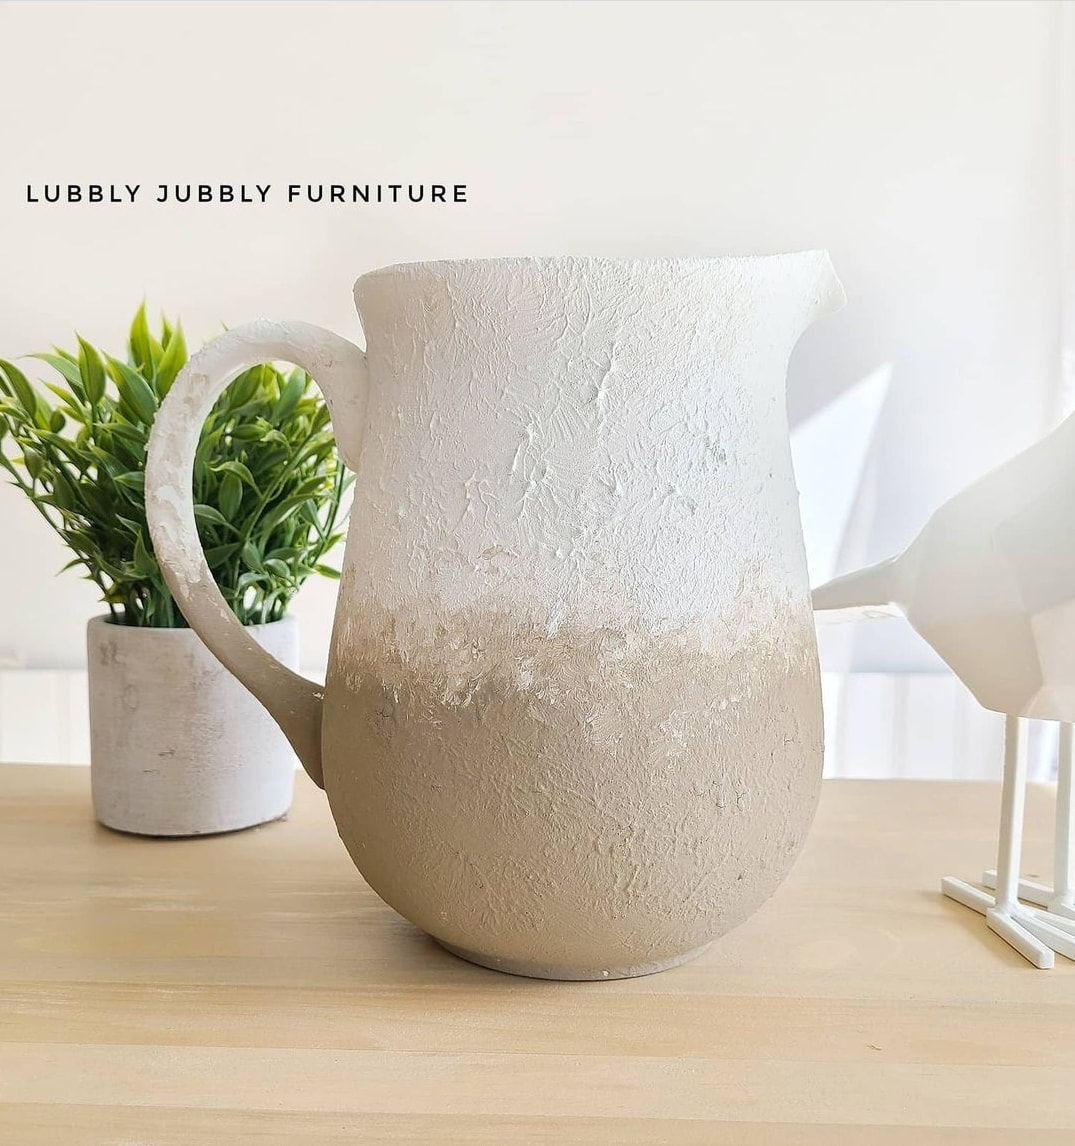 |
|
 RSS Feed