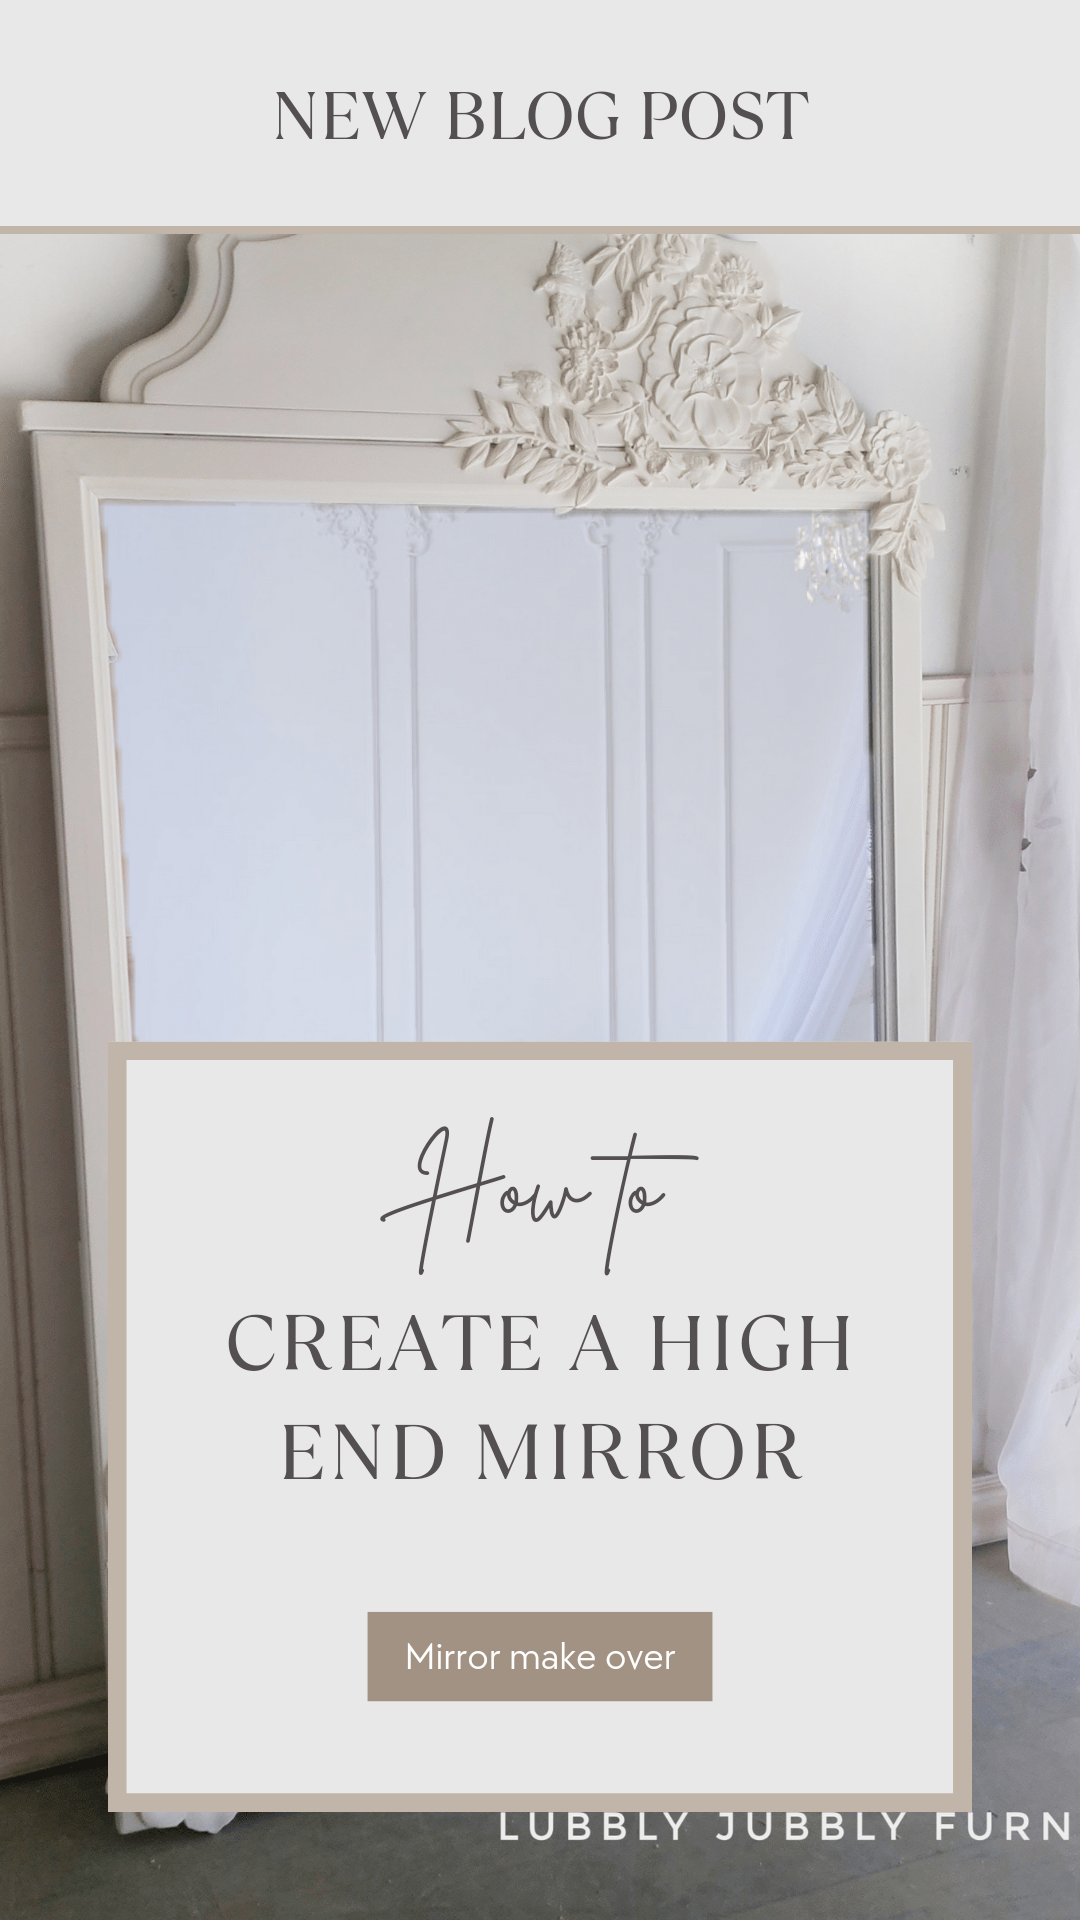
 I always love window shopping on websites or stores with high end pieces of furniture or home decor items, but I could never afford the price tags. I decided I could make my own high end looking mirror and so can you. I had bought some dressers that came with mirrors and I never sold the mirrors with the dressers I painted, but I did keep them aside for the future. Some of the mirrors had vintage tops to them like the one above and some were straight edges, perfect for moulds. Other mirrors I had I actually had to give to Value Village due to them being outdated to the point of no updating lol they had so many outdated details it wouldn't work. Now the one in the picture turned out amazing and was the perfect mirror to use for moulds and to create my high end mirror look alike. This mirror sold immediately for a wedding, how amazing is that? Let's get started.... What you need A mirror Redesign With Prima Moulds Amazing Casting Resin found on Amazon or Michaels Paint Primer Sanding paper Cleaner Super glue, I used the Gorilla glue Paint brushes Clear Coat to Seal Gloves, very important to wear 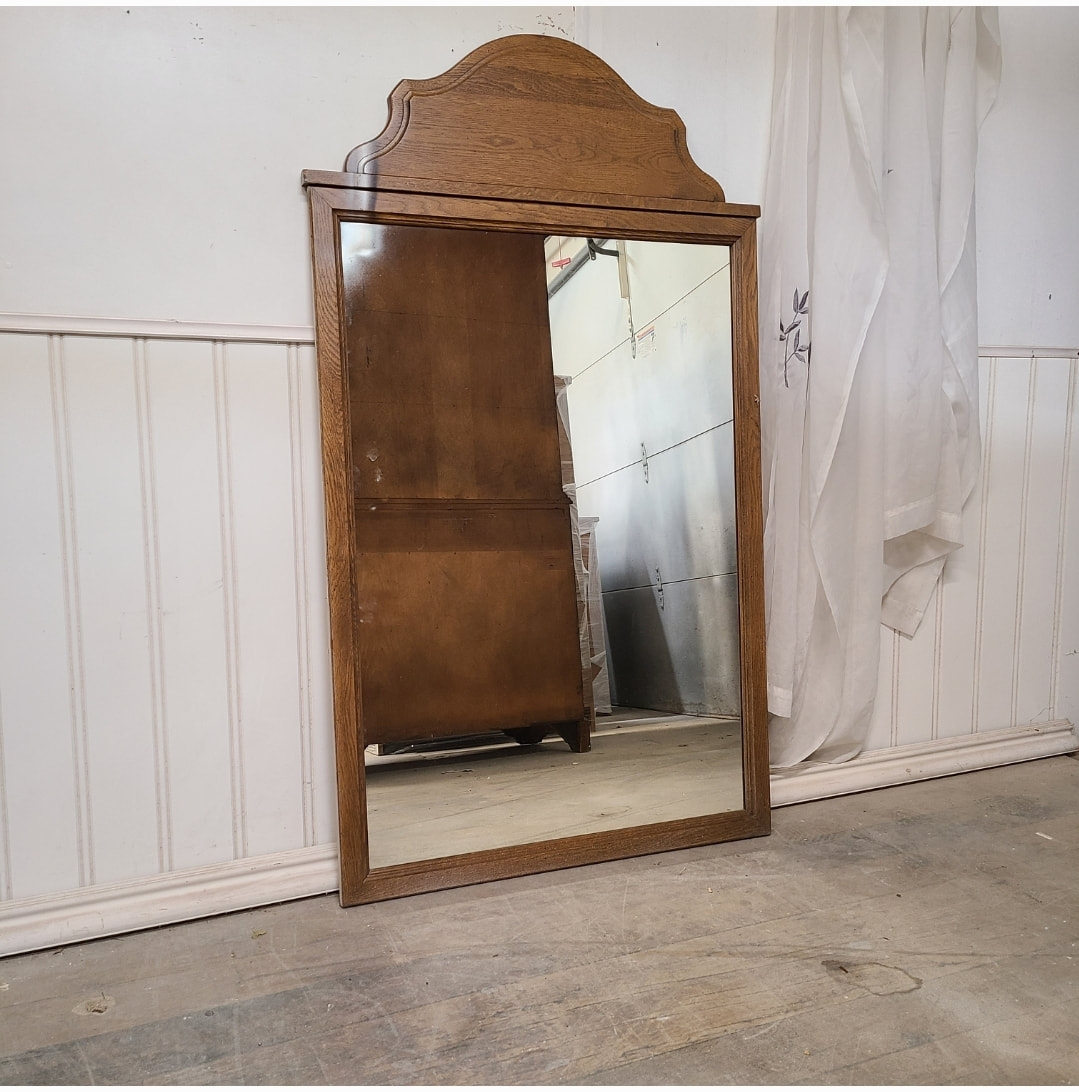 First thing I did was to take off the spoke things at the top either side of the mirror. As seen below... 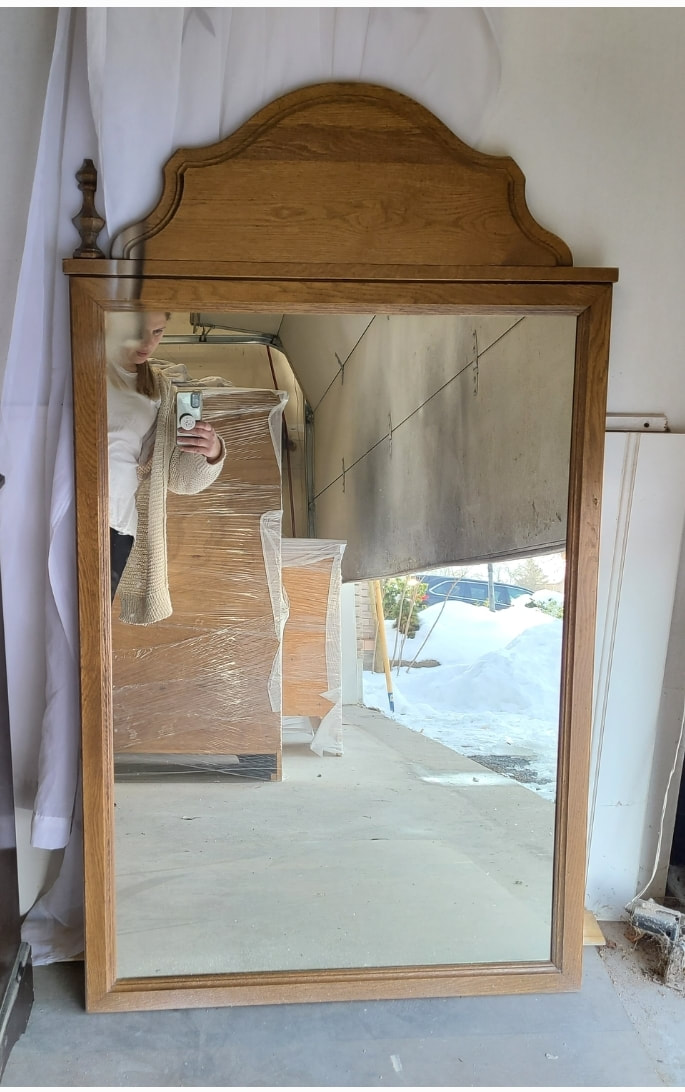  I then scuff sanded the mirror trim and top and cleaned the entire piece. I placed paper over the glass mirror and taped. I then primed 2 coats of primer, sanded with 220 grit sandpaper and then painted with Country Chic Paint in Crinoline. While that dried and set I made the moulds. These moulds are from Redesign With Prima I used quite a lot of moulds for this mirror but you can use any mould you want from the link WEAR GLOVES DURING THE WHOLE PROCESS OF MAKING MOULDS. It is important to wear gloves because this resin is very difficult to get off your skin. To make the resin you will need the Amazing Casting Resin. In the box comes two bottles, A and B . One is yellow liquid and one is clear liquid. It also comes with two little cups, if you are making alot of moulds you might want a larger container that you won't use again like i did. You are going to pour equal parts of liquid A and B into the larger container. It is a MUST that you pour equal quantities of each liquid or it won't set properly. Pour as much as you think you'll need for at least 3 moulds You may need to pour out more to make more moulds   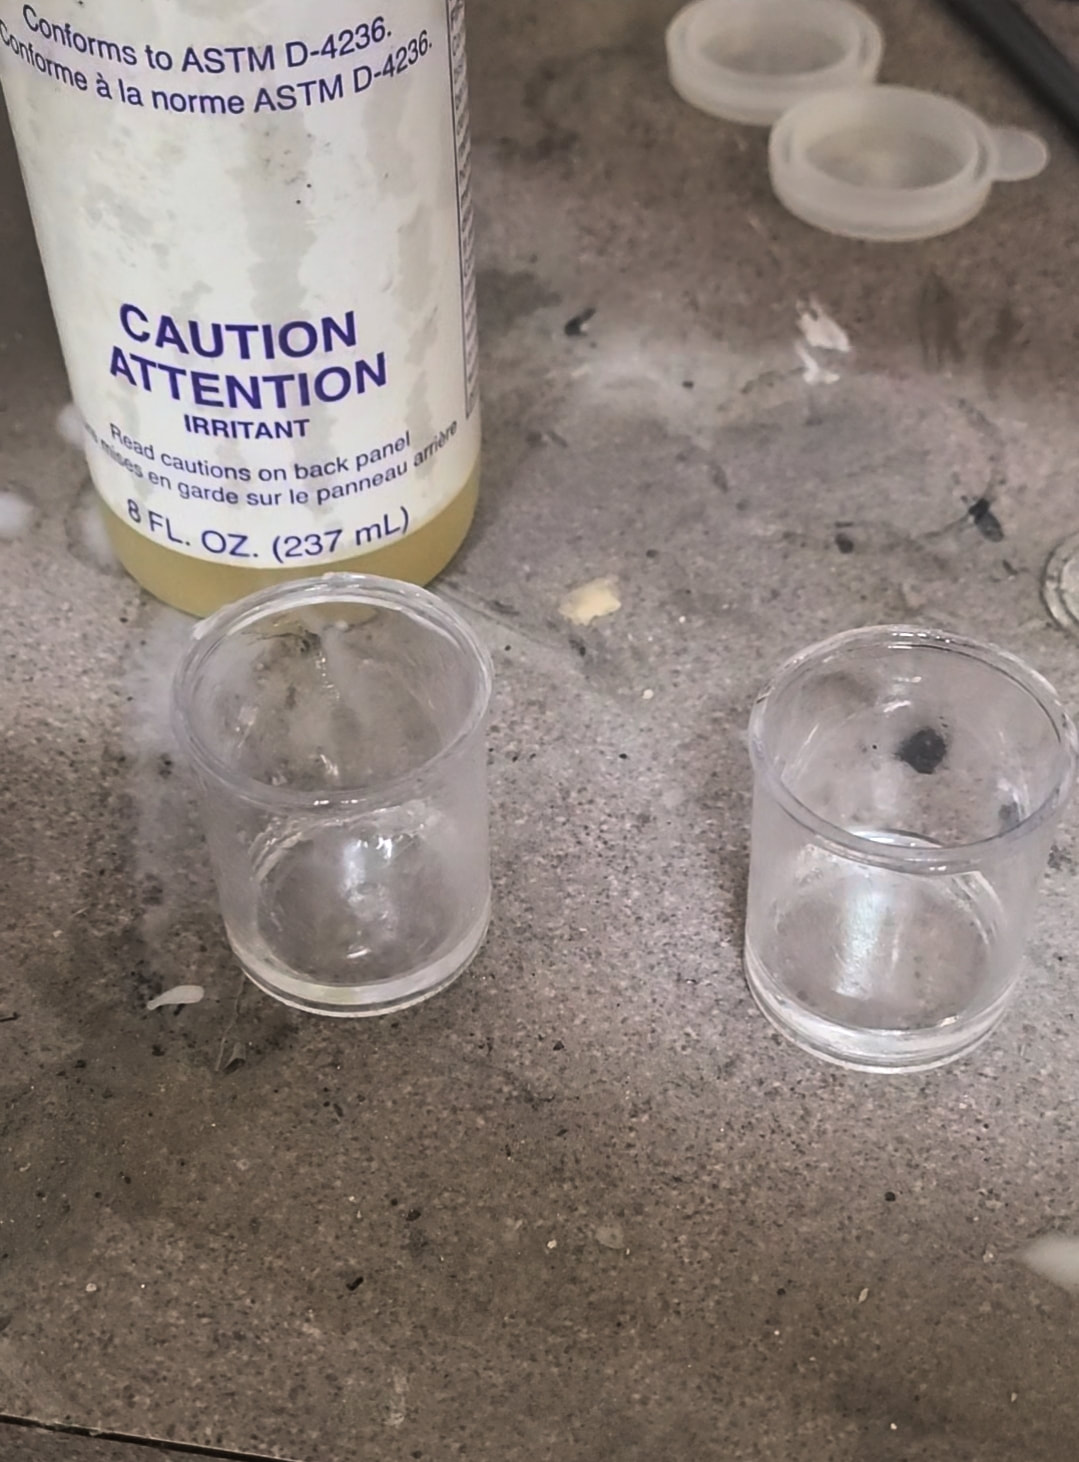 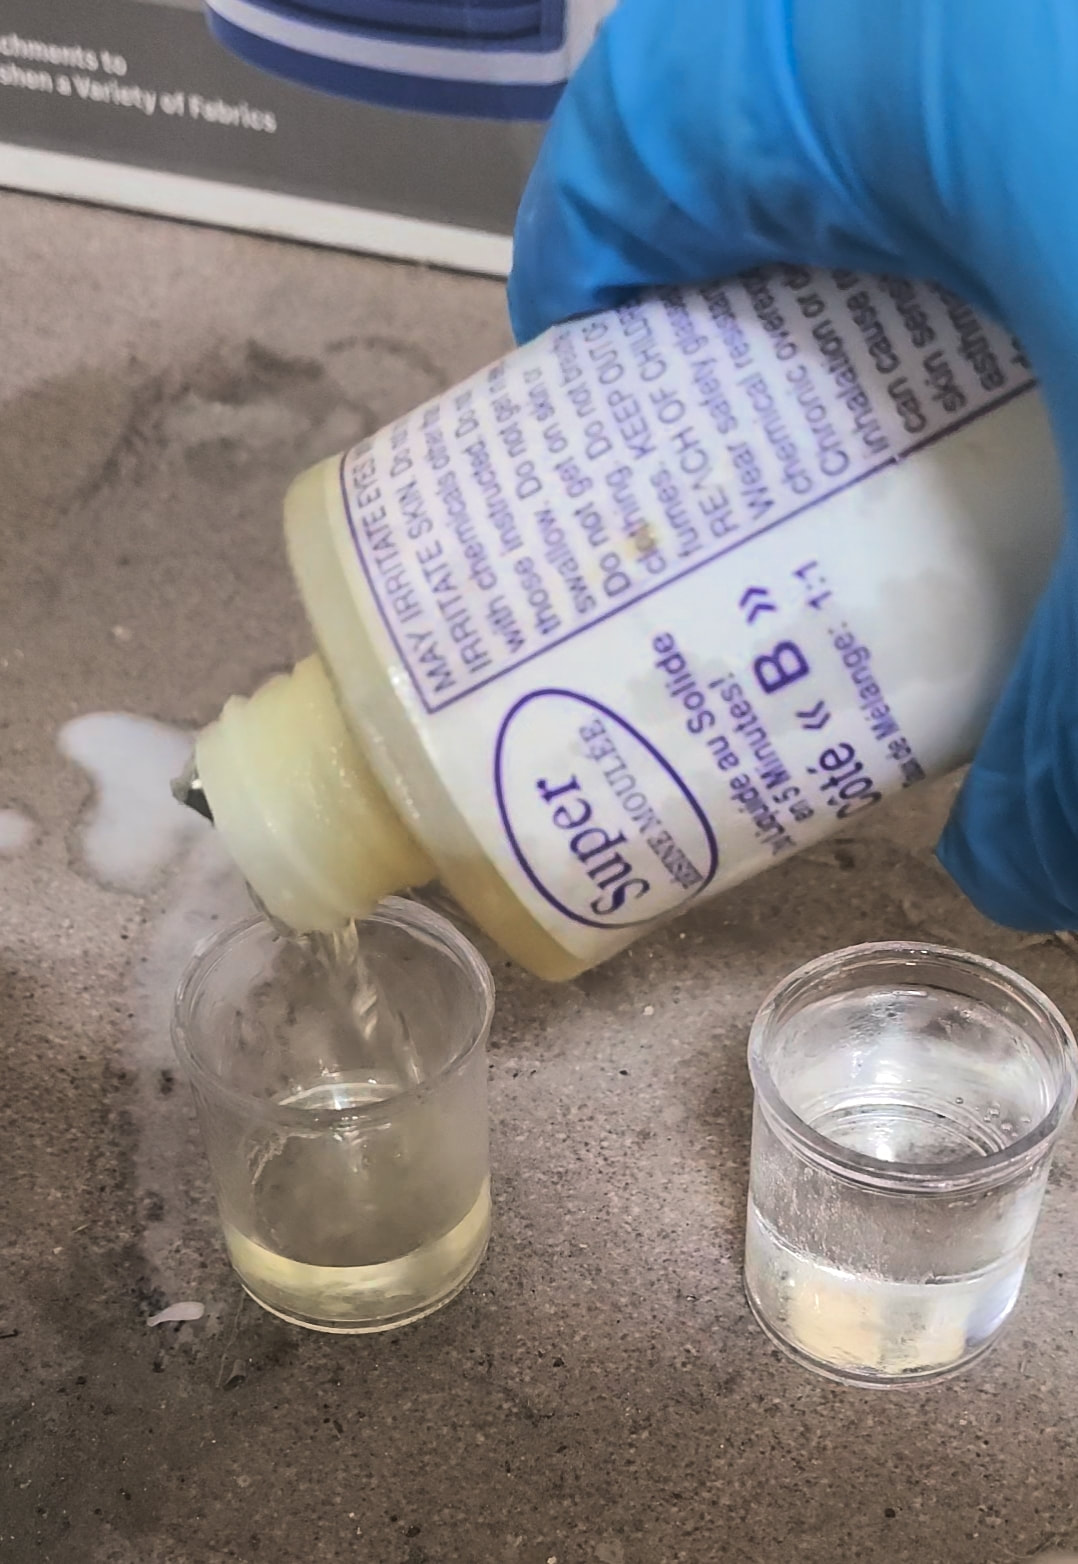 Once you have poured it into the container work fast to mix it really well until it is no longer cloudy. You can also follow the instructions on how to mix the resin on the box. Once mixed and it looks clear pour the resin into the moulds, if you need to make more then make more. You will notice the liquid turning white, wait until the moulds turn completely white and hard. The moulds do get a little warm and thats normal. Once they are hard you can pop them out of the mould case and make more. 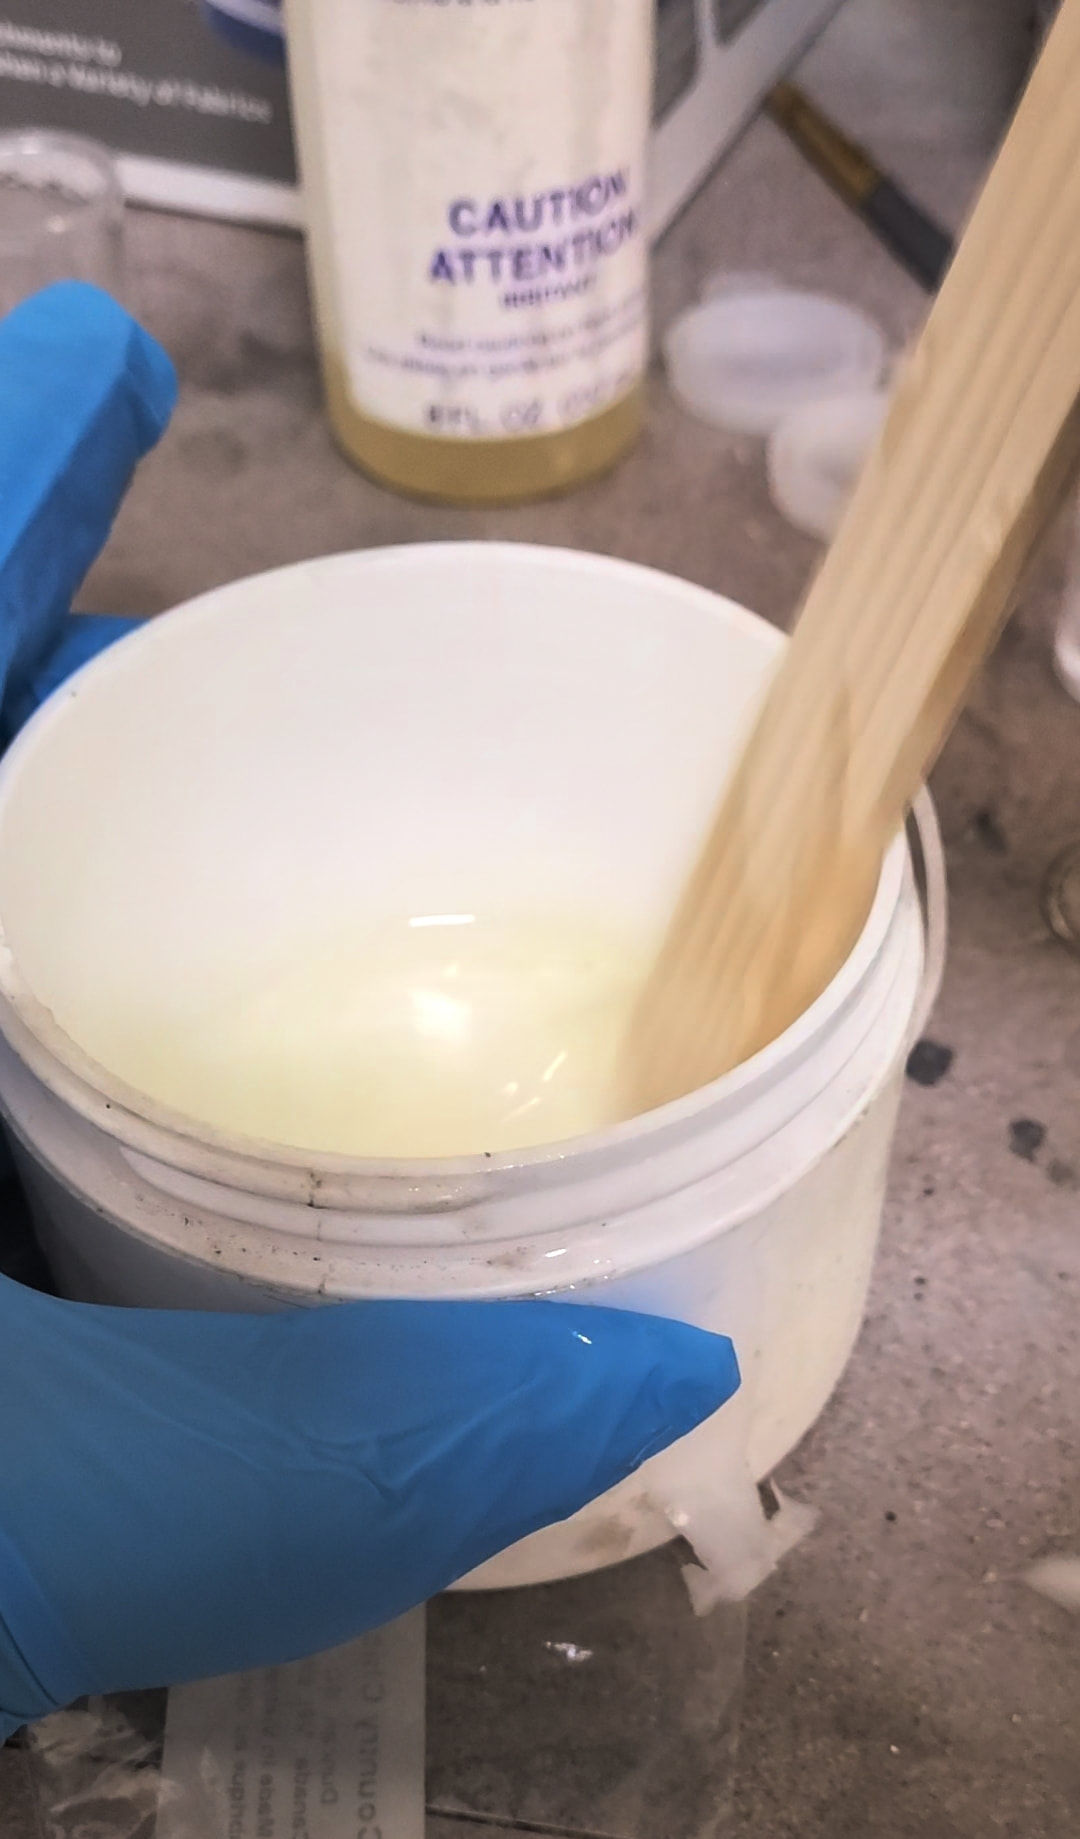 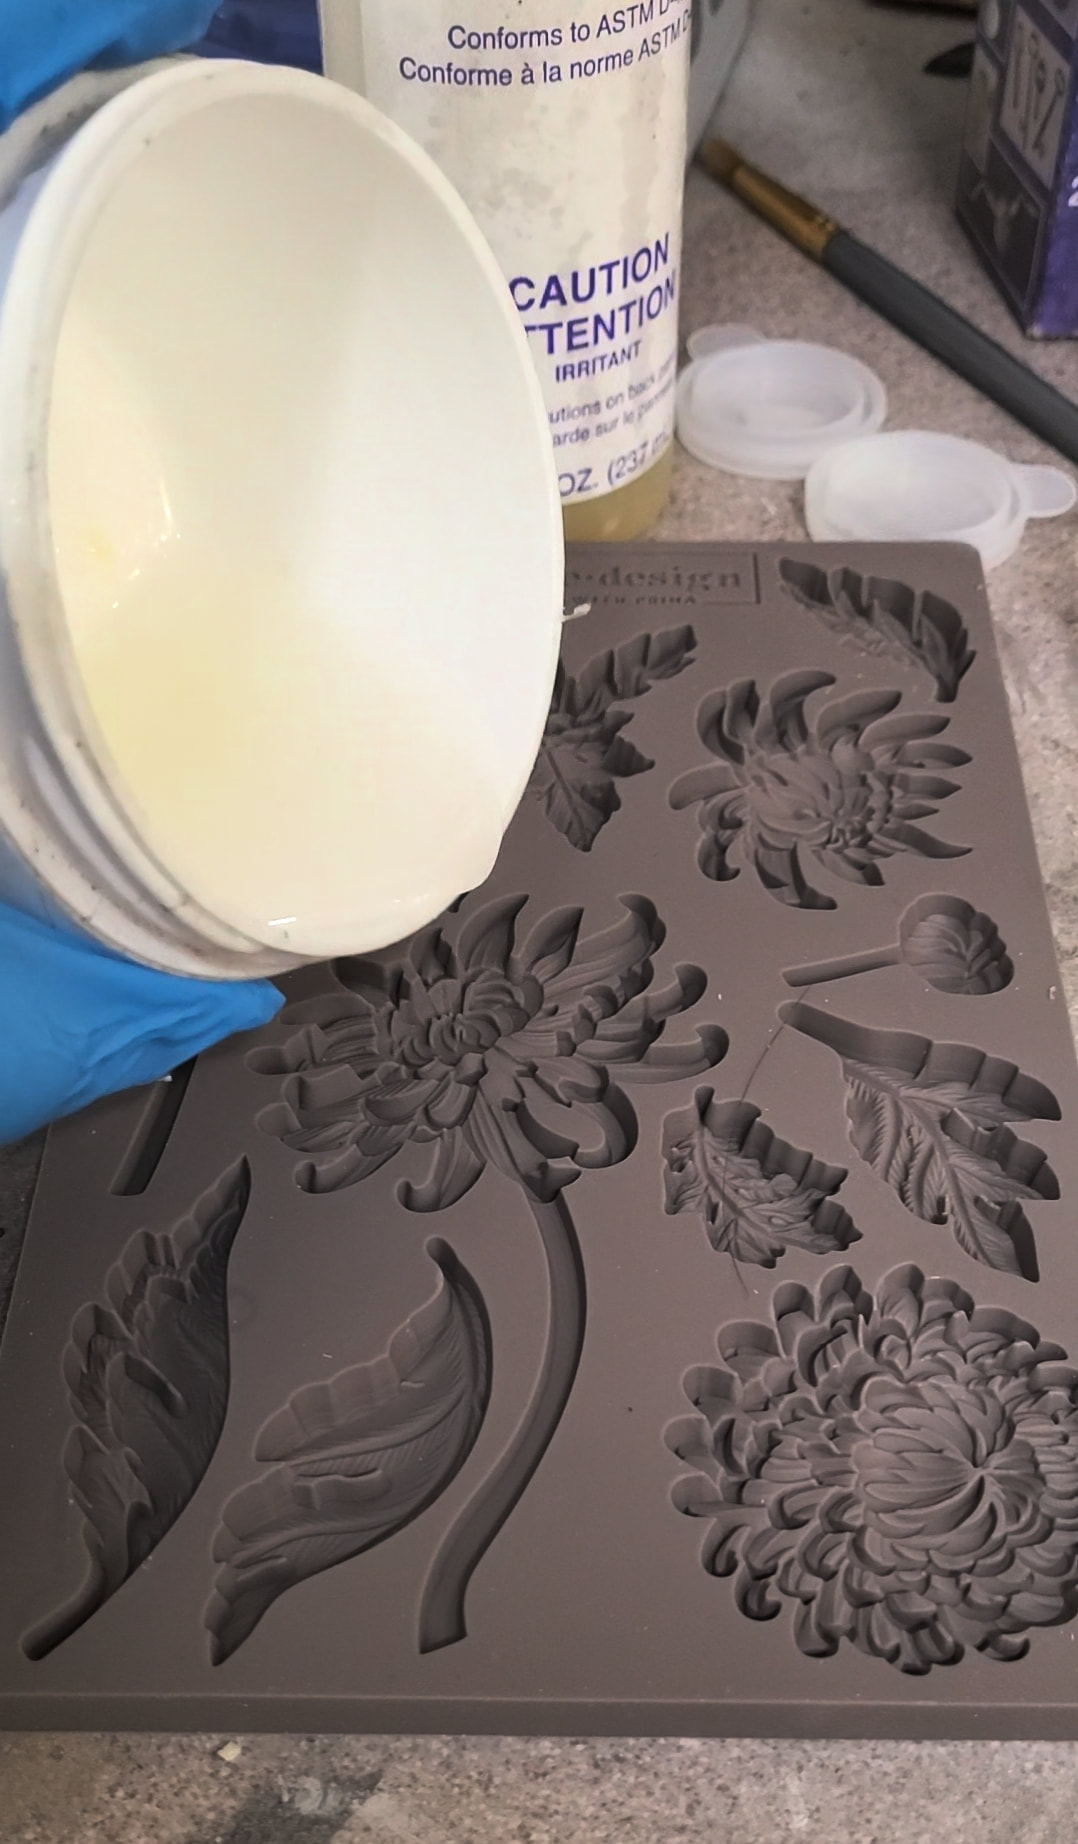 After the moulds are made you can start placing them on the mirror frame or where ever you would like them. Once you have them in place make sure you are wearing gloves to apply the super glue and glue eachnone down. Make sure the moulds don't over hang on the frame because when you lean it on the floor the moulds snap off. I learnt the hard way. You can then brush your paint over the moulds so they blend with the mirror frame that is already painted and then brush your clear coat on once the paint is dry. Make sure also to clear cost the entire mirror frame. Once everything is dry and ready you can take off the paper and tape and clean the glasd mirror with windex gently . Place your mirror on your wall and display your new high end mirror. I hope you enjoyed this post and project and tag me on Instagram or Facebook to let me know you made the moulds. 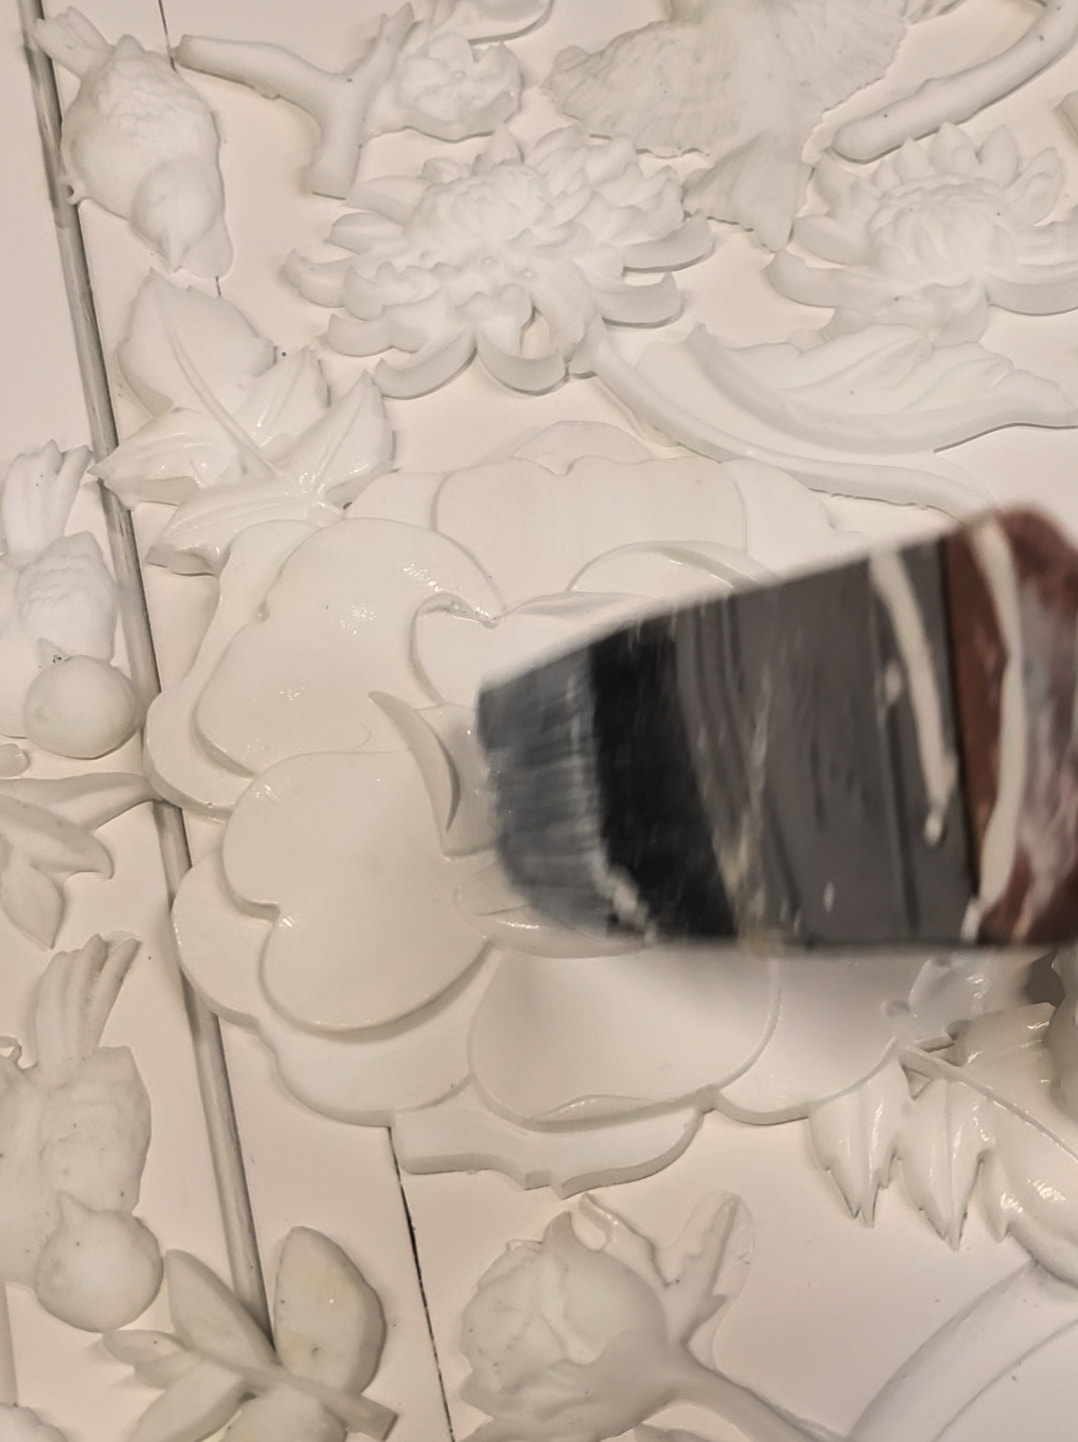 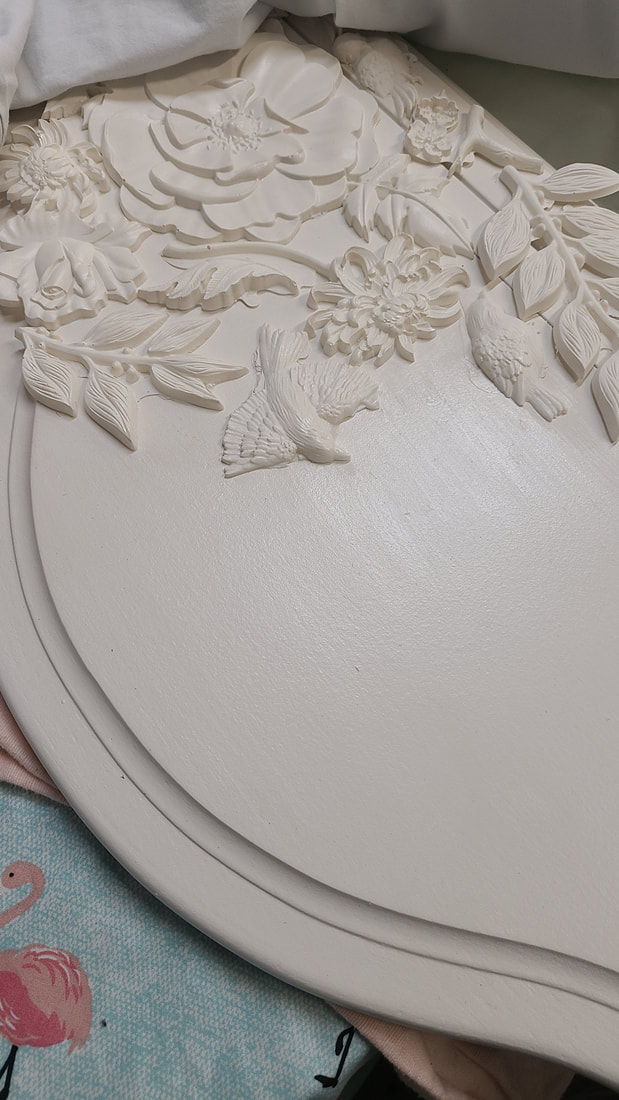 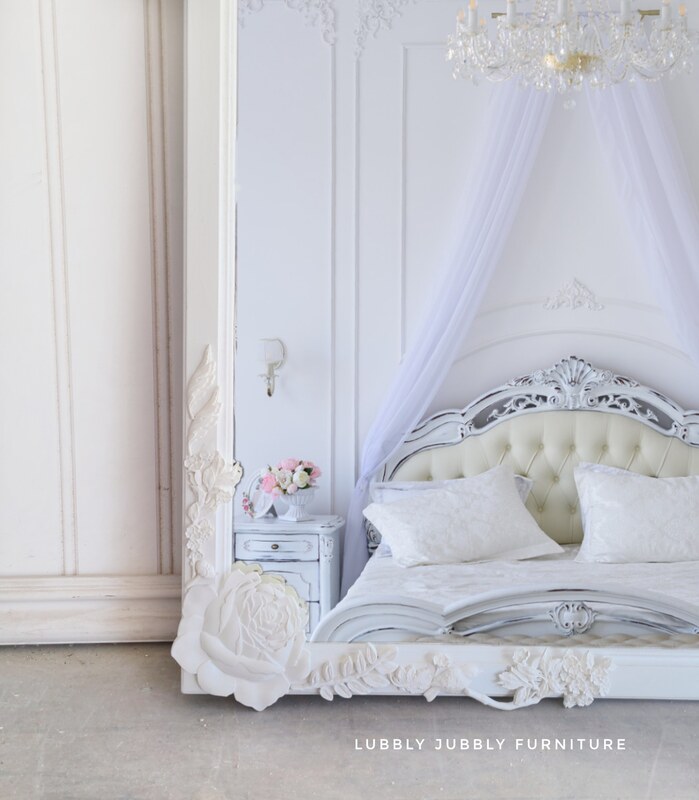 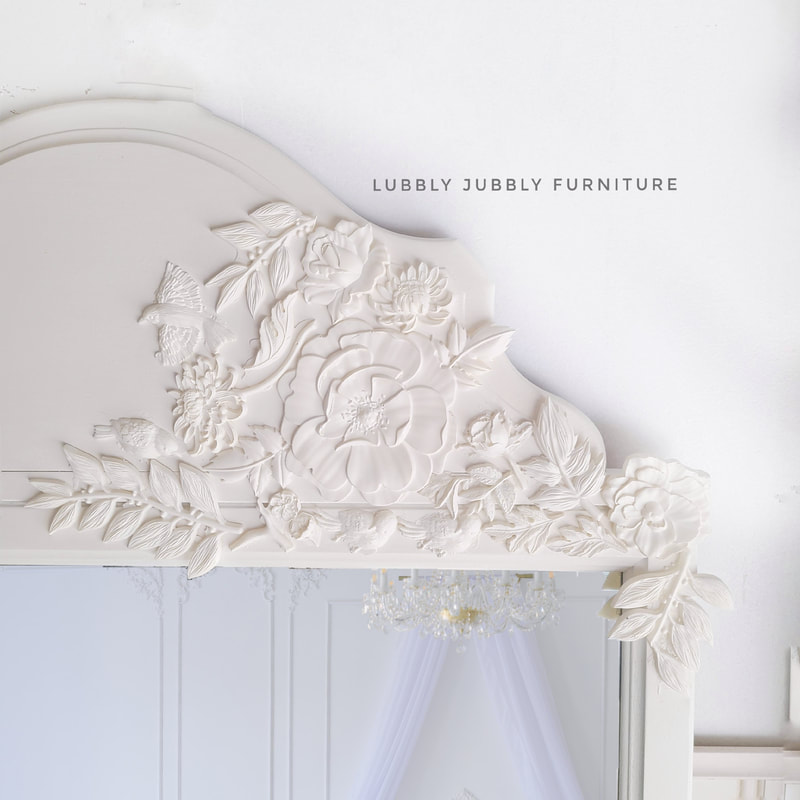 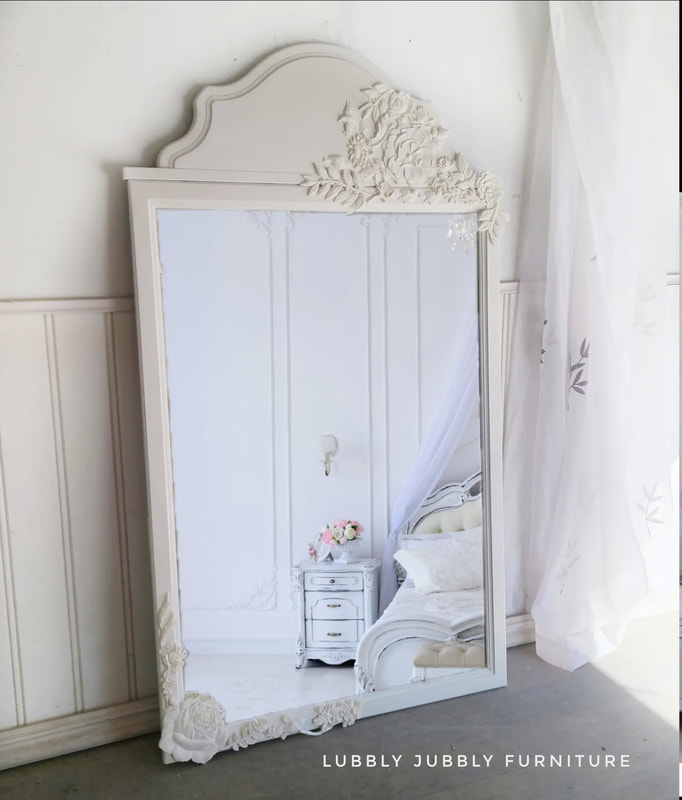 IMPORTANT: Some of the links on this website are affiliate links where i recieve a small commission, this is no extra cost to you. Thank you for supporting my small business. If you are attempting any projects and using tools, please wear the appropriate work wear and safety gear. Read all labels of every product you are using and follow instructions and guidelines for each individual product.
Thank you again for all your support in my small furniture business, i am extremely grateful.
2 Comments
Maureen Colangelo
5/31/2022 10:21:52 am
This is such a beautiful makeover. Love what you did with this mirror.
megan redden
5/31/2022 10:22:49 am
Thank you so much Leave a Reply. |
|
 RSS Feed

|


|


