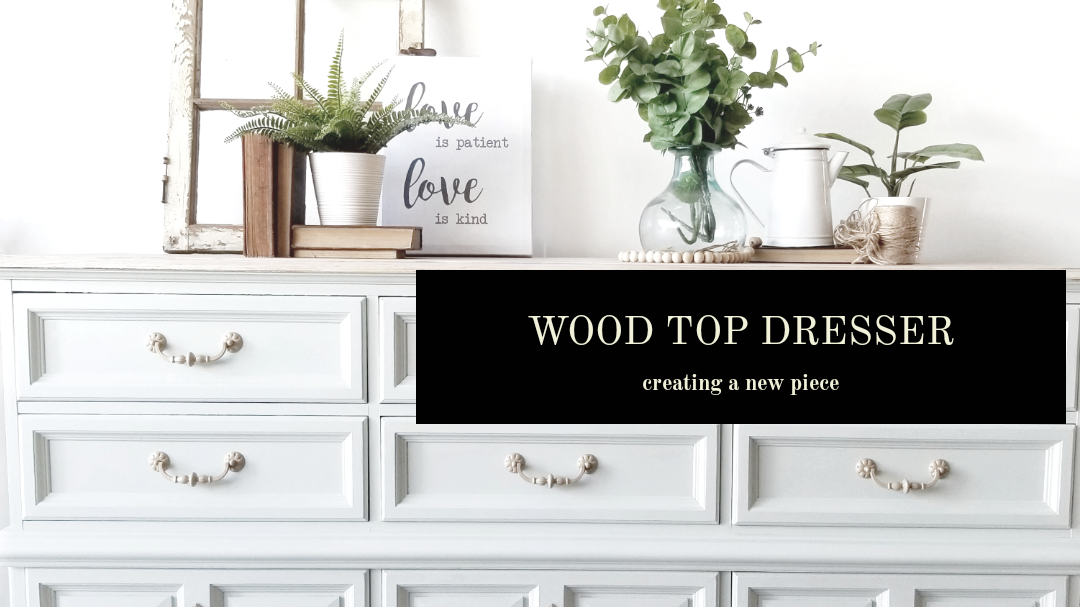
 Hey everyone. Hope you are all well and getting some painting done. I’ve been held up for a few days due to my back but it gives me this chance to write this blog post for you. This dresser I’m in absolute love with, I wish I had the space to keep it because it’s definitely my style and in my opinion it looks beautiful. If you would like to try this refinish project yourself then read along on how I did it. First you need to have legs ordered or legs available to add to this piece. If you don’t want legs added that’s fine, they aren’t needed, it just gives extra character and height. You can find furniture legs in all styles and sizes on Amazon. I made sure to scuff sand the whole piece except the top and give it a good clean with vinegar solution. I then sanded down the top to raw wood using my belt sander with 80 grit paper. Then using my oribtal sander with 400 grit paper to smooth the finish. I then poured some Country Chic paint limestone glaze into a jar and added a little bit of water to thin the consistency because I wanted it to be a thin application. I used my Country Chic paint sponge to apply the glaze. I wiped the glaze on the wood top making sure to go over it several times until I liked the look. I let dry and then applied my clear coat, I did two to three coats. Its very durable and leaves a nice sheen. I then had help to tip the entire dresser on to a small table on its back so that I could work on the legs. The legs come with metal plaques. You’re going to need extra pieces of wood to make a platform from edge to the other depth wise. See pictures. Then the metal plates can be screwed into the wood either side and the legs attached. Its very easy to do. You got this!!! Once that is done I left the dresser on its back so that I could paint the legs and seal them. I also primed two coats and painted 3 coats of paint (luna) while the dresser was in that position. Once that was done I managed to lift the dresser with help back up right on the ground. I then sealed it with Country Chic paint clear coat with 2 coats. Let dry and cure. The original hardware I mixed beige acrylic paint with Rustoleum metalic gold paint and came up with this soft wood style colour and painted the hardware with it and then used clear coat to seal them. Once all this was done it was finished and ready to sell. I hope you enjoyed reading on how to create this look and I can answer any questions you may have. Thank you Megan 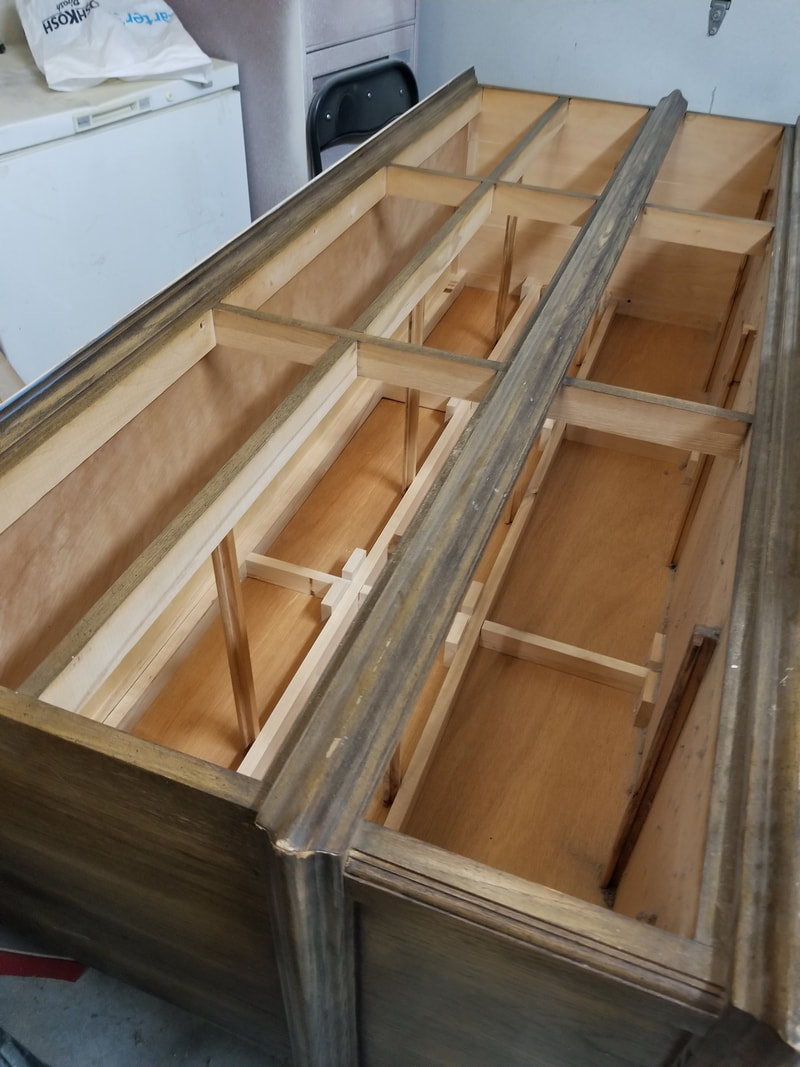 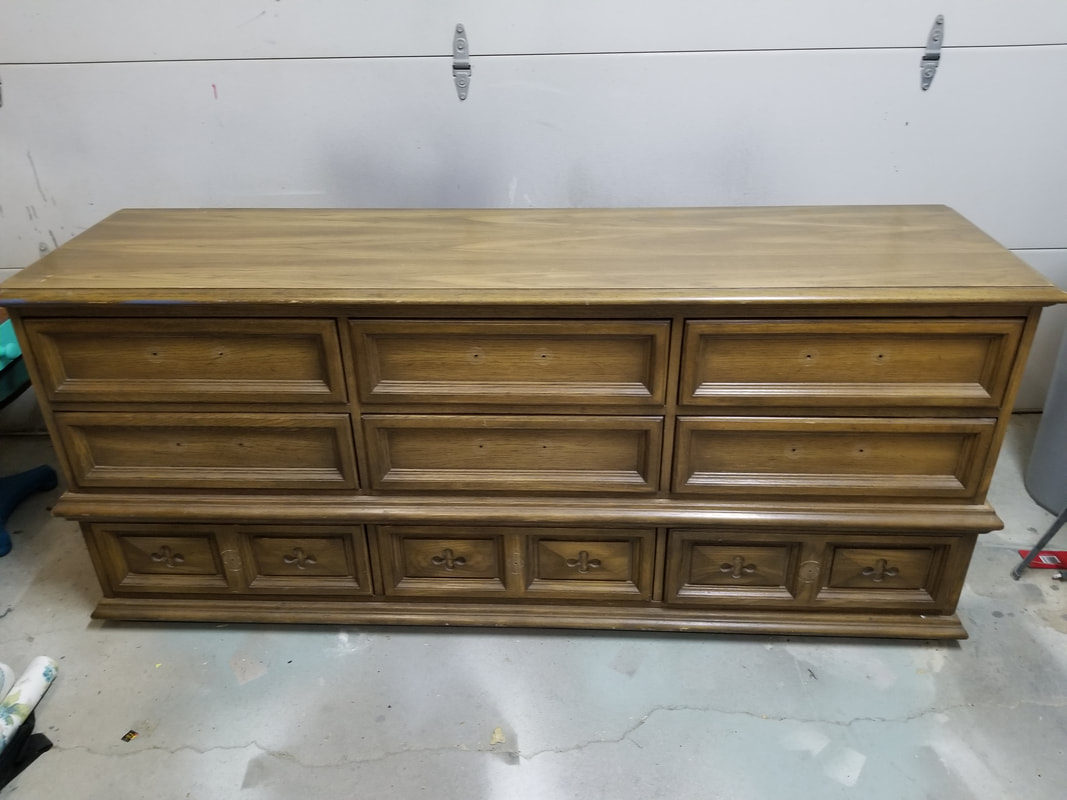  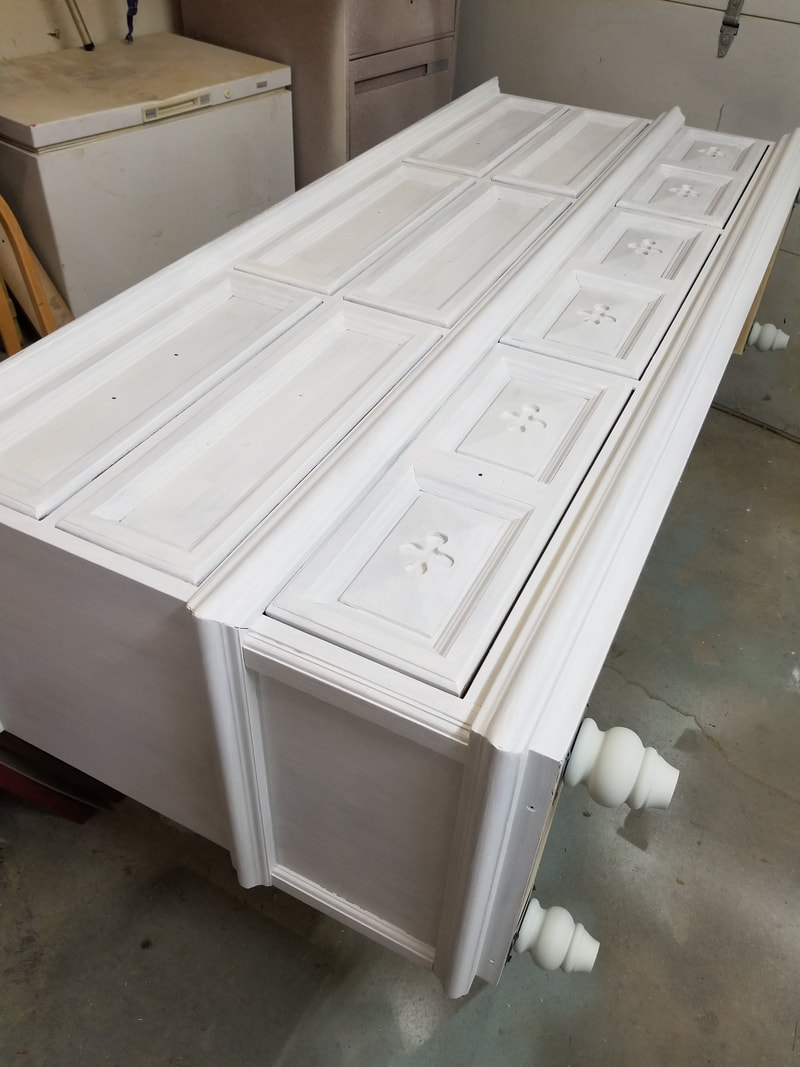 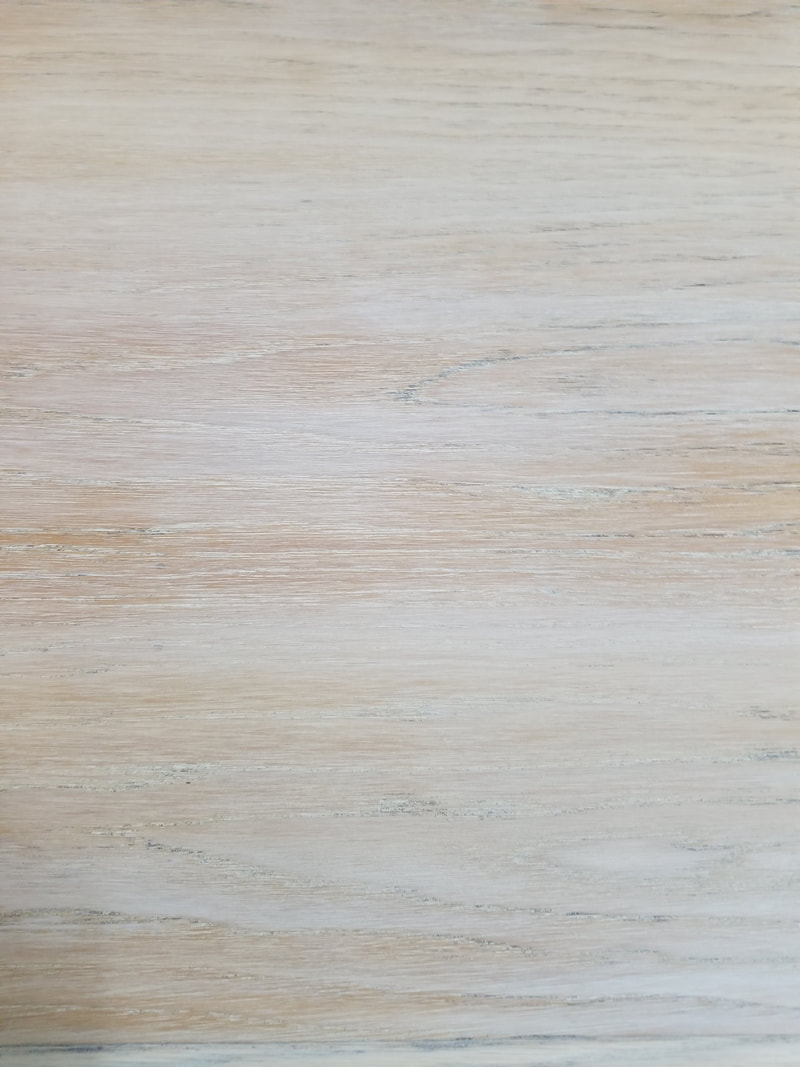  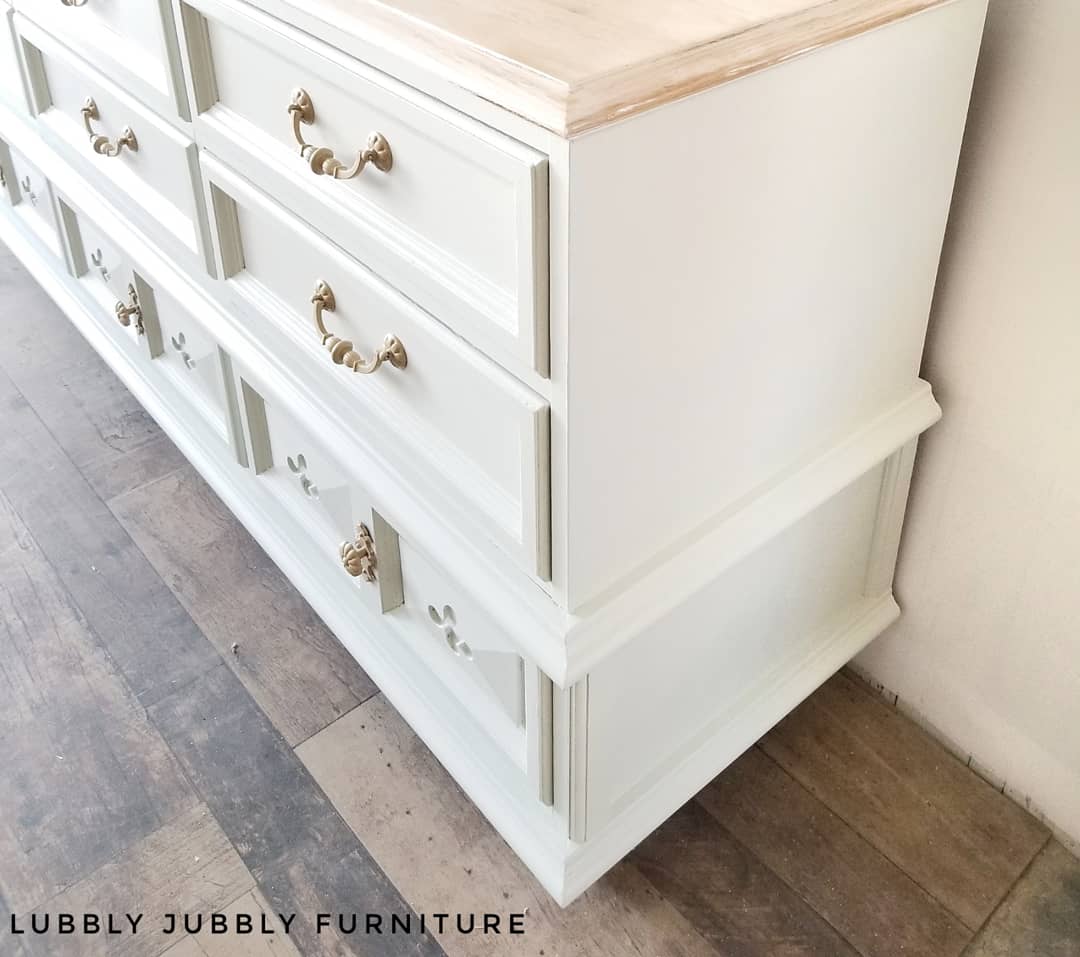 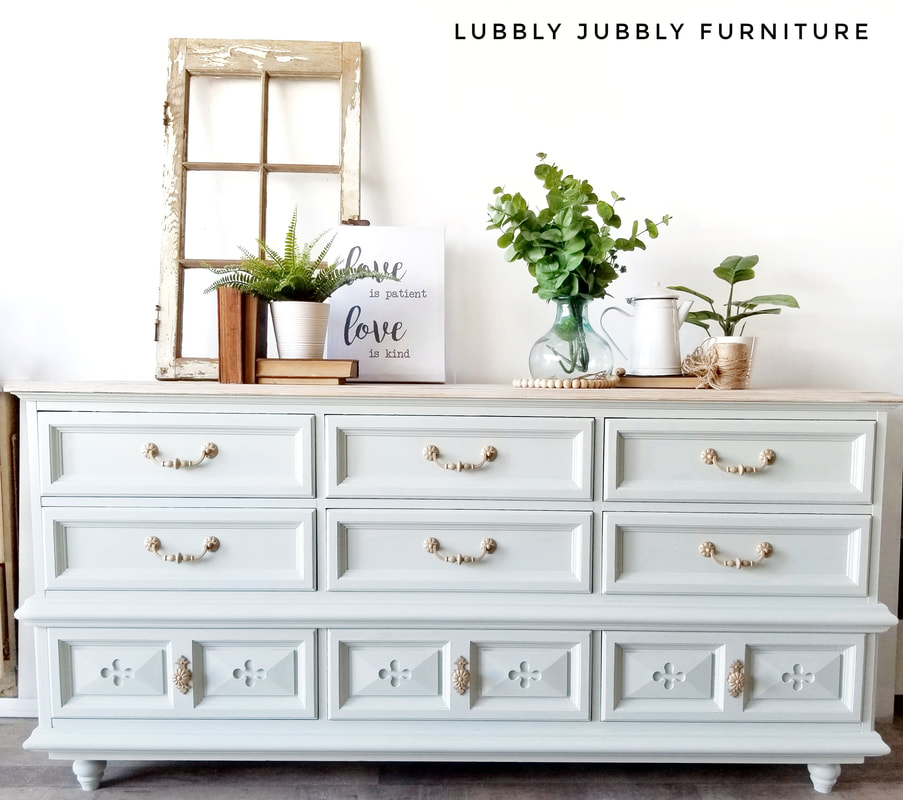
2 Comments
Gracy
12/19/2023 11:53:10 pm
Your blog post was a breath of fresh air. The writing style was engaging, and the content was informative without being overwhelming. I enjoyed the way you simplified complex ideas. To continue the journey, <a href="https://f0a8cc-4w1mo6wegjcvgw-sk6r.hop.clickbank.net" target="_blank">click here</a>.
Justin
12/20/2023 03:26:52 am
I liked thier work very much, they do a very good job in like price. To explore more, <a href="https://f64bb8kc7bd985ehqbvdy71oac.hop.clickbank.net" target="_blank">click here</a>. Leave a Reply. |
|
 RSS Feed