 Okay I have to say this summer was not the greatest if Im being honest. It started off great, we went to Canada's Wonderland for a birthday party, we relaxed, swam alot and the weather has been super hot. Then I got covid, it took me out, I thought I was dying, yes a little dramatic but it felt like that. The first day I had pain and aches shooting up legs, around my ankles and I could barely walk. My back hurt and my hips and the awful headache that wouldn't go away until the third day. Let's just say I prayed alot for it to end. Luckily it was the weekend and my Husband was home to take care of our kids because I was in bed the whole time. So after the third day it all sort of went away, but I was very tired and then obtained a croaky voice and a scratchy cough. I didnt have a cold which was what I found odd, but this irritating cough that occurred mostly at night as I fell asleep. A month later and I still have this cough but not as much, just a few times a day. So that was that!!!! I started menopause at 39 years old right before Covid began, it was way to young for me to be getting those symptoms, but my doctor started me on pills so I wouldn't be burning up and sweating. TMO? Well this is life lol and its my life and Im choosing to share it with you. I think writing this down really helps me and I find it much easier to be open this way. So what has peri menopause have to do with this summer you ask? Well it doesnt really I just had to let that out lol but I did miss 4 pills over the long weekend and it ruined my 2 weeks after that because I was constantly getting way too hot. Anyway moving on.... Summer got better , my kids went to camp for a week and I was able to get some work done. I found two china cabinets and thought oh my gosh these would make amazing dressers for my Husband and I for our bedroom. My Husband picked them up and wow they were so tall but I could see them in our bedroom and I couldnt wait to get started. I also started and finished this dresser for the Makers Challenge Central Let It Shine theme. This was so exciting as Ive never used metallic paint before or sprayed it before. It turned out amazing and I have it listed on my Available Furniture page in the menu if you'd like to check it out. There are some new pieces available on that page too that I got finished this summer. On top of all of that we have basically been swimming and hiking and its been quite fun. We are taking my oldest to University in a few weeks which will be fun and also sad, mostly for us parents lol. So that is about it for now, you can check put alot more on my Instagram page and Ill be sharing a new blog post soon all aboit my nature photos I took and how I used them in my living room. Take Care Meg 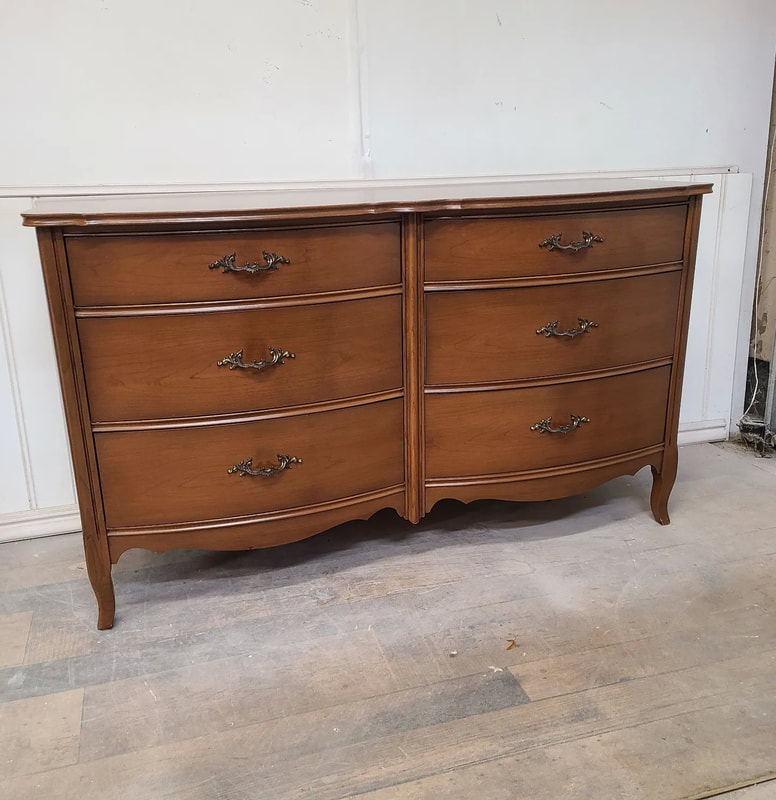       
2 Comments
 Well hello everyone, welcome back to my blog. Its already been a crazy summer and I feel like its just started. During the summer I find it difficult to get work done and projects while my children are home. I try to get out to my workshop as much as I can. I have been looking for some lamps for a while now for my staging furniture pictures and found two short lamps and I absolutely love them . I also found another set which are the two I have here. They were $5 each, perfect deal!!!! Once I got them home I cleaned them really well with furniture prep and clean spray by Cottage Paint. USE CODE LUBBLY10 FOR 10% OFF THROUGH THIS LINK.  Once I had cleaned both lamps I dried them and then sprayed white satin spray and black satin on the other lamp. I also sprayed the white lamp stand part in gold. This was a quick and easy flip and now both lamps match my interior decor and will look great for staging furniture. Thank you so much for reading and following my blog and Ill see you again this week with a new blog post and project take care Meg  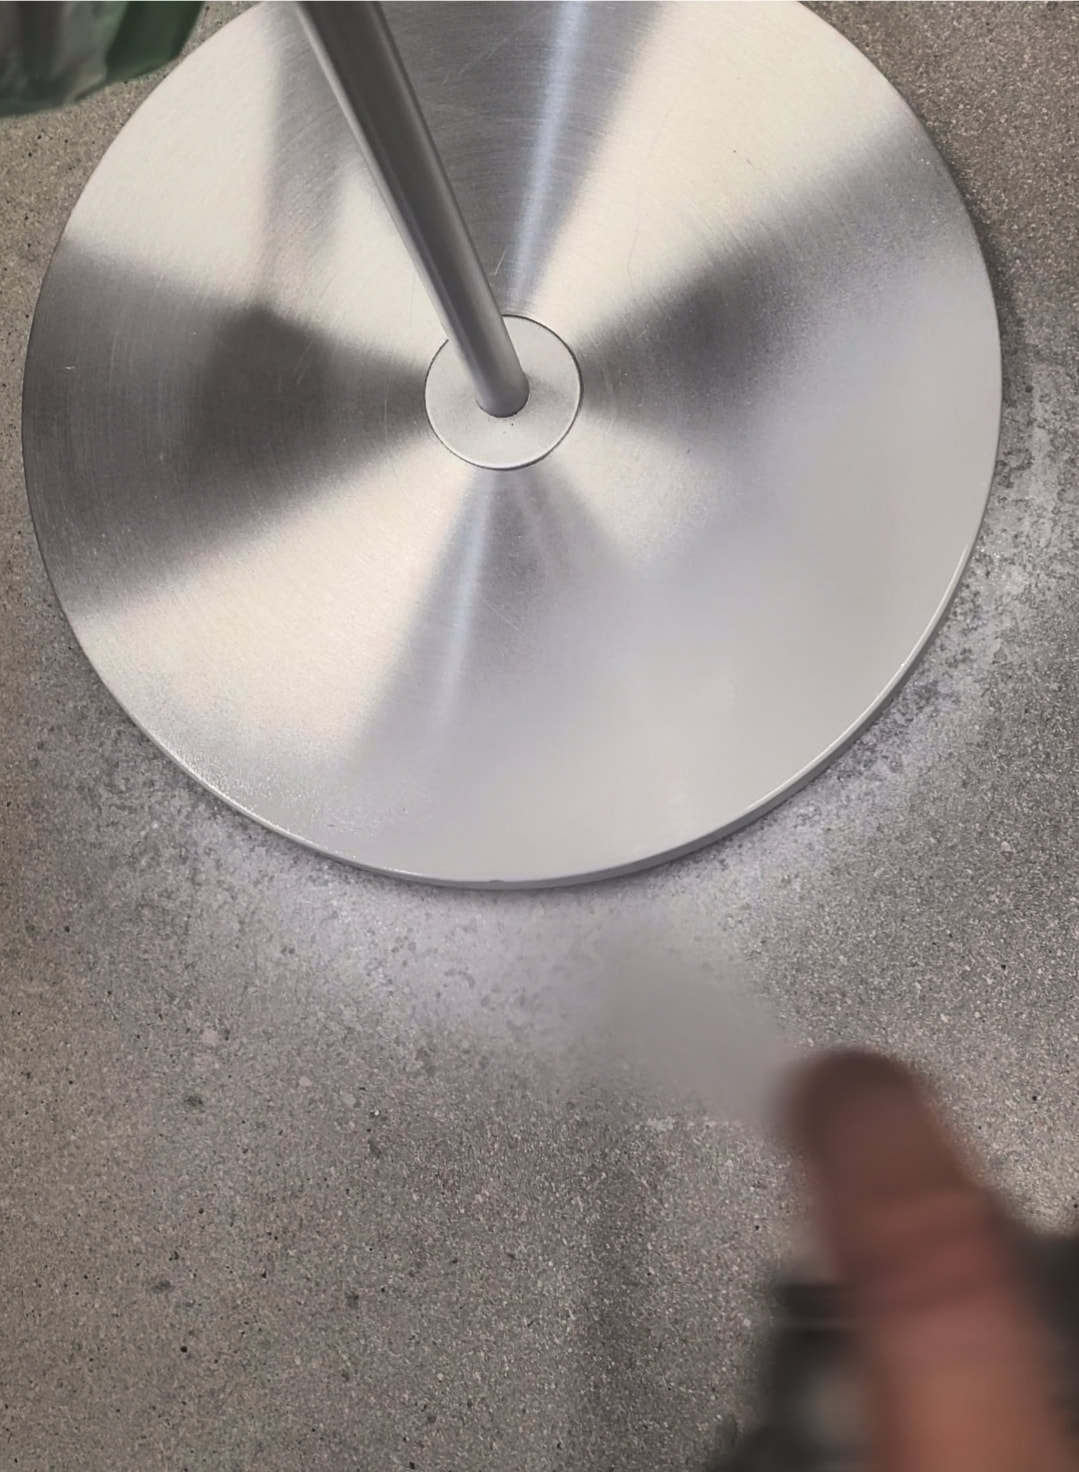 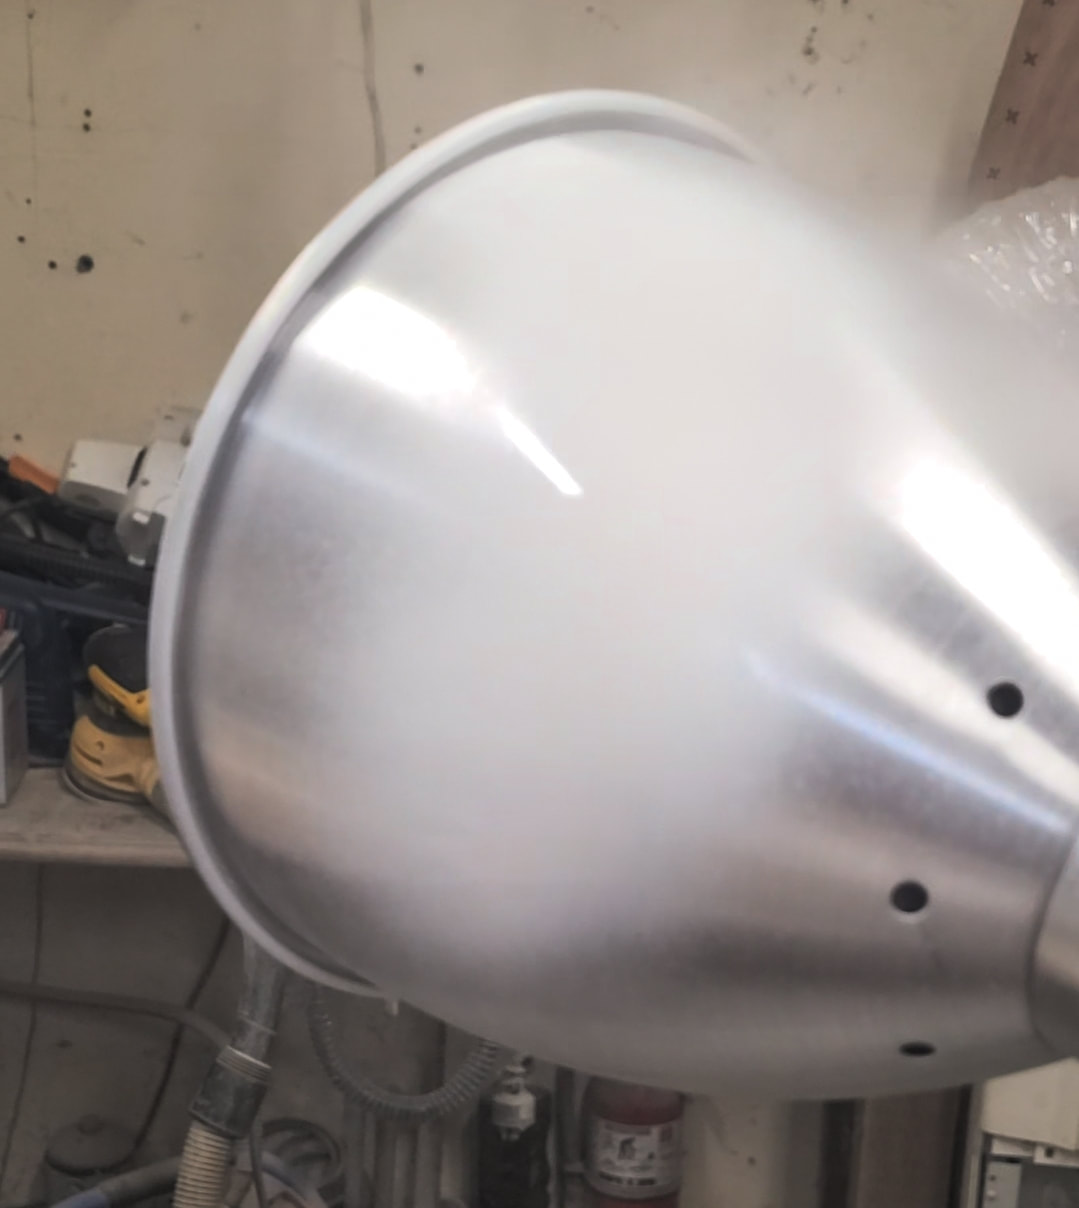 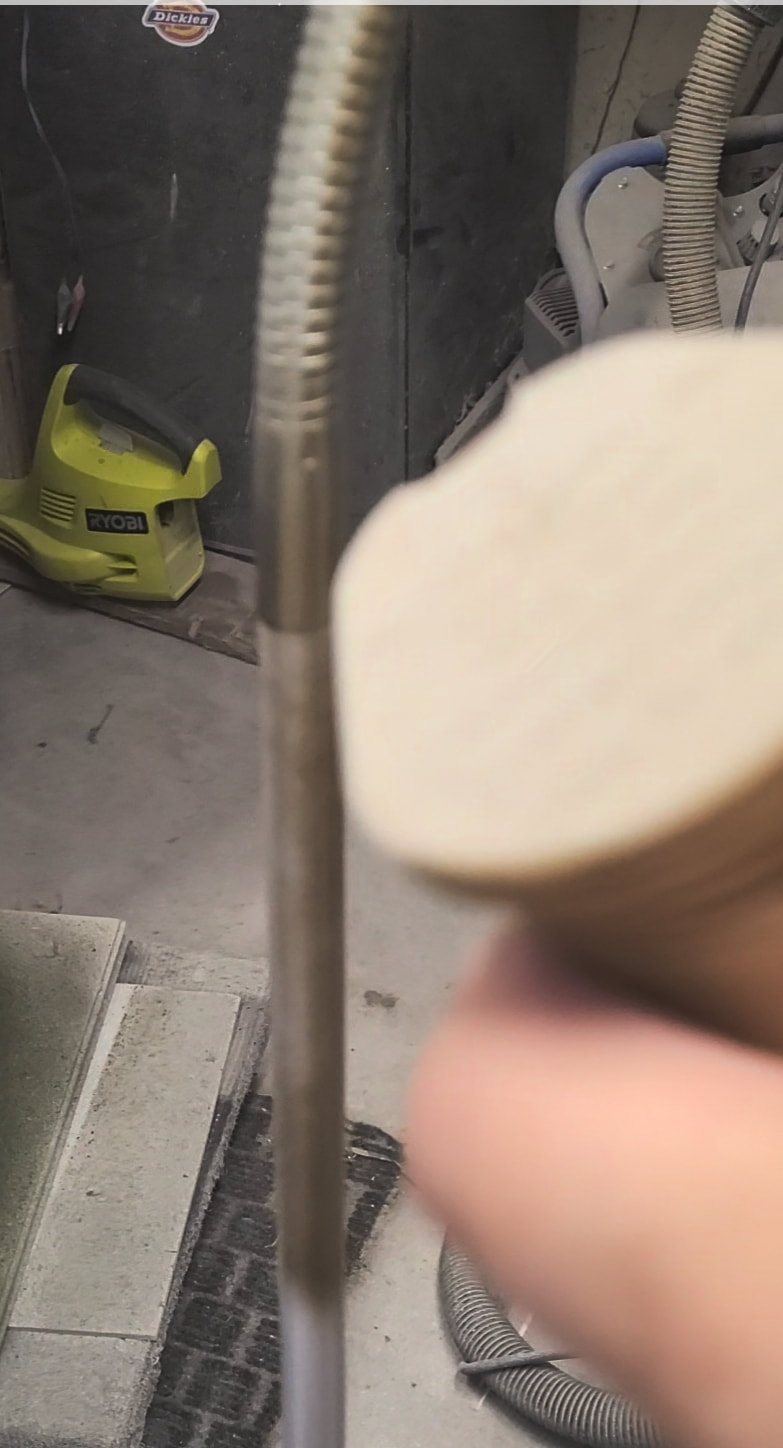 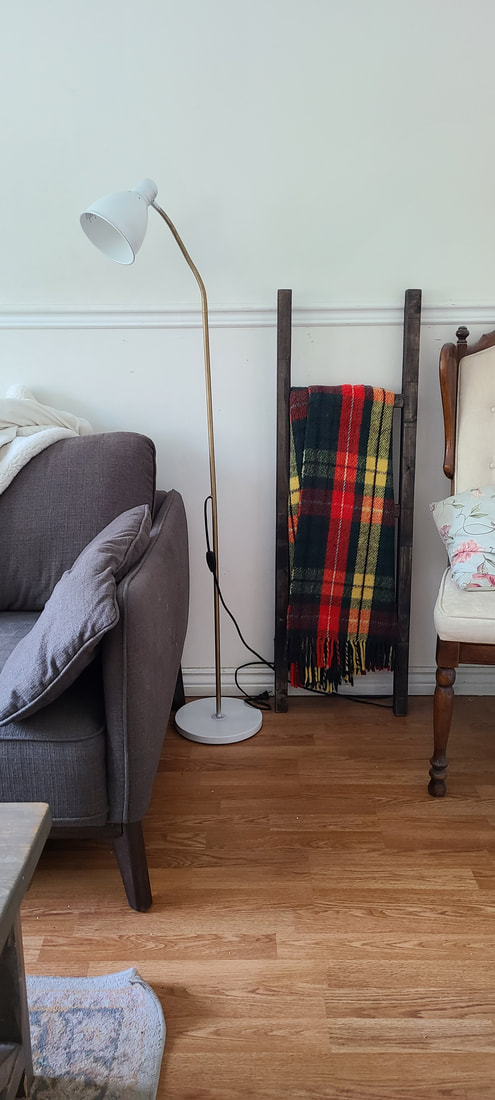  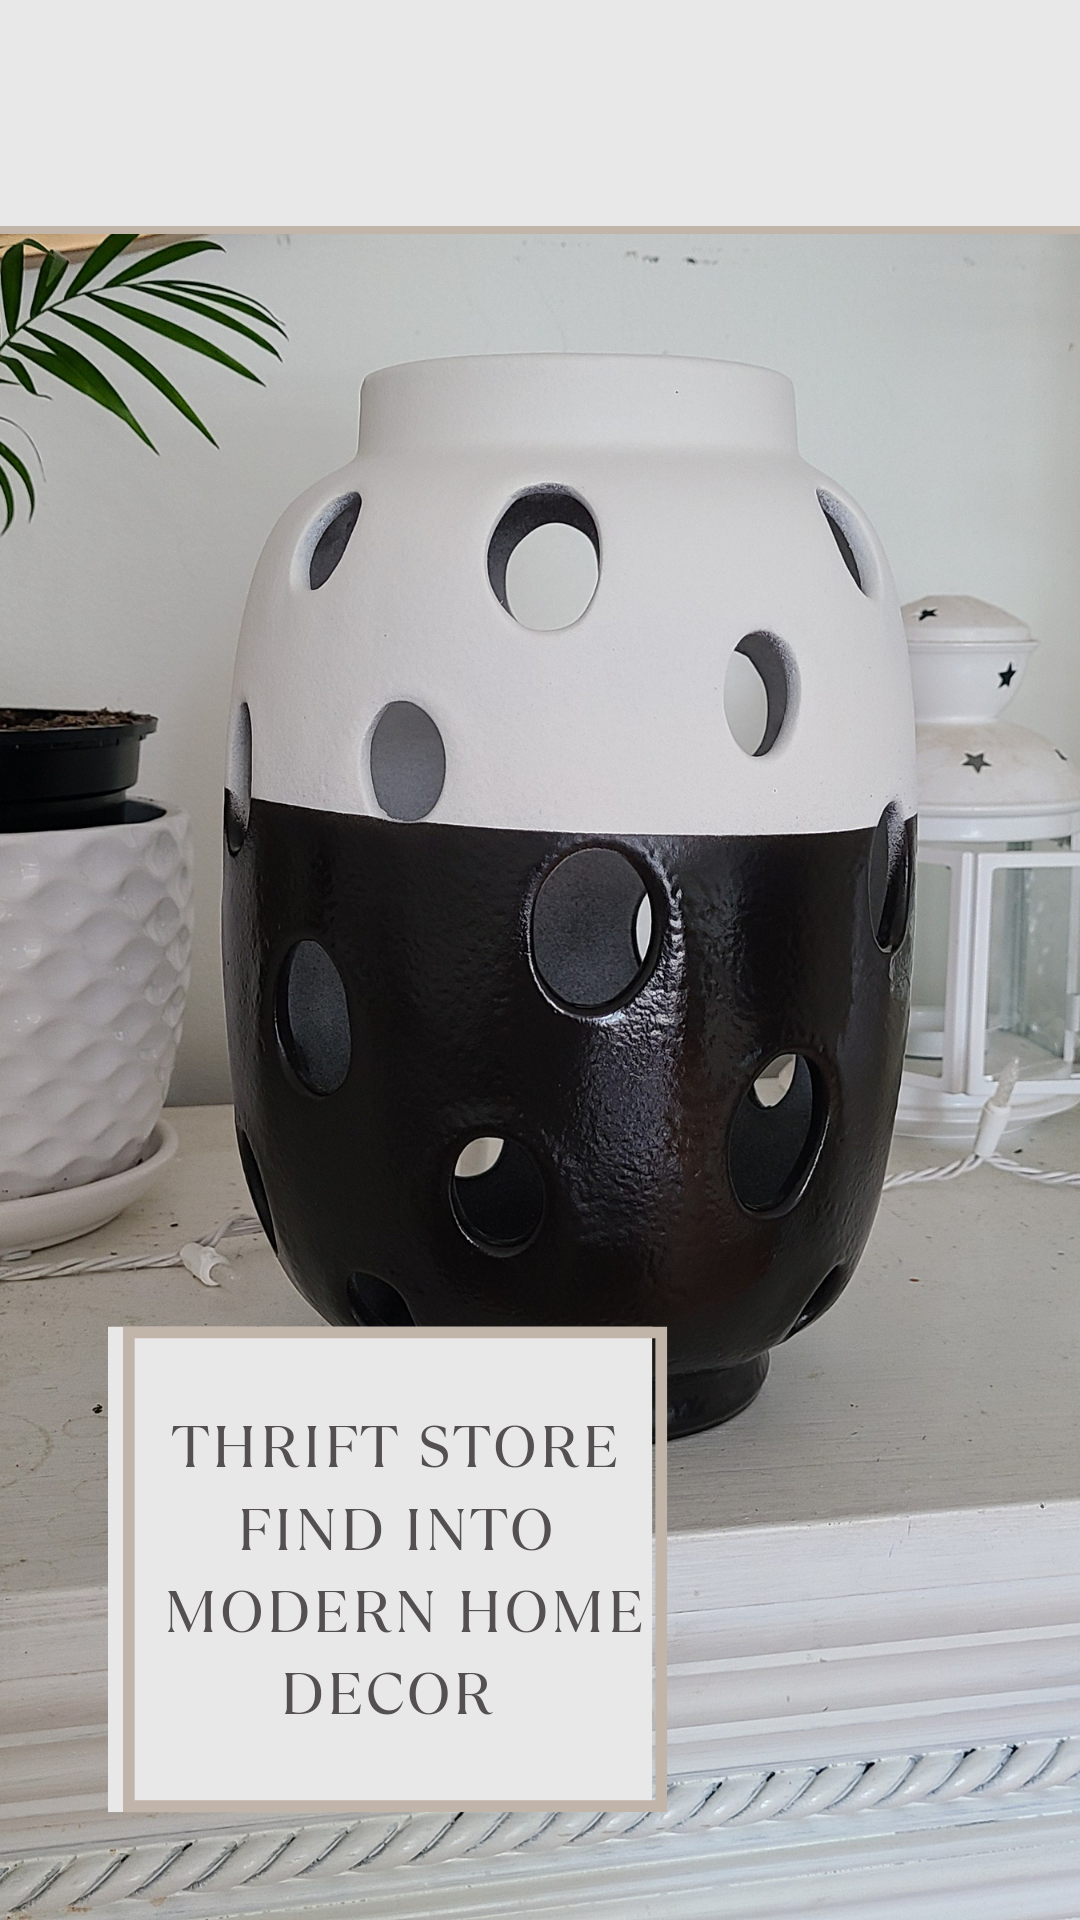 Good morning everyone, today is July 2nd and the day after Canada Day and what a glorious day it is. Hot days lately for the summer but I absolutely love it. Thrift stores are so much fun, you never know what you'll find or if you find anything that day. Sometimes I find gems and some days I walk out with nothing and thats okay. Below is the picture of the before of these vases I bought. I thought they were so cool looking and would be an amazing flip into modern stylish vases. 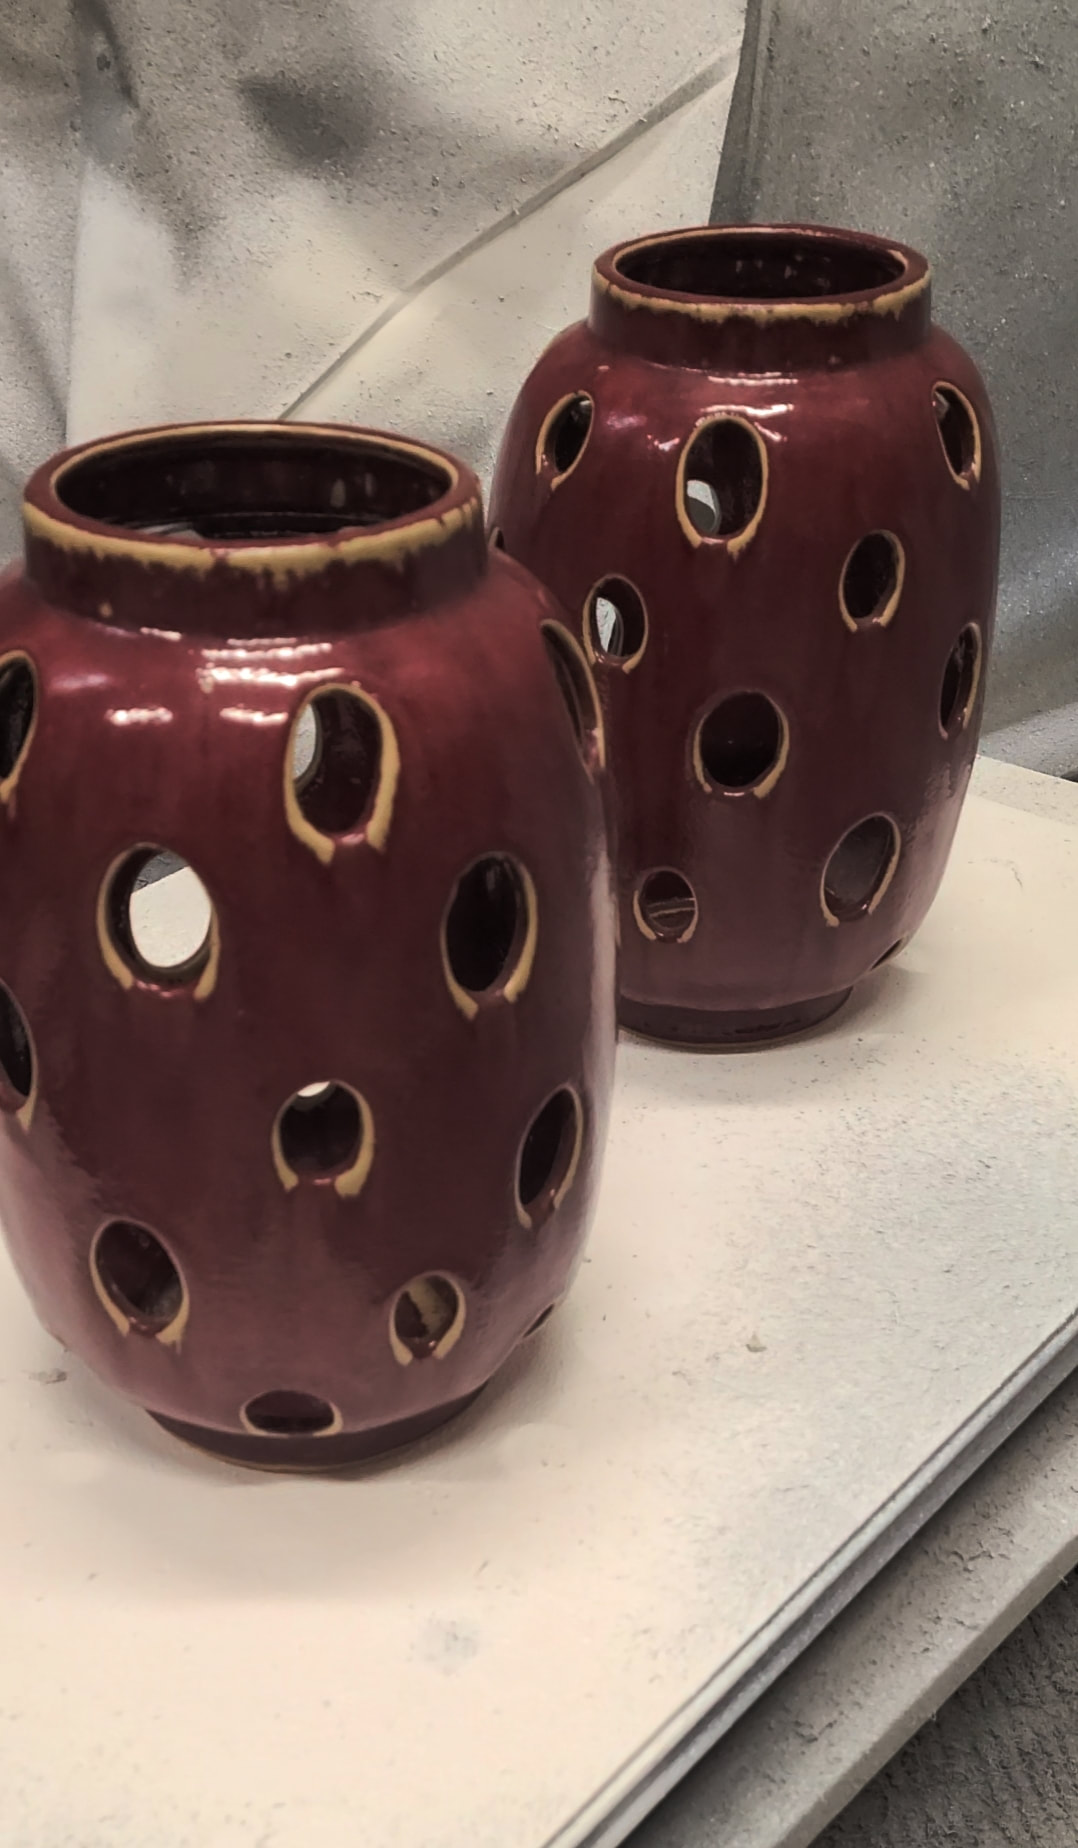 I went into the thrift store not knowing what I was looking for. As soon as I walked in I saw these vases right away. They caught my eye because they looked so neat and I could see what they could be. After I picked them up and placed them in the cart, I walked around the store but couldn't find anything else that got my attention. I started to smell something that was really bothering me, it didn't matter where I went in the store I could still smell it. Seeing as I didn't know where the bad smell came from I cleaned these vases right away with Cottage Paint (Use Code LUBBLY10 FOR 10% OFF) furniture prep and clean spray. I scrubbed my hands and the vases but I think the smell was on the cart. Once I got home I sprayed the vases and then cleaned them. I first sprayed them with a Primer spray. Kiltz spray is my go to but Lowe's was all out so I had to get the pricey shellac spray. 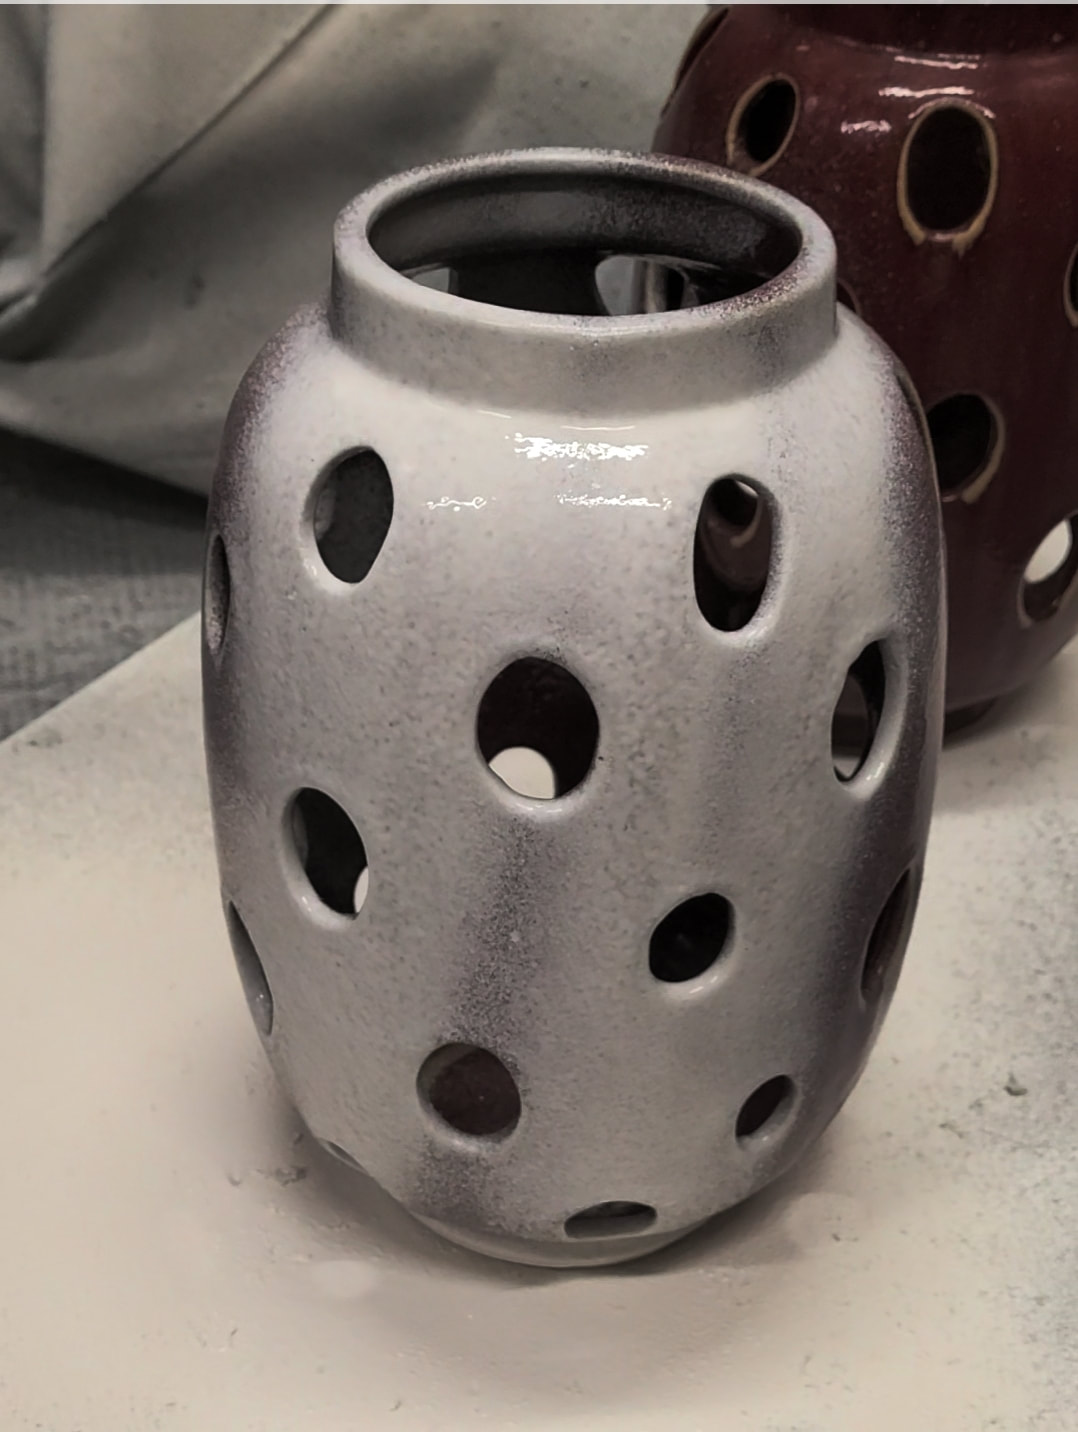 After I sorayed two coats of Primer spray I lightly sanded the vases. I then painted them with Crinoline paint by Country Chic Paint about one coat. I grabbed some green tape and wrapped some tape around the middle of one vase. I sprayed the bottom half with Rustoleum spray in dark Walnut.  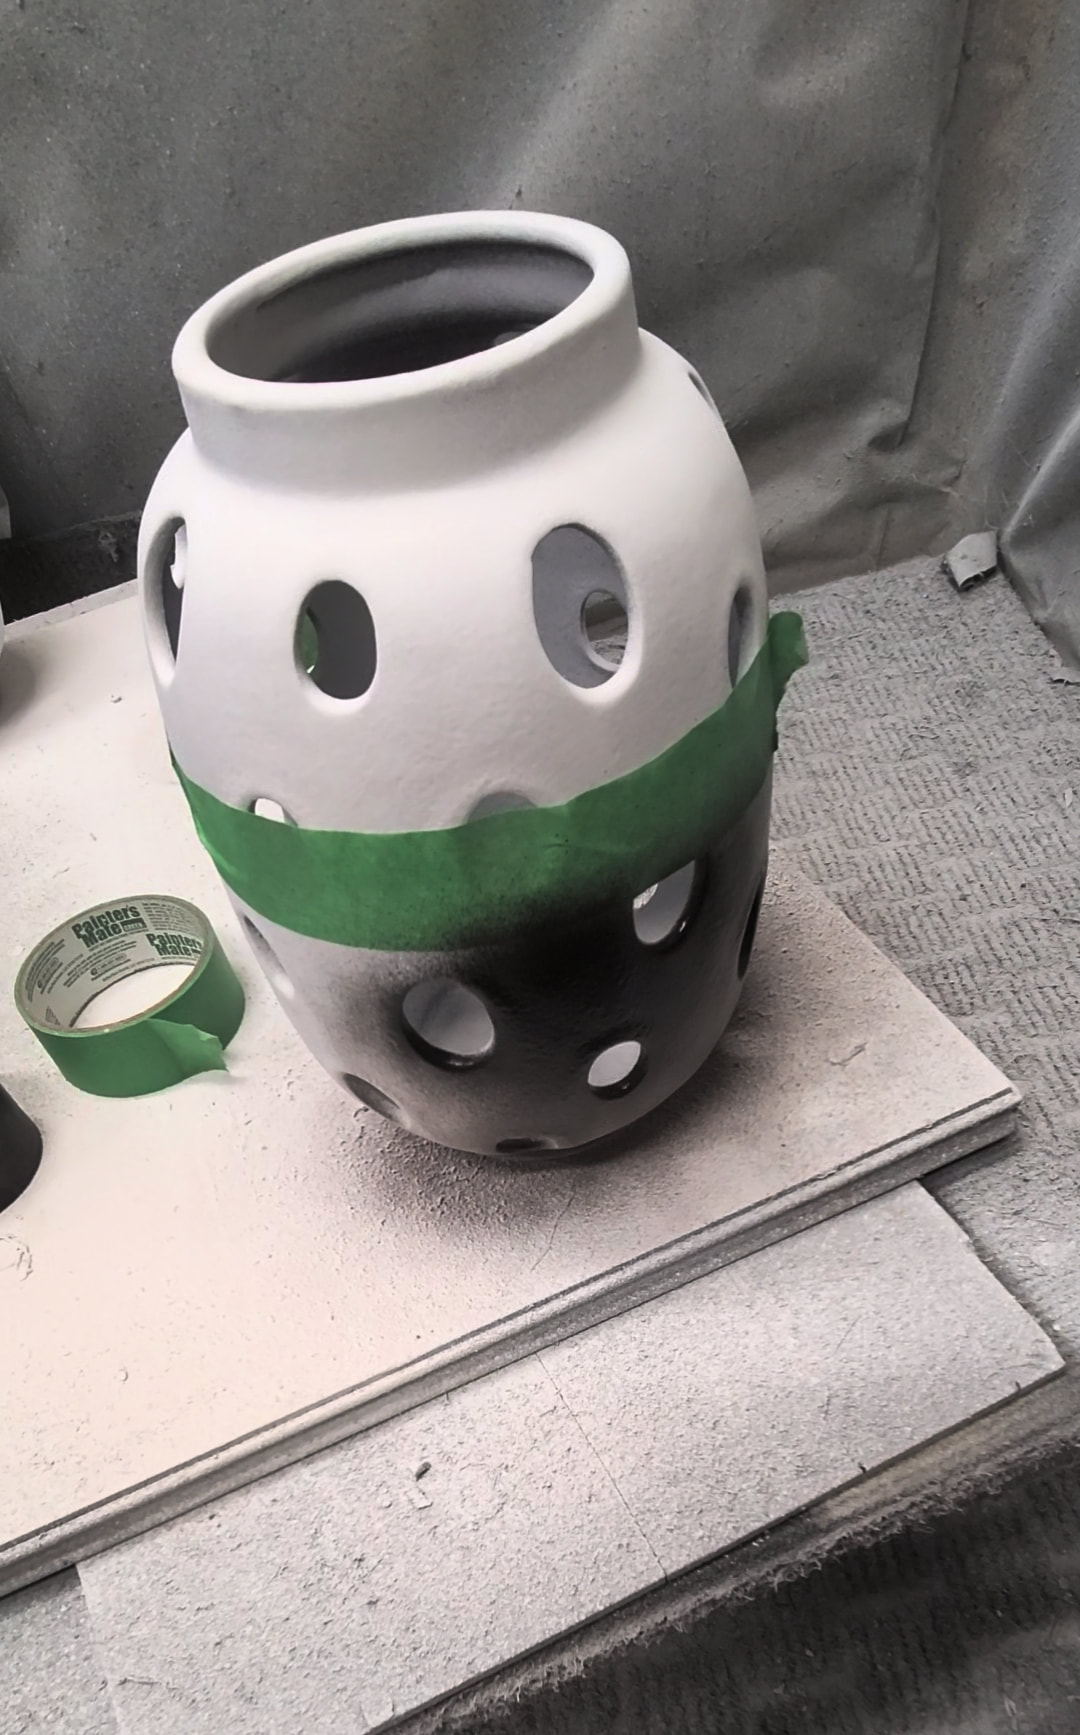 Once it was dry I took the tape off. I sealed both vases with clear coat and here below is the final reveal. Simple, easy but modern update to two thrift store vases. I hope this project provides some inspiration, its so much fun and can be really easy and creative. Take care my friends and see you for the next project Meg   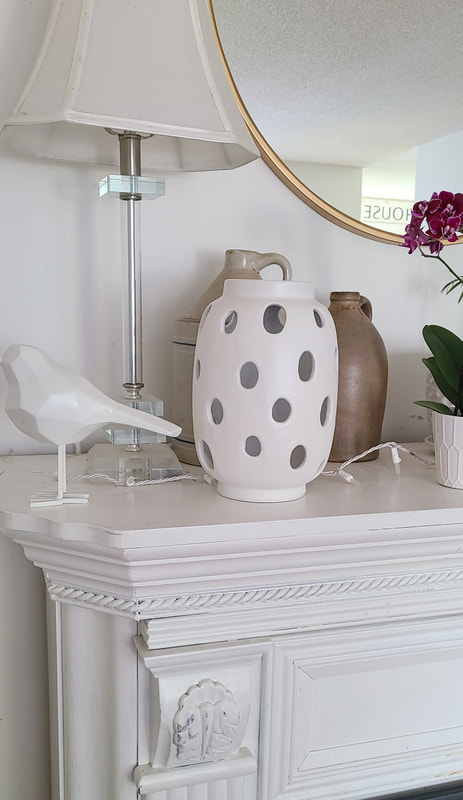  If it is Summer where you are then you are going to love this summer pasta recipe dish. It's quick and easy to make and the ingredients are easy to find, you probably already have them in your pantry. Its funny writing the word pantry because I grew up in England and we never had a pantry, just kitchen cupboards. When my Sister and I went to the US to visit my Dad we found this spice bottle kit for salads and it was the best thing ive ever bought, well i've bought more great things but this was amazing for the kitchen. I'll share a photo below of it. Unfortunately I could not find it in Canada and only the US. If you don't have the bottle kit you can use anything to mix it in. The salad mix spices can be bought in Canada and US at any grocery store and ill also share below the picture. Again this is such an easy yummy summer dish to take to parties or serve at your own party. Make sure you have a big bowl that you love to use.  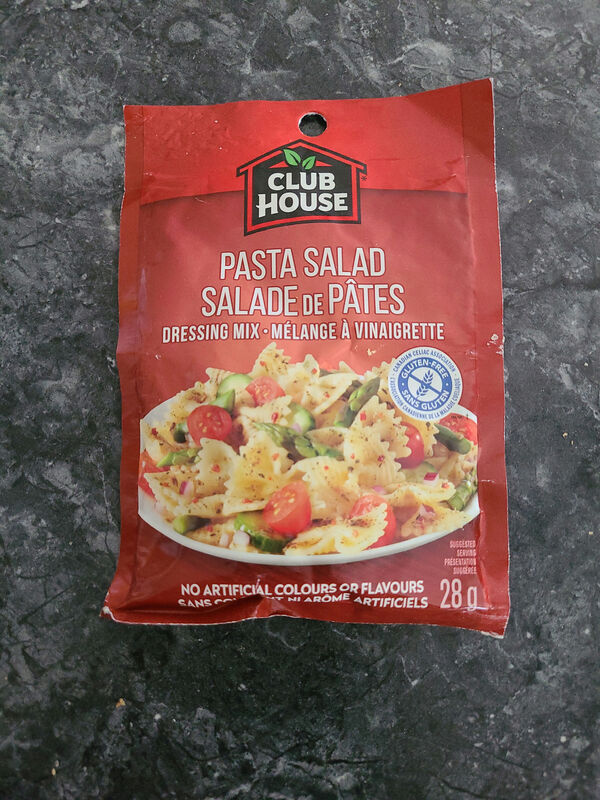  First thing to do is boil your pasta, while its boiling chop up your veggies. Mix up your salad mix packet with the vinegar and oil, make sure to read the packet instructions and measurements. Once the pasta is done, strain it and pour into a large bowl Mix in the veggies with the pasta and then pour the salad mix in. Stir really well and let cool. See how easy was that? 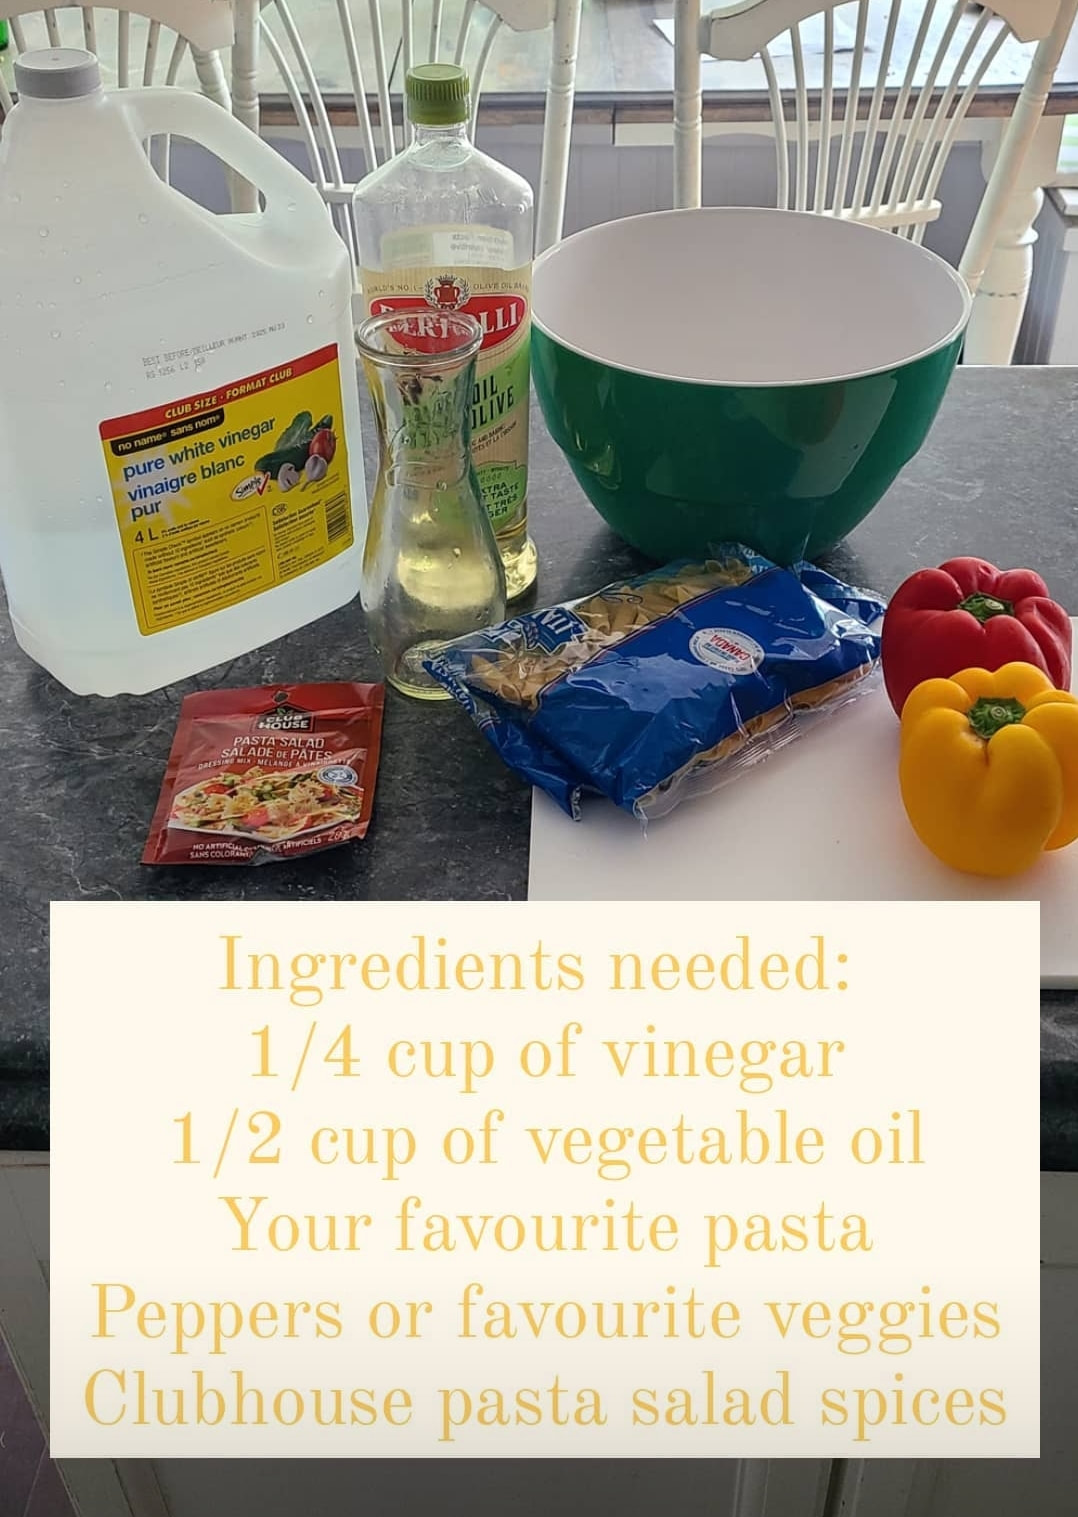 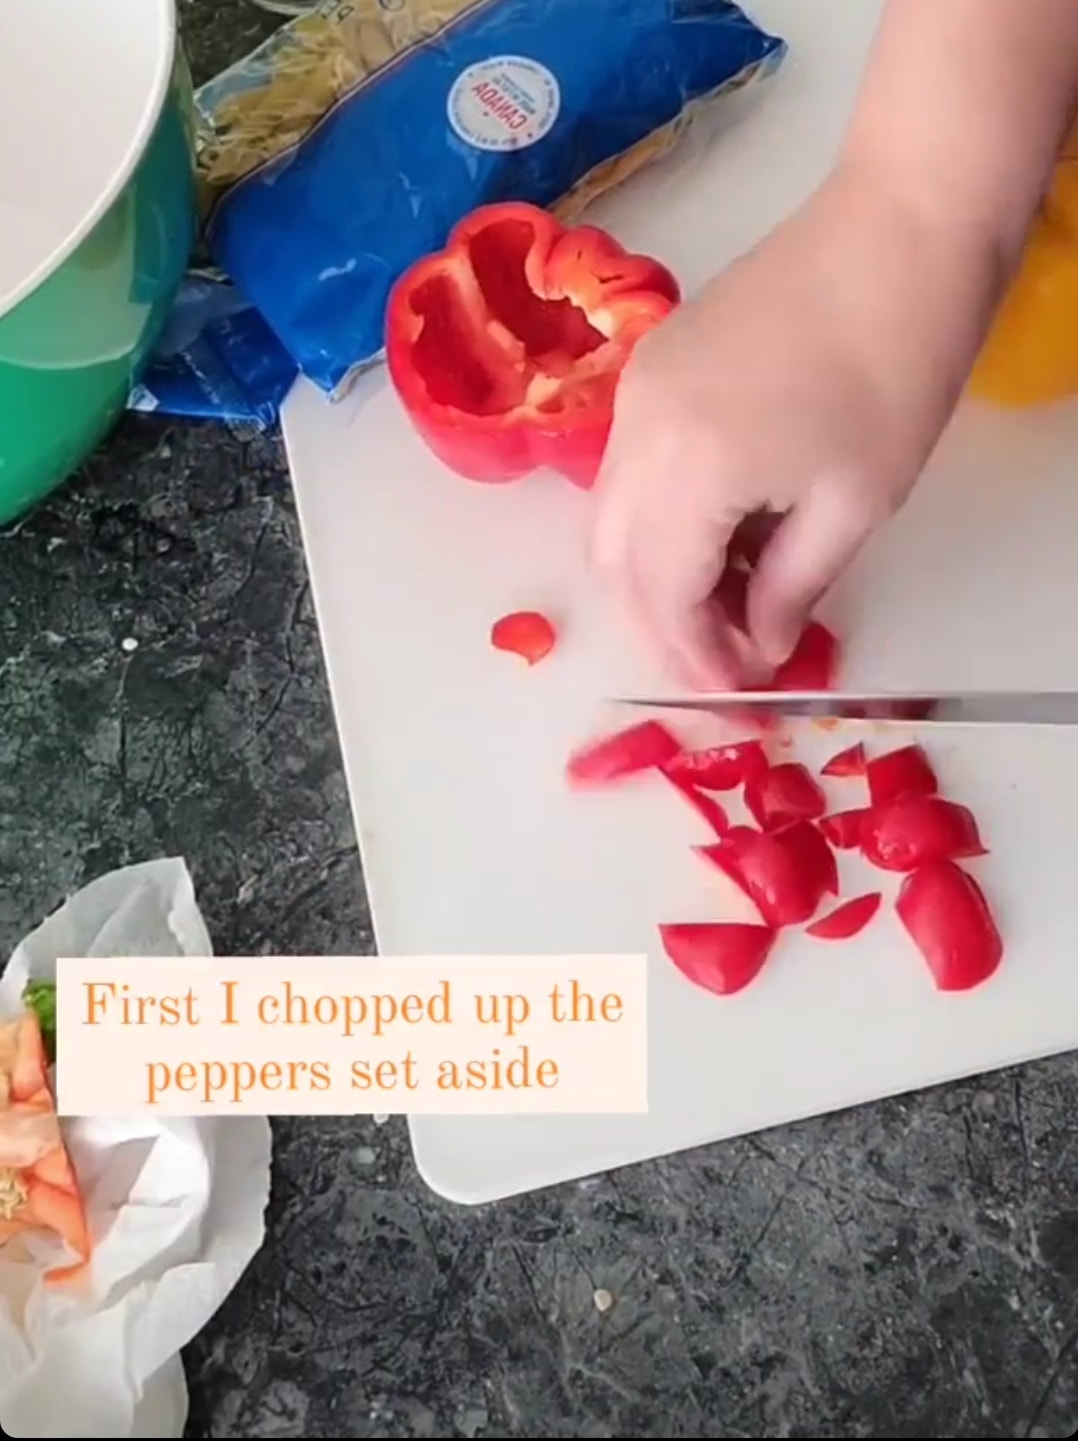 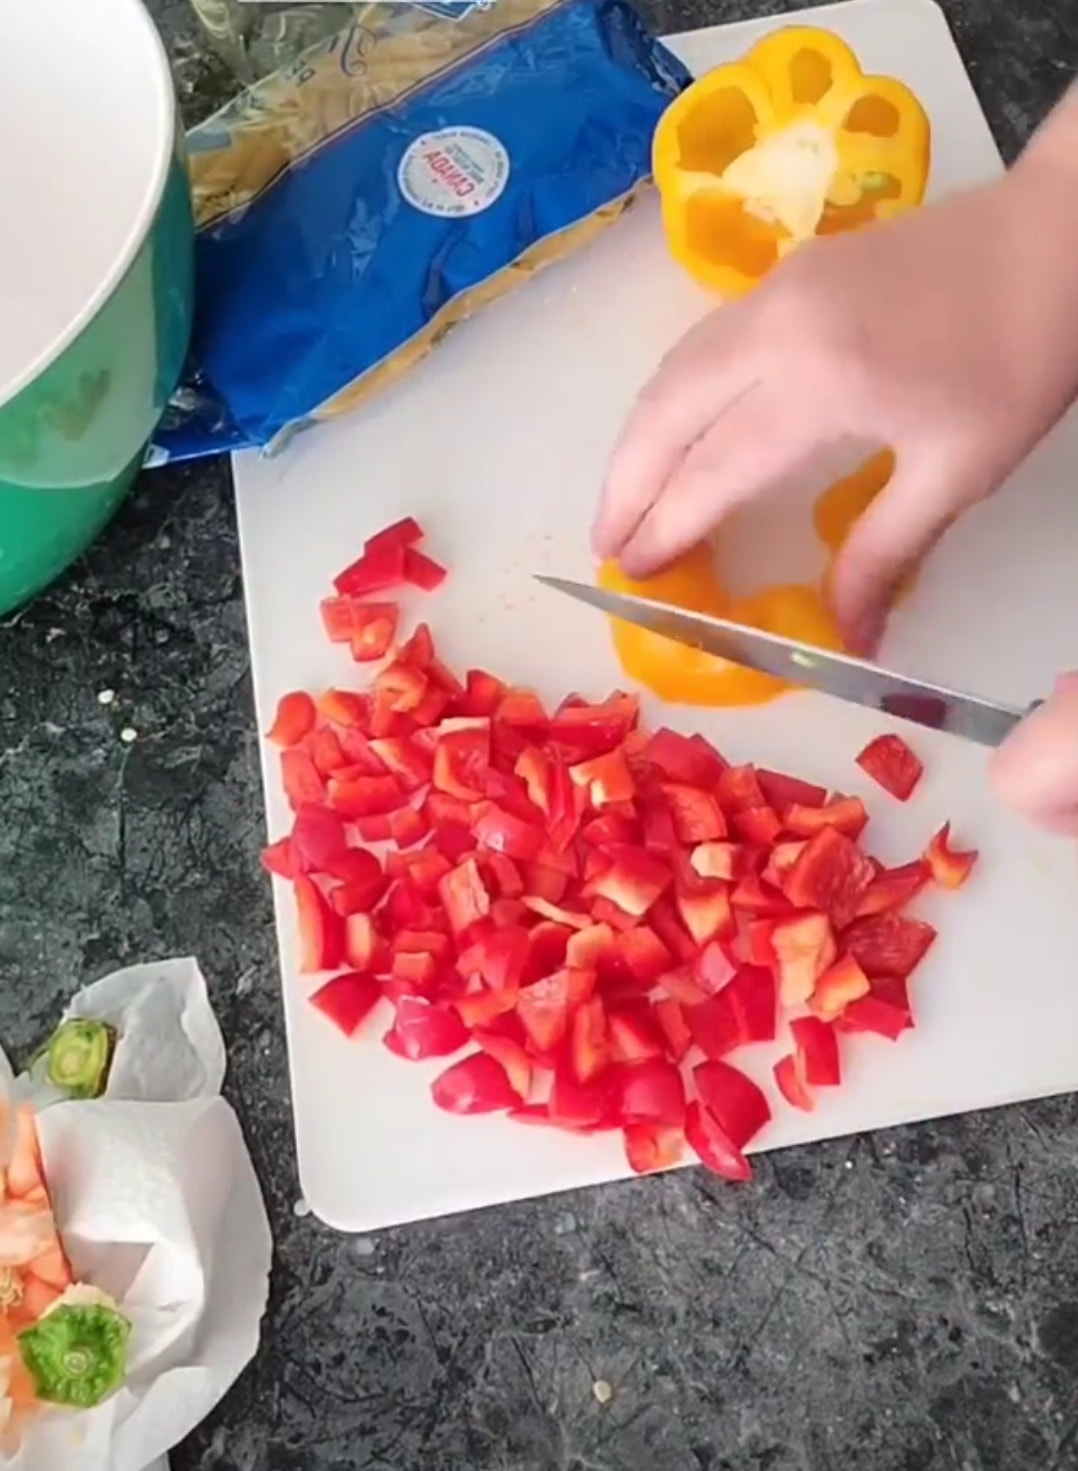 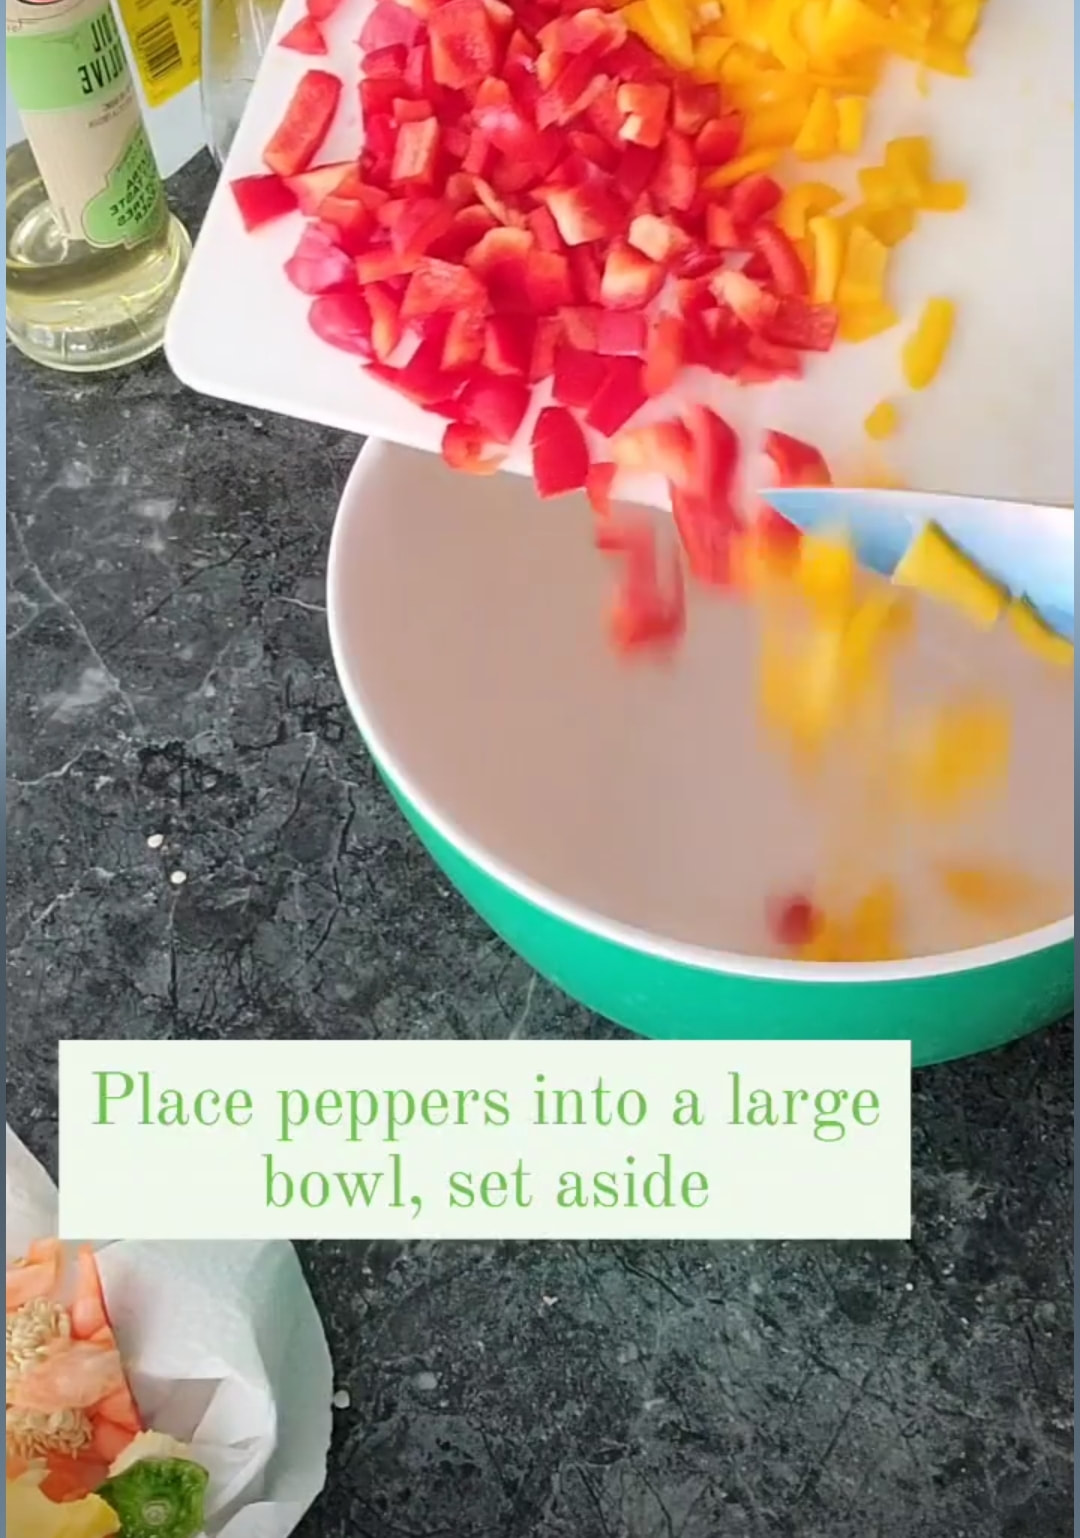 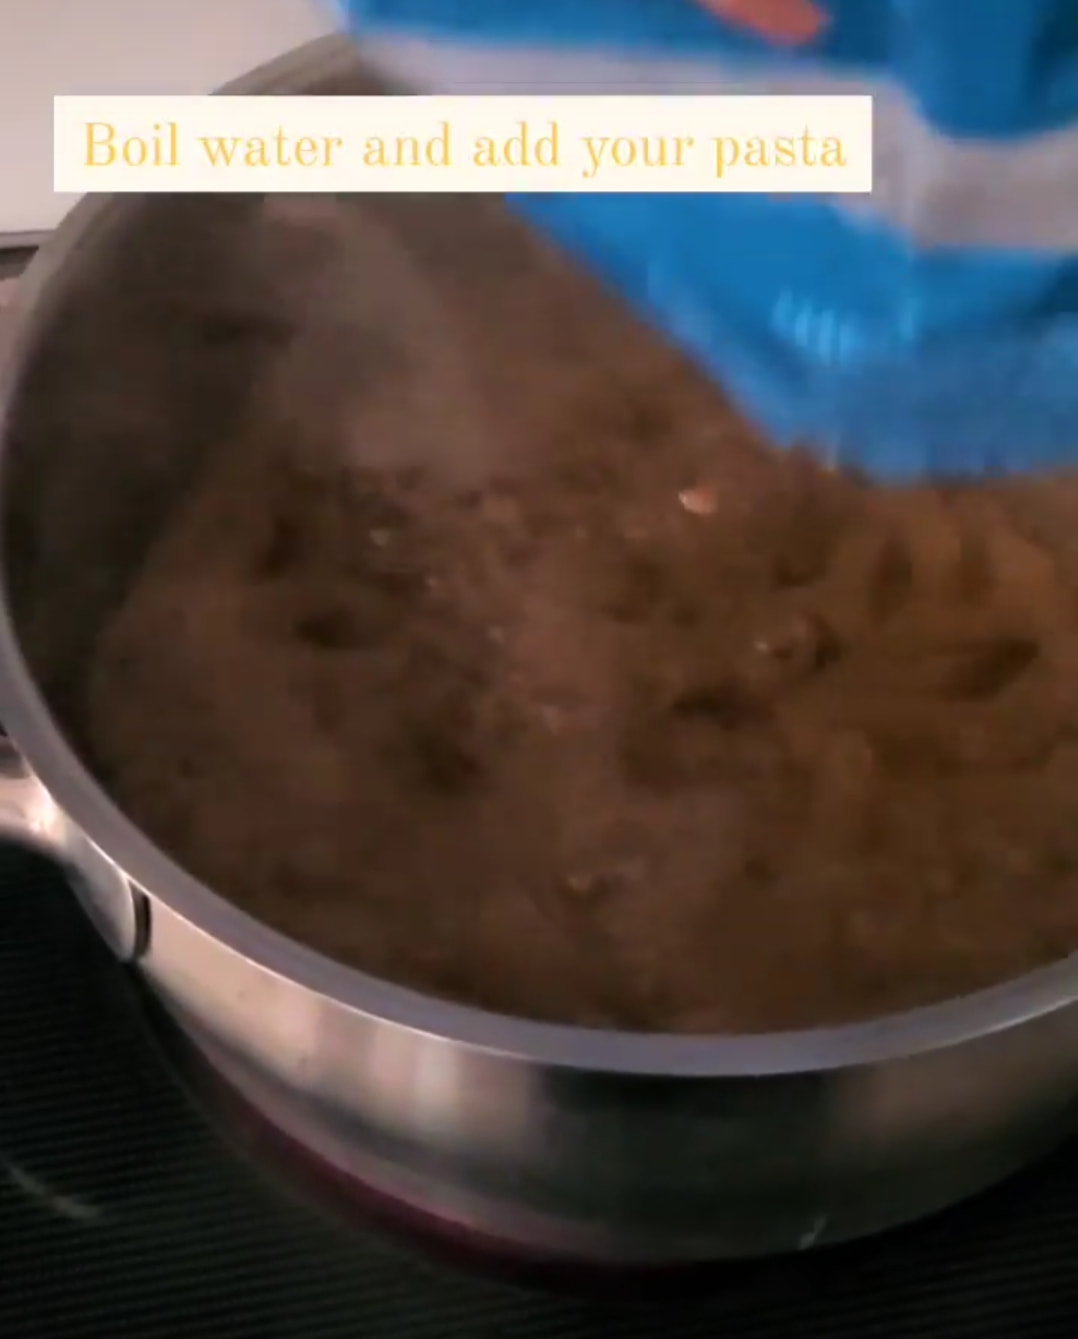  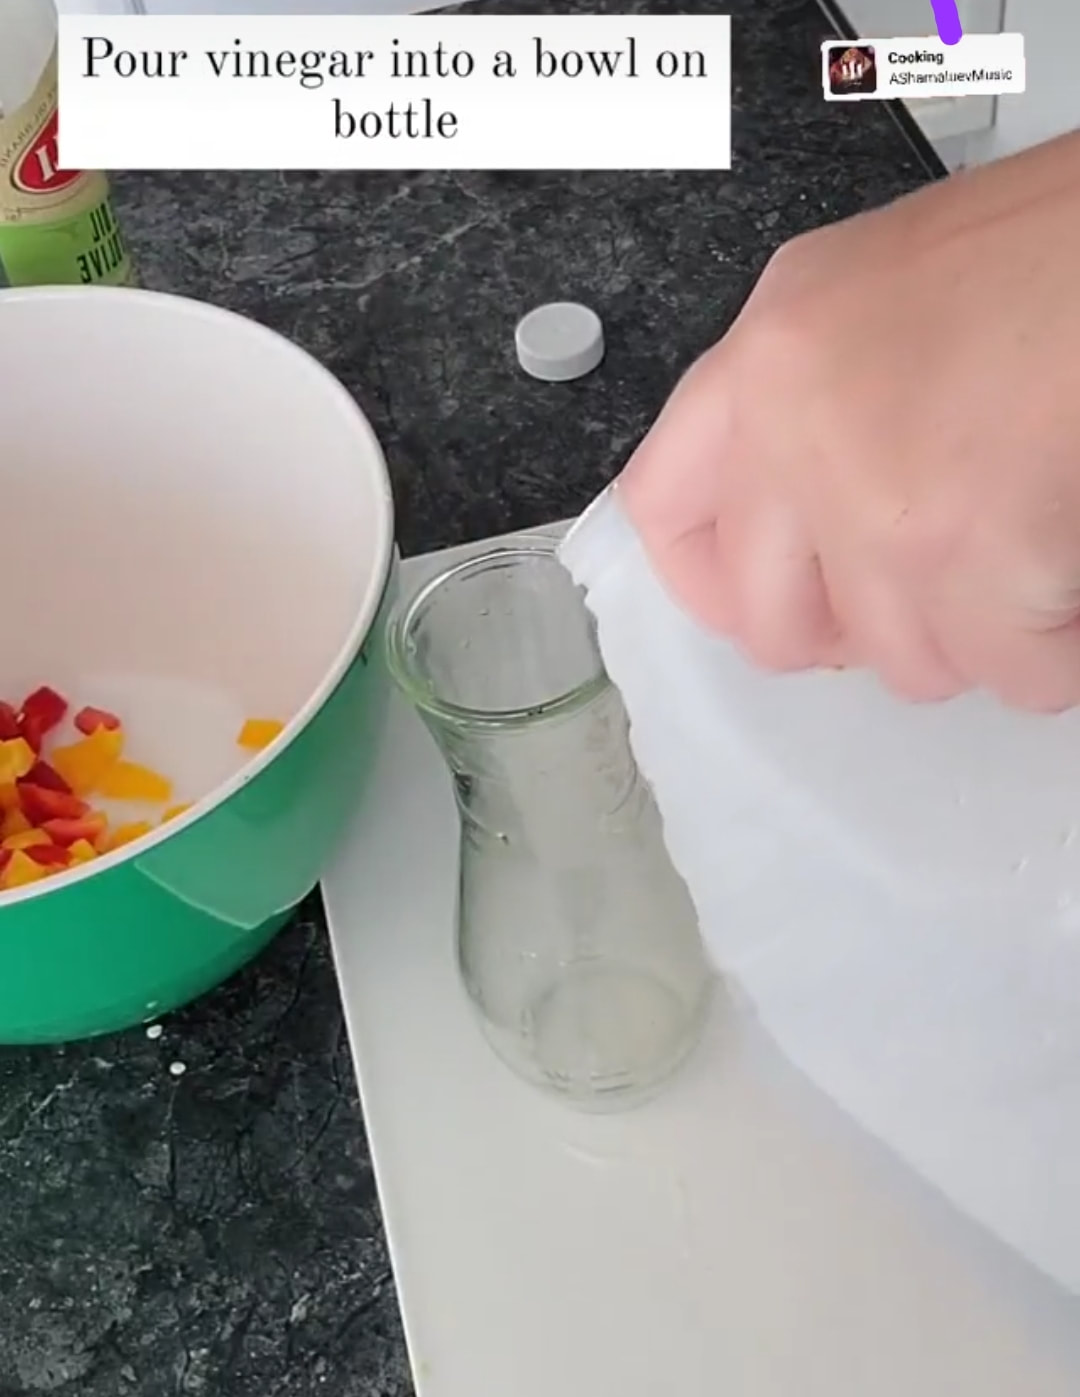  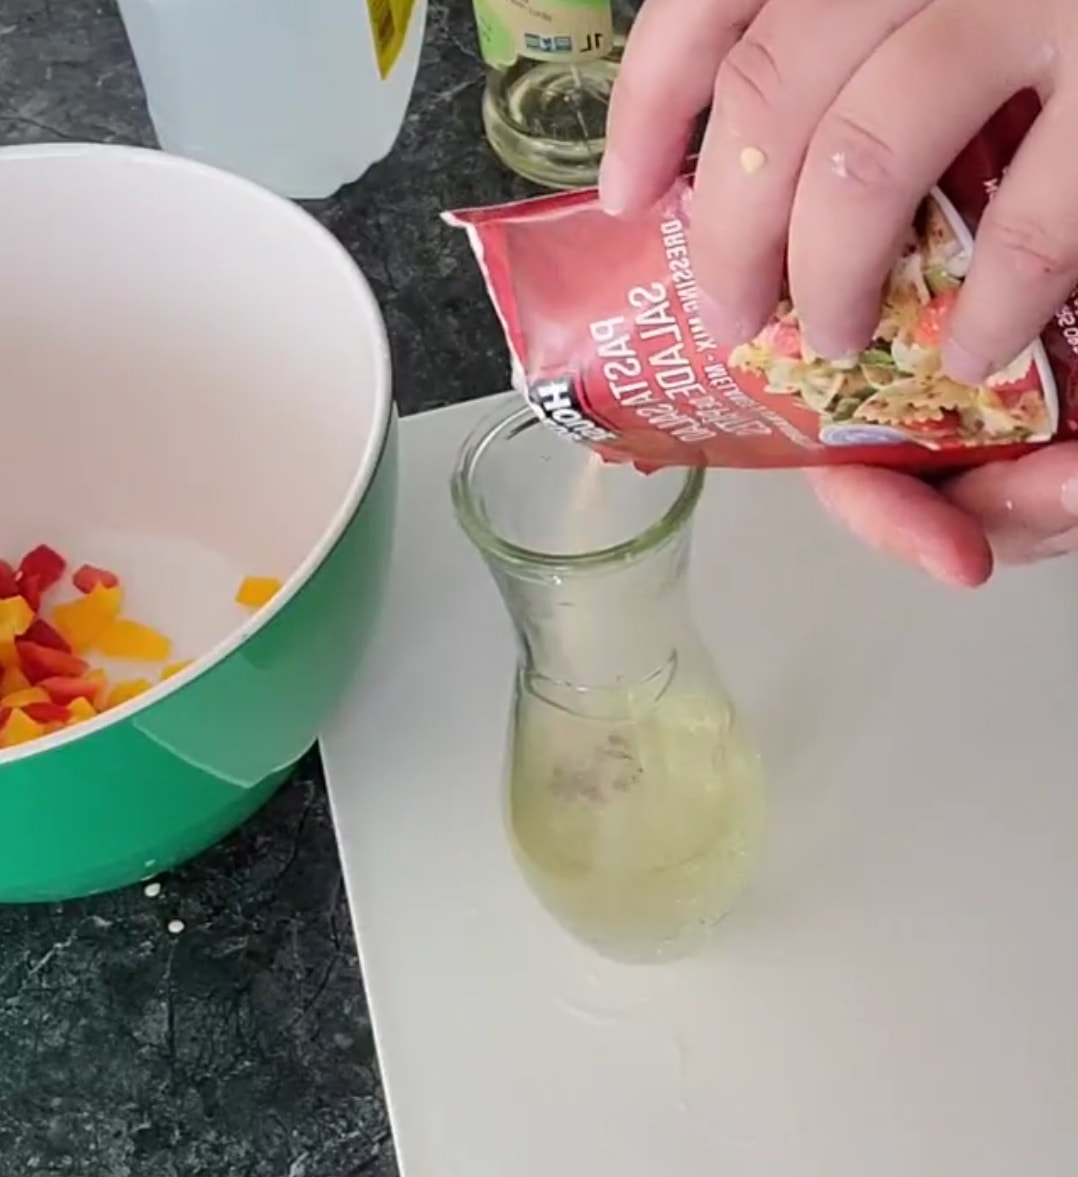 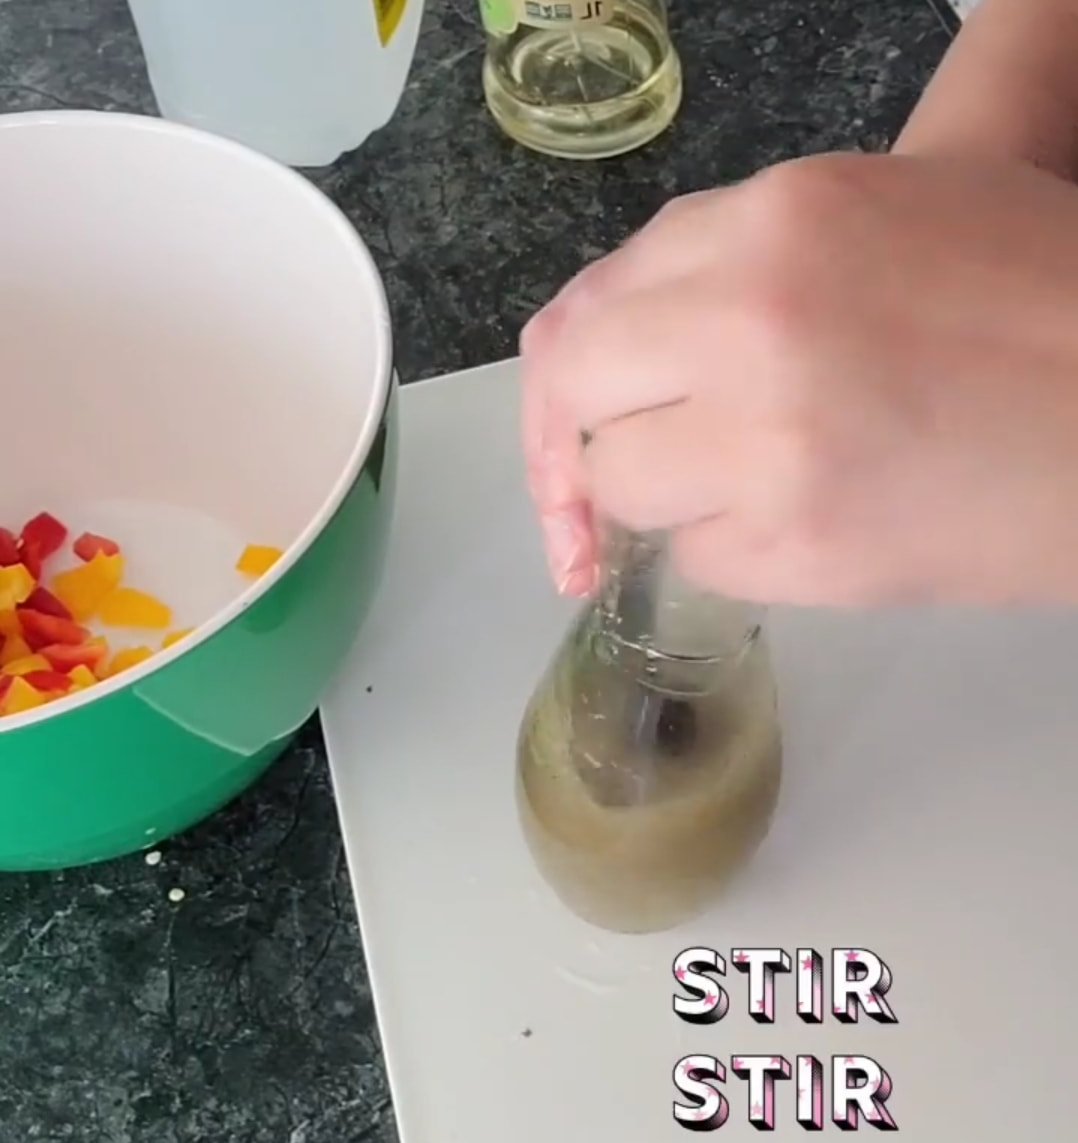  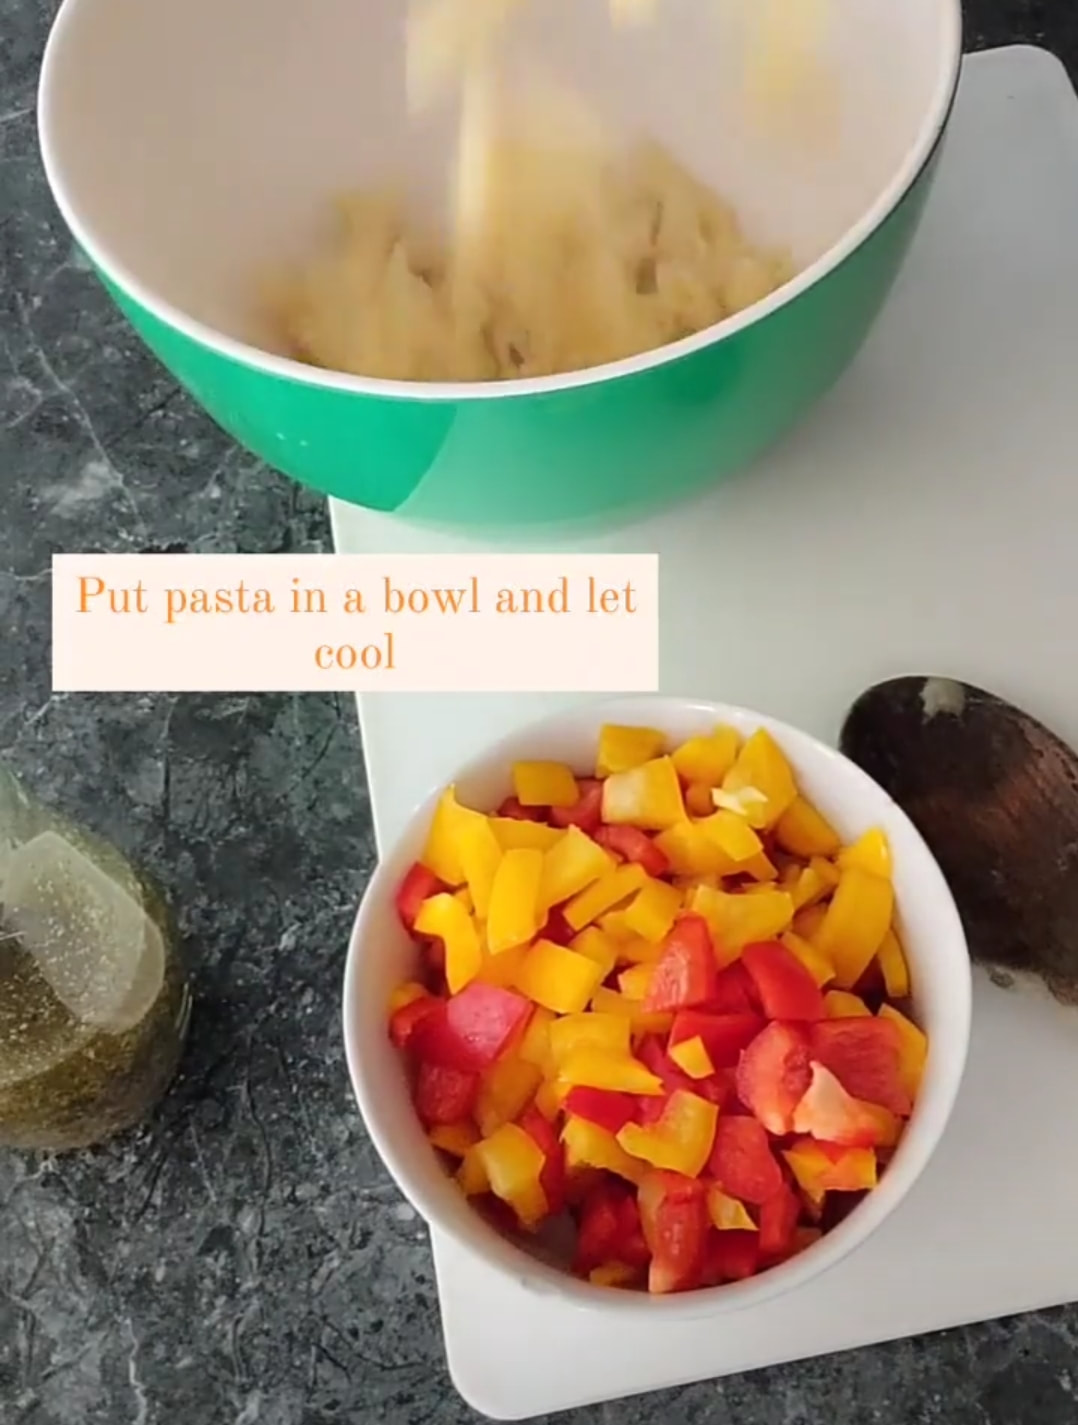     I hope you enjoyed this recipe and if you make it let me know... tag me on Instagram or Facebook. Let me know in the comments below what you thought. Enjoy
Meg 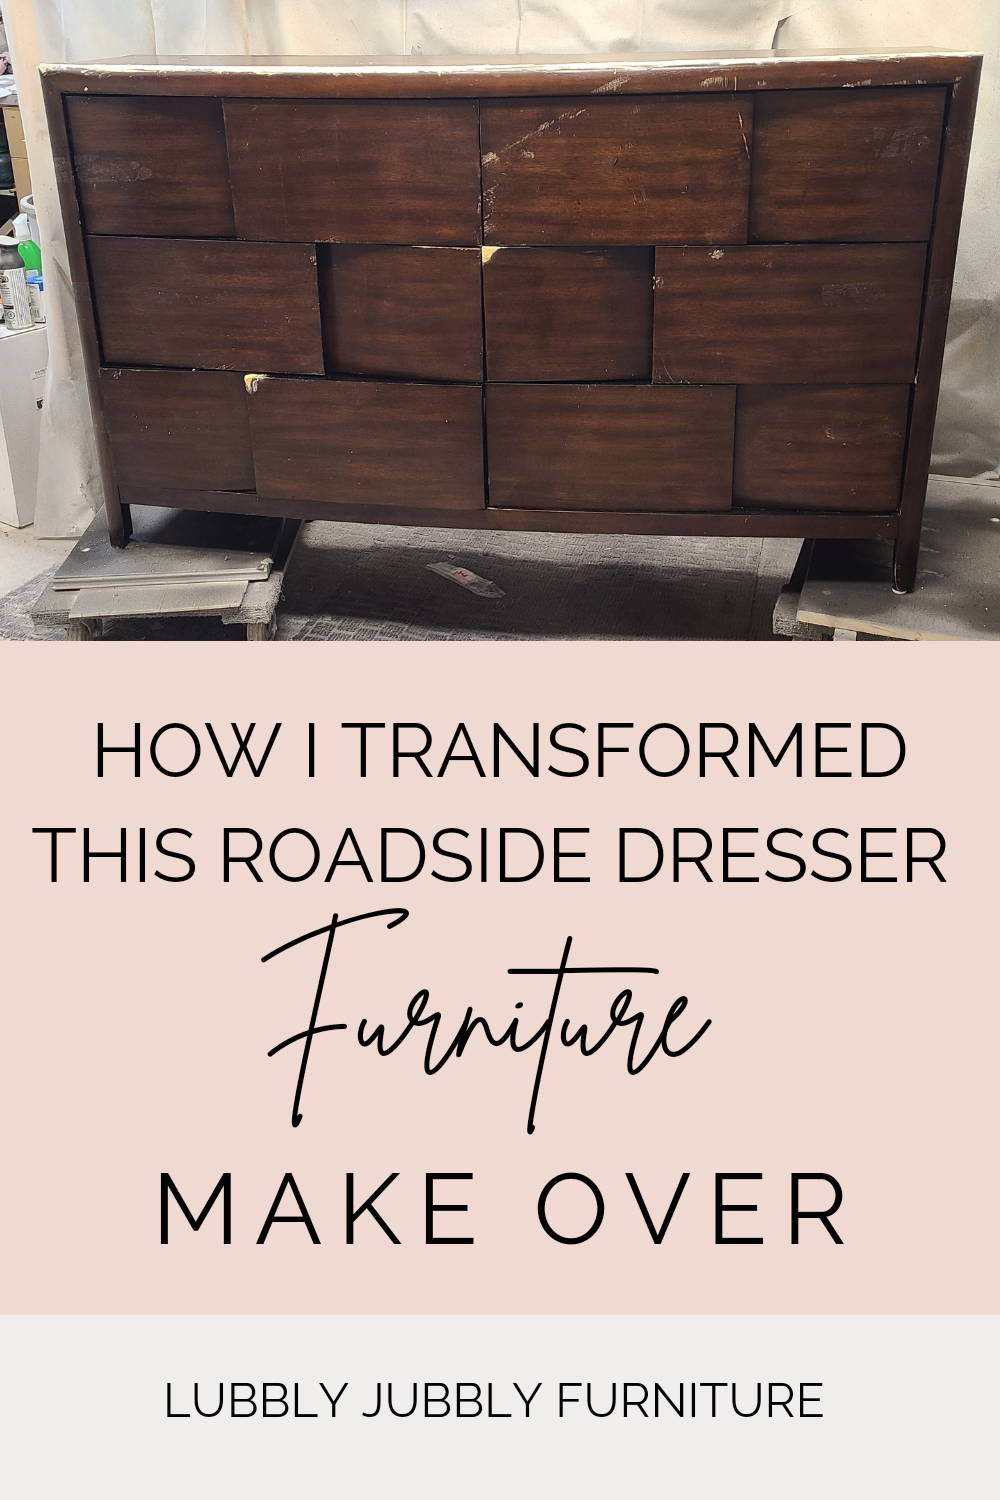 Roadside dresser make over  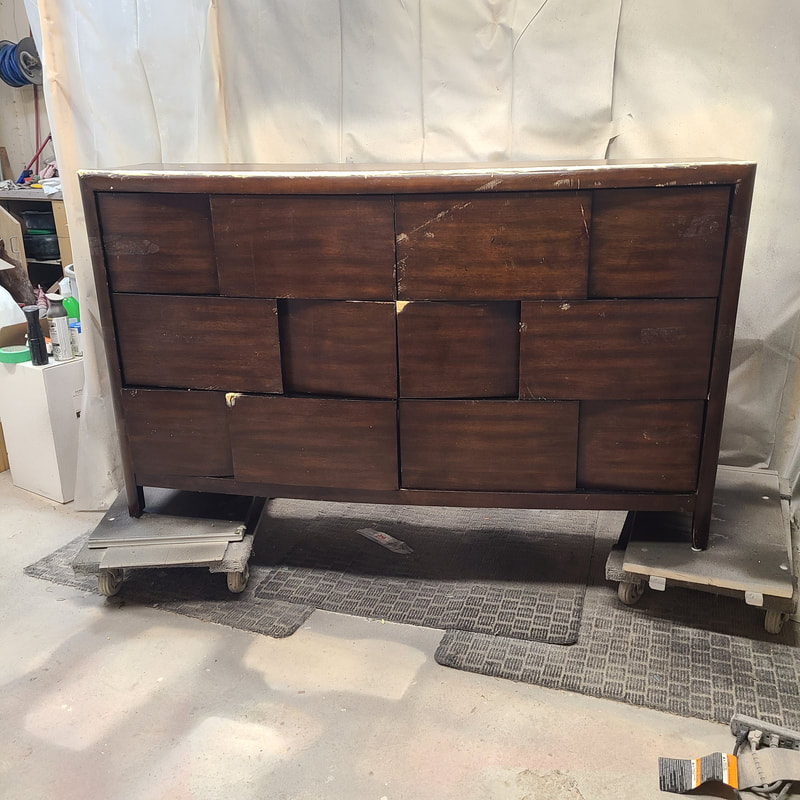 Hey everyone, hope you are all well. This past couple of weeks have been absolutely crazy and busy for us but we found this dresser. I saw it on Marketplace and the owner had placed the picture of it on the roadside, I messaged asking if I could it have. They said yes, so my Husband went to pick it up and found it at the end of the driveway. I thought it was such a cool piece and how the drawers looked weaved and knew I could give it a make over. It can be intimidating seeing large pieces of furniture on the roadside and not knowing what to do with it but you so desperately love it you want to take it anyway. Don't be afraid to pick it up and take it home, if you are a beginner and want to learn, follow along and learn step by step what to do. You don't have to do exactly what i do for this design, but this gives you an idea or some inspiration. It's crazy, we never find anything good on the roadsides in my area, furniture is mostly sold in Facebook marketplace or Kijiji or other buy and sell pages. When I saw this piece, i thought the drawers looked so unique and had to get it. I also have a YouTube video out this week on this dresser if you prefer to watch than read. When I got this dresser home it was filthy, absolutely filled with dirt from the storm we had just had. The outside had tape on it and mud in the drawers, mostly the bottom ones and the underneath. I grabbed my portable vacuum and started vacuuming the outside and everywhere basically. 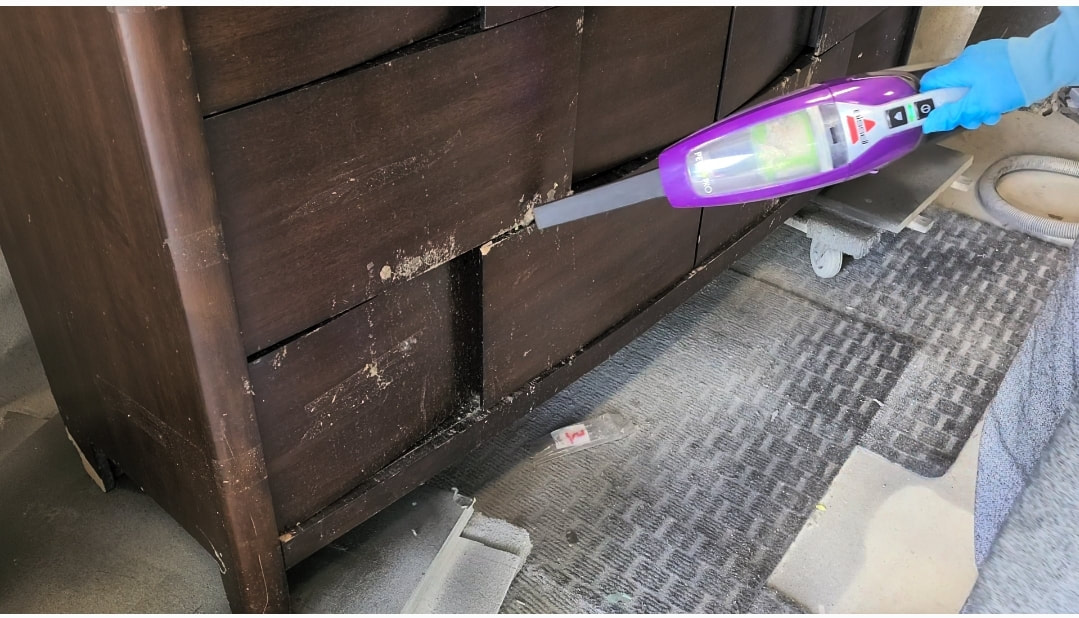 Once I had vacuumed the outside and the inside drawers, I cleaned the entire piece. I took out the bottom drawers and filled a bucket with hot water and a small amount of bleach. I grabbed a rag and cleaned the entire bottom and outside. 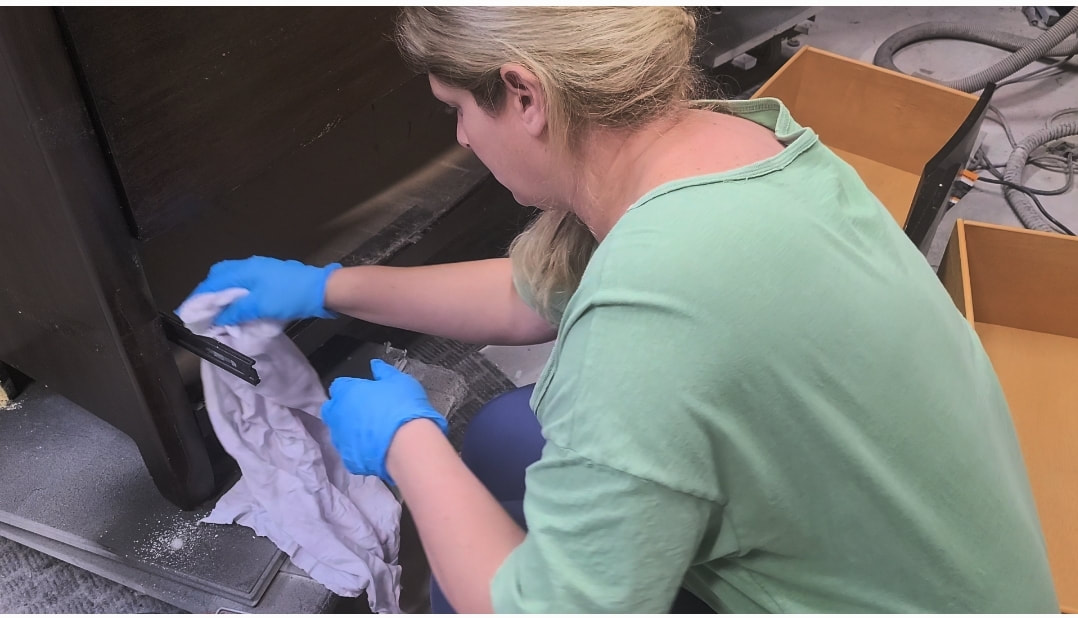 I did'nt like a groove that was on the top so I filled it in with wood filler. 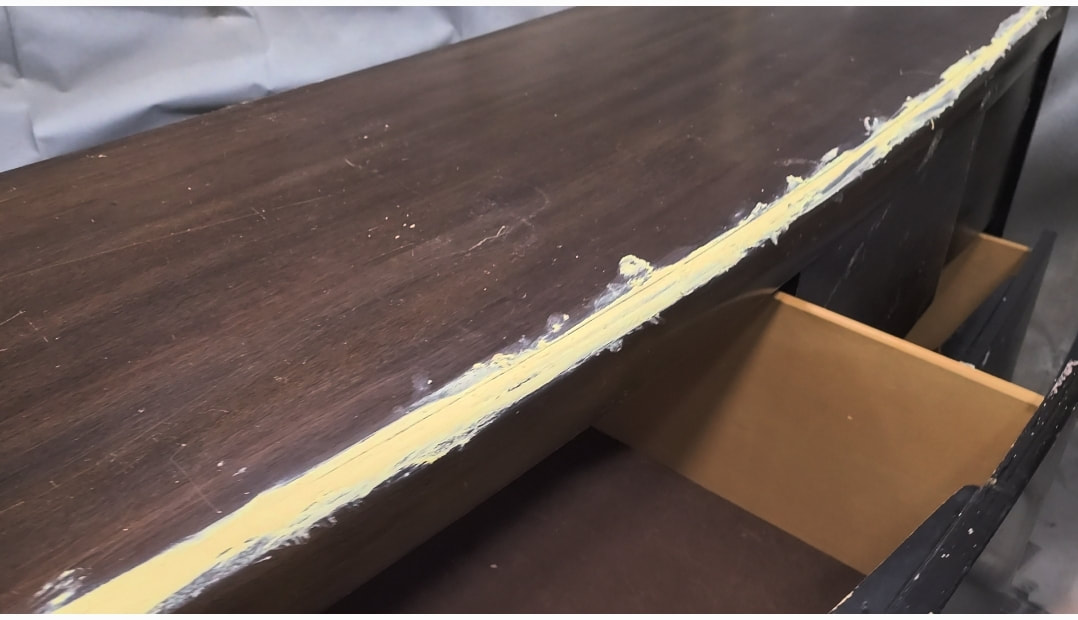 Then I sprayed the underneath, backing, underneath the drawers and inside the drawers. I knew there wasn't bed bugs but I wanted to make sure as I had gotten this dresser on the roadside and didn't know the reason for the owner to throw it out. Once I let it sit for a bit I then wiped it all down with water and cleaner, after that I vacuumed again. I wanted this piece to be really clean and new again. 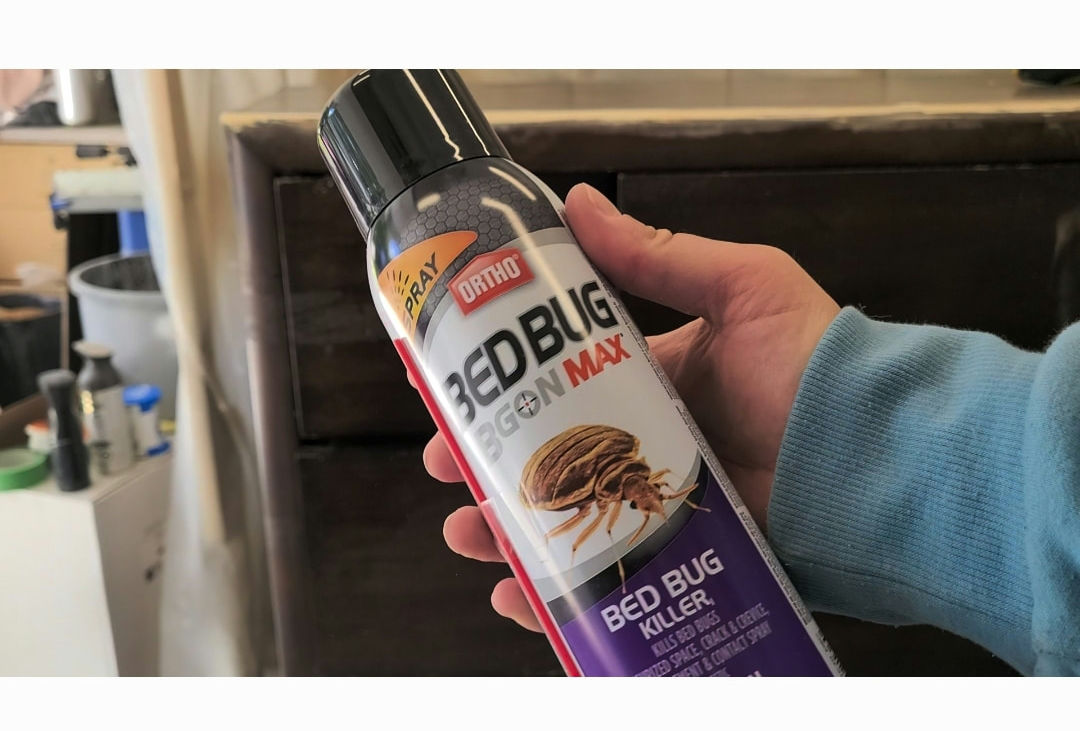 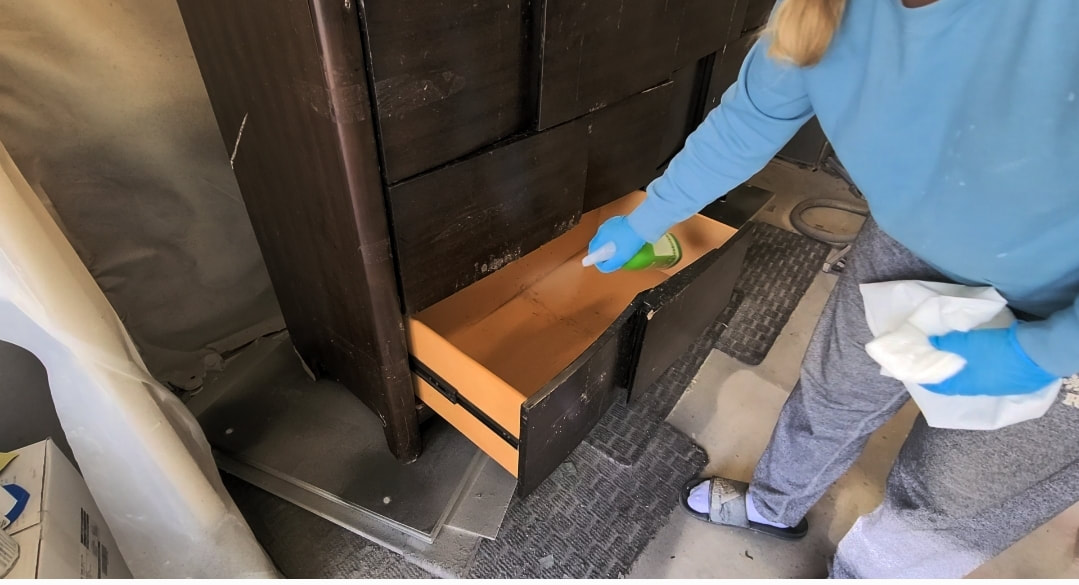 Once this piece was completely clean to my satisfaction, I then started to scuff sand the entire piece and sand various drawer panels, the ones that formed a pattern. 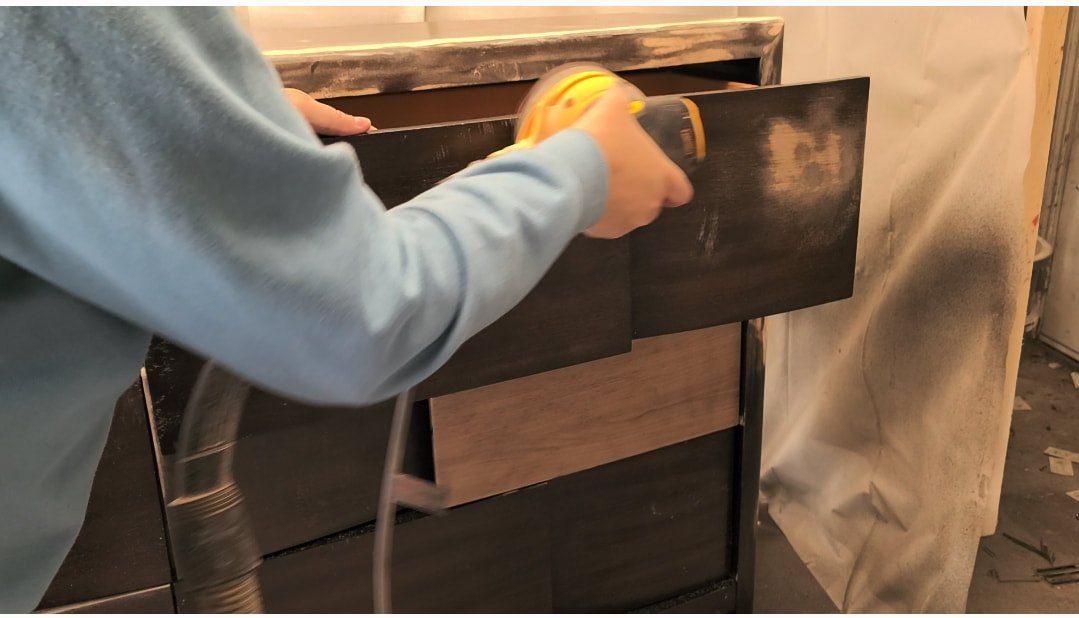 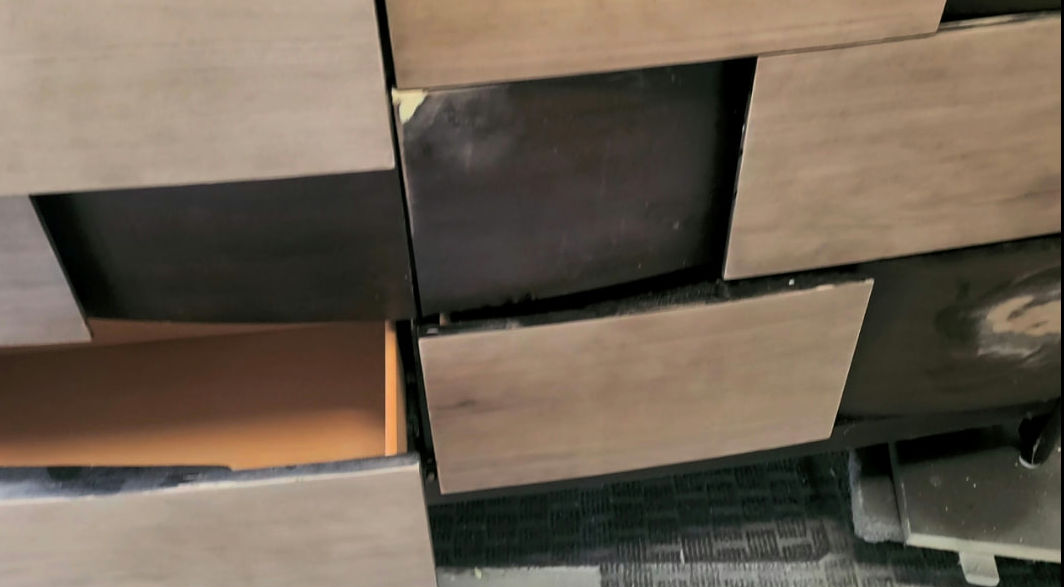 Once everything was cleaned inside and out and scuff sanded and sanded panels, i wiped it all down again to remove sand dust. Then finally it was time for the fun parts, priming and painting. I primed by using my favourite primer, Kiltz Restoration and did 3 coats, sanding in between coats with 220 grit sanding paper.  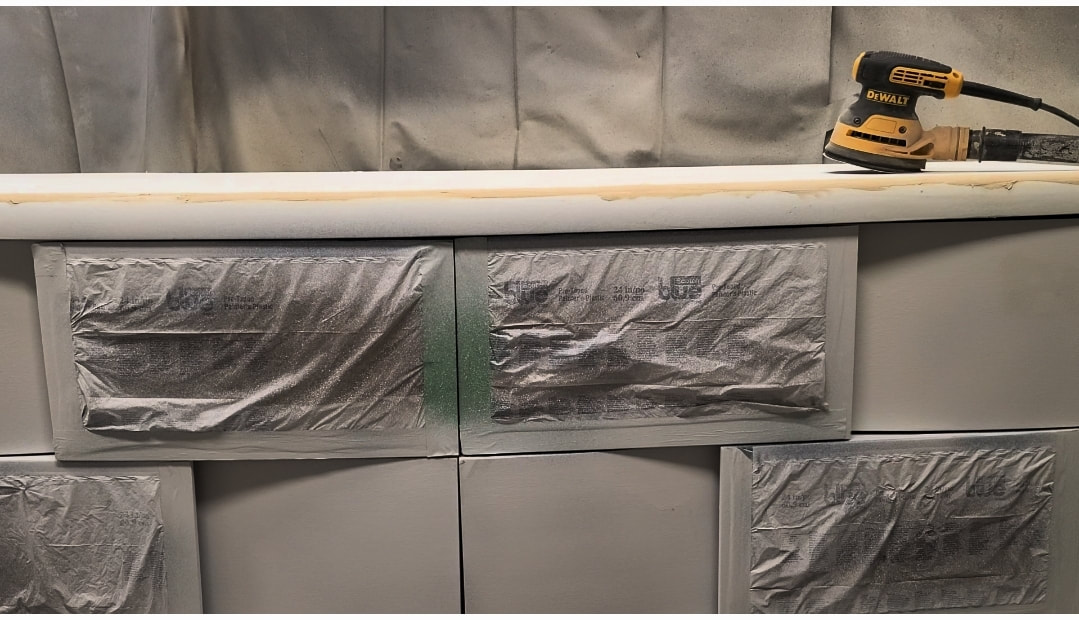 I had to re-sand the rounded edge so that it was completely smooth. Below is how it looks after priming. I then painted using my sprayer and Lichen by Cottage Paint and Varnish in Satin. (USE CODE LUBBLY10 FOR 10% OFF Cottage Paint) click here. 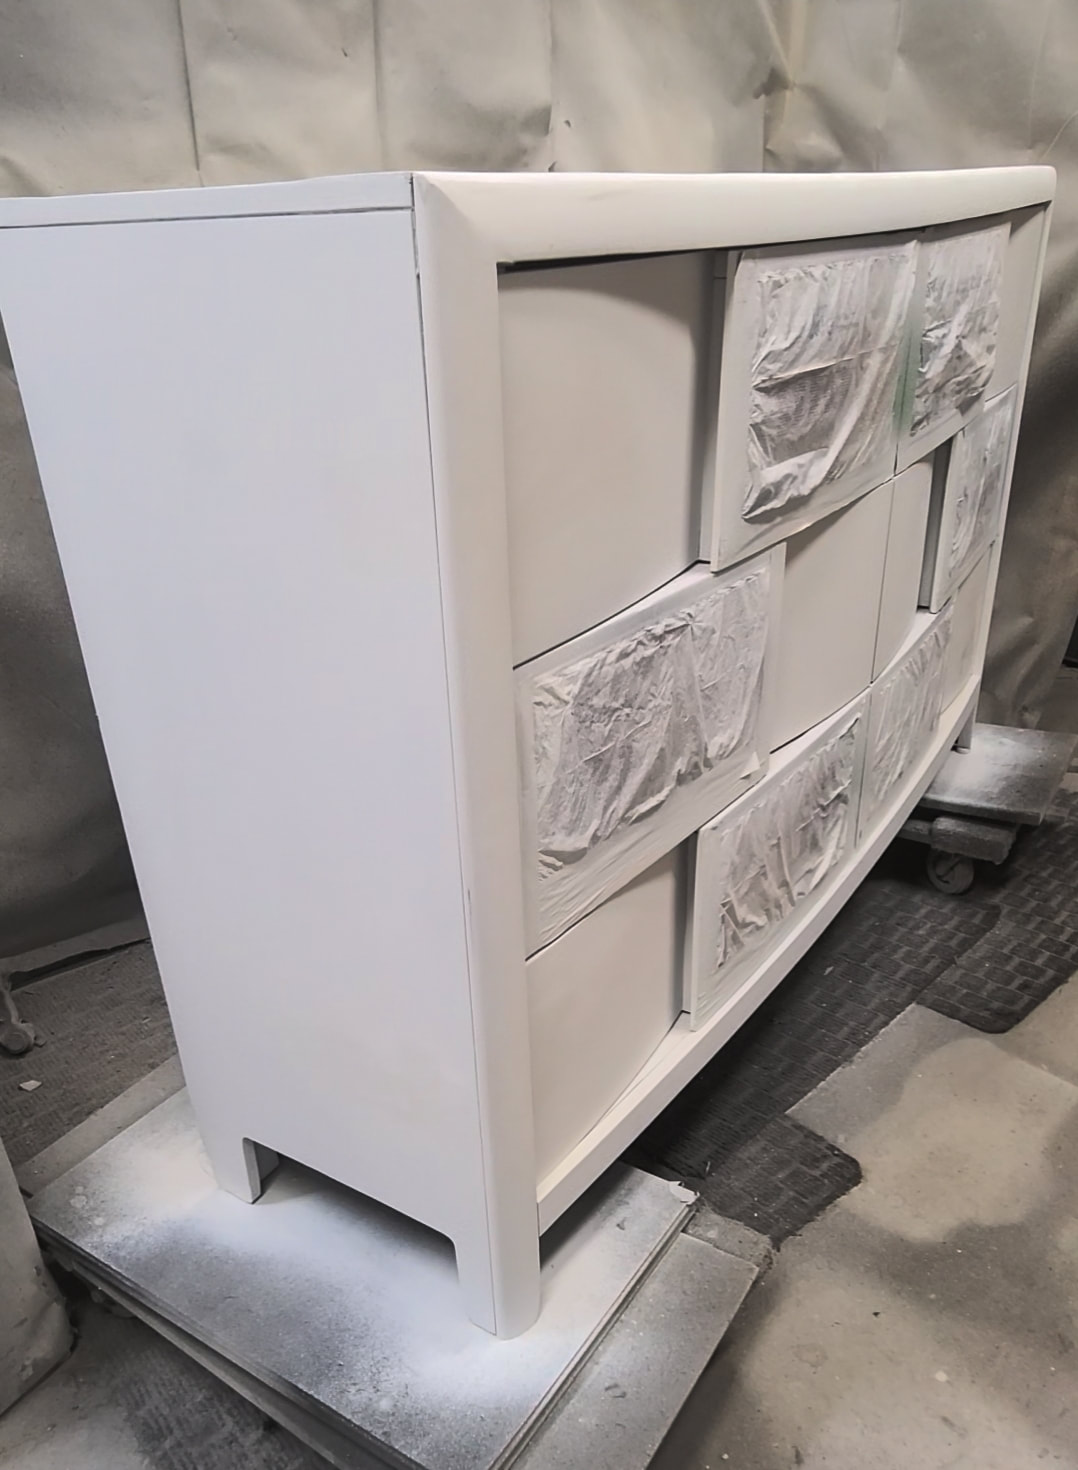 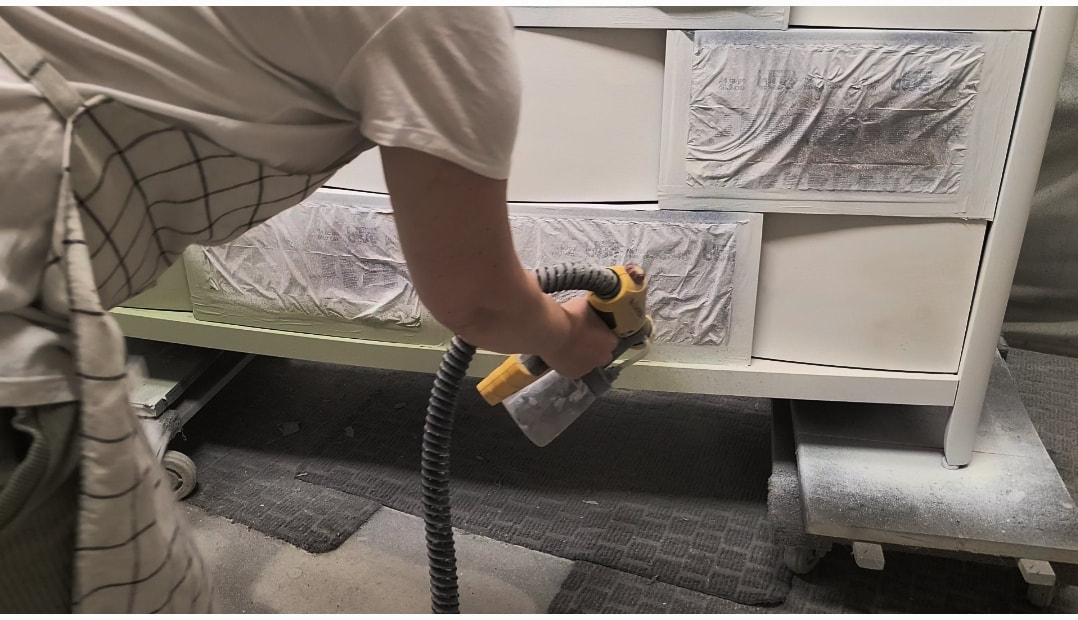 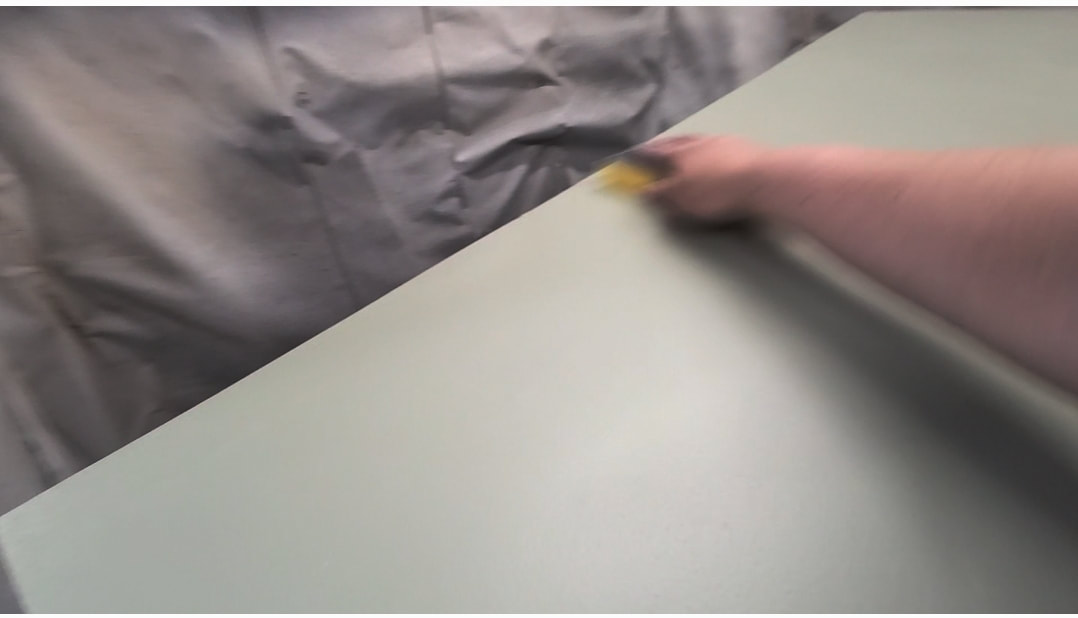 I sanded in between paint coats with 1000 grit sanding block and then gave the wood panels a beige paint wash spraying a little water and wiping off the excess. I then sanded each panel with the sanding block and then lined each drawer with peel and stick wallpaper from Lowes. I sealed the entire piece with Cottage Paint Varnish. And below is the final look Although this roadside find was a lot of work it brough me so much joy to see the final result which in my opinion turned out amazing. Thank you so much for taking the time to read my blog and I hope that it helps you find some great pieces on the side of the road and that you won't be discouraged but have confidence that you can turn something into something beautiful take care Meg 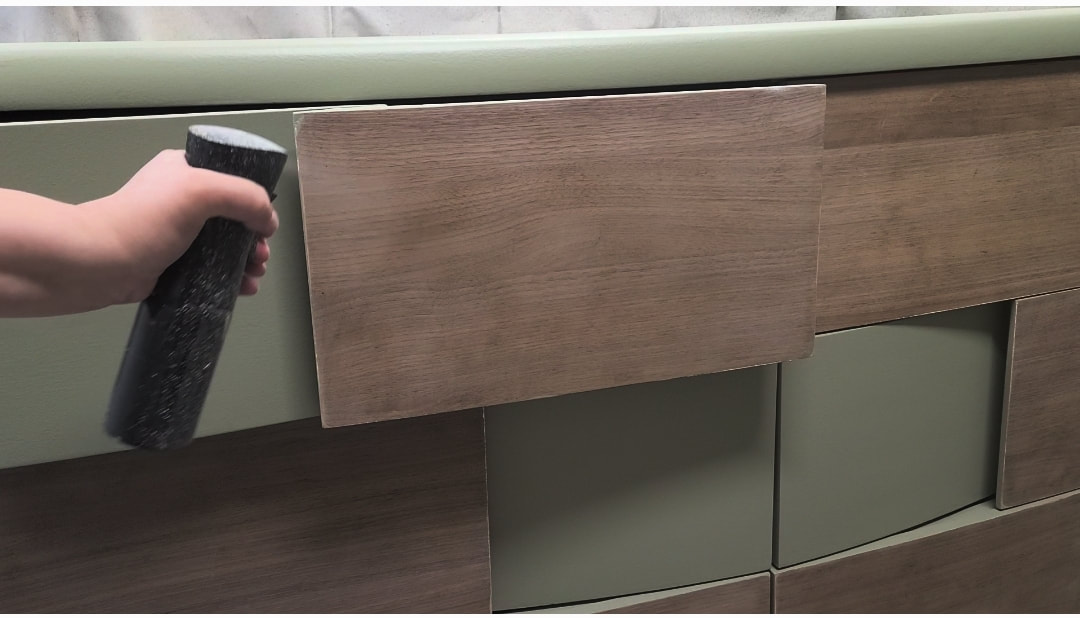 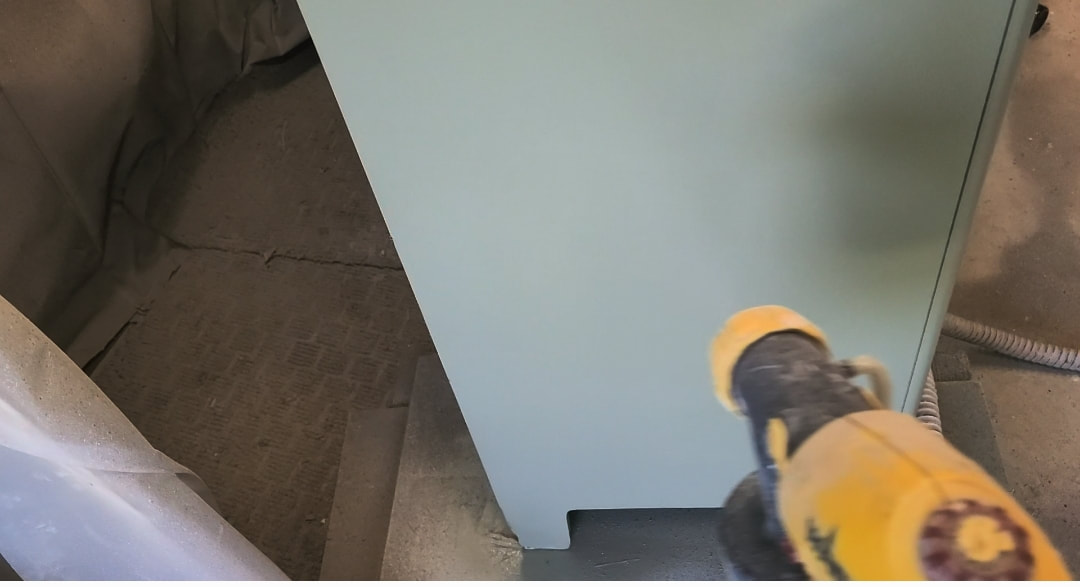 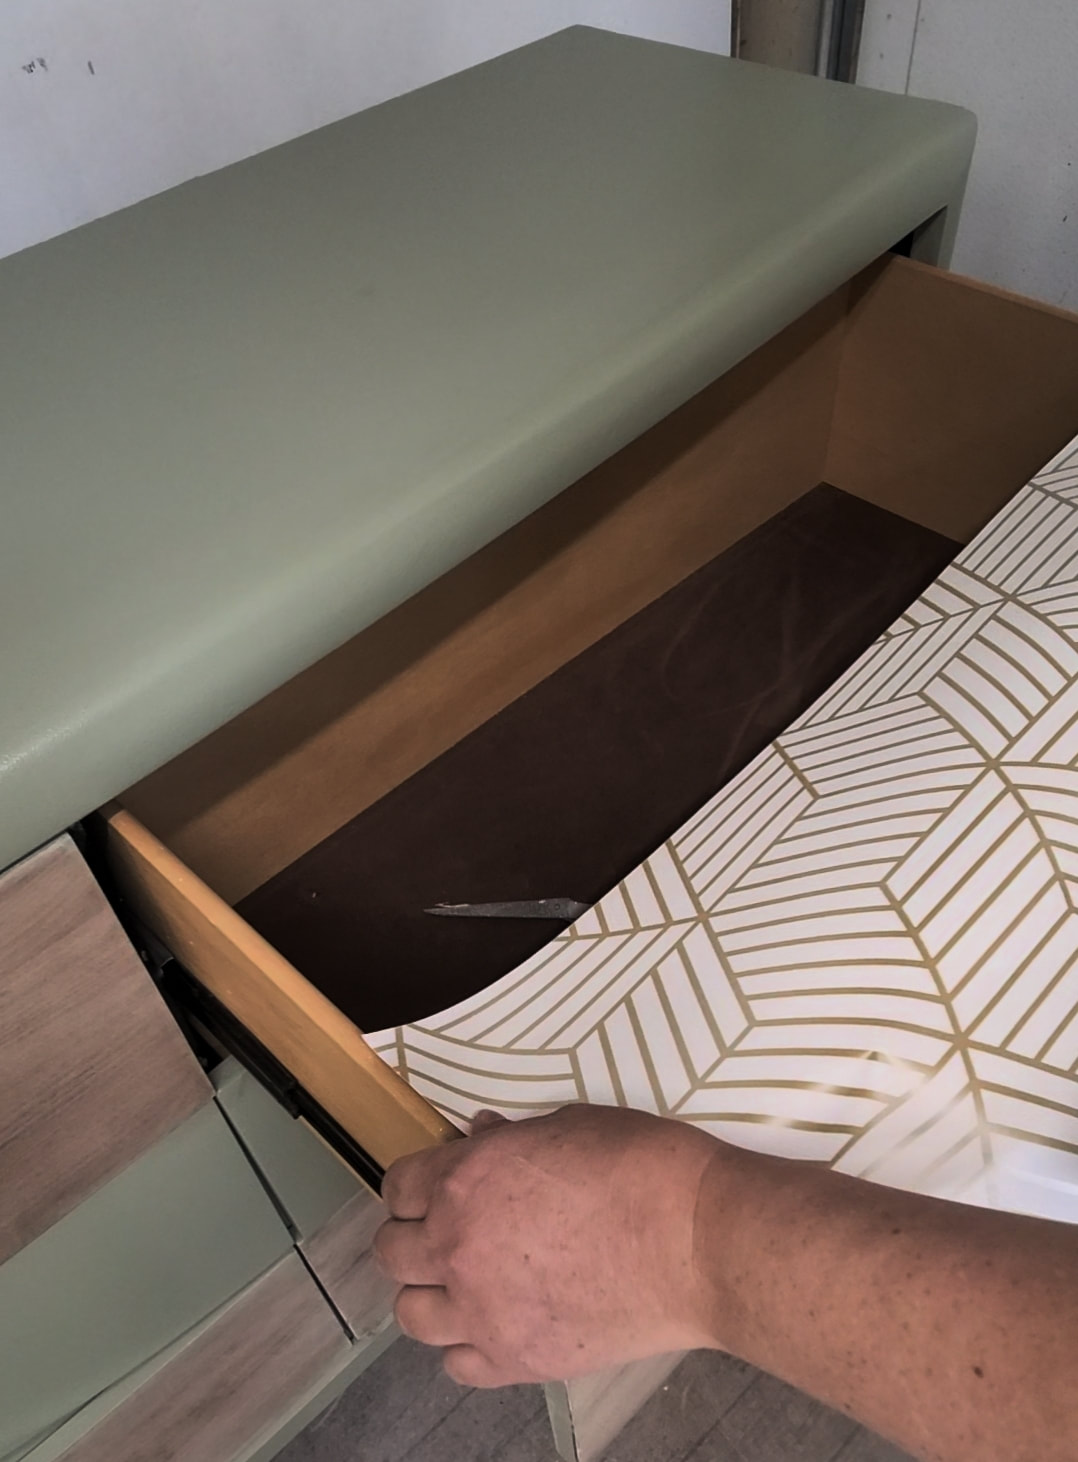 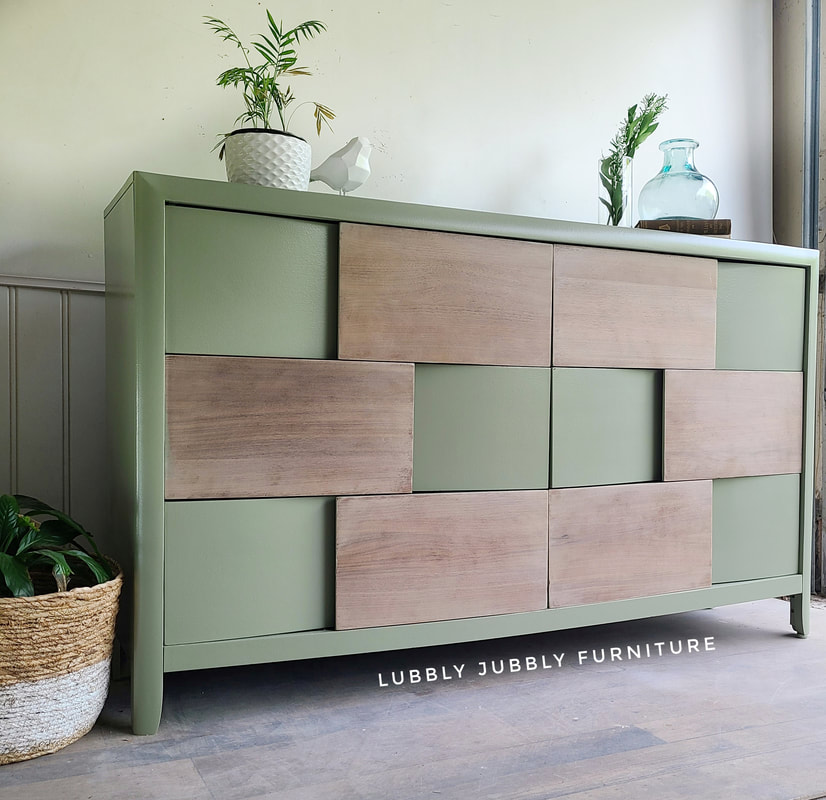 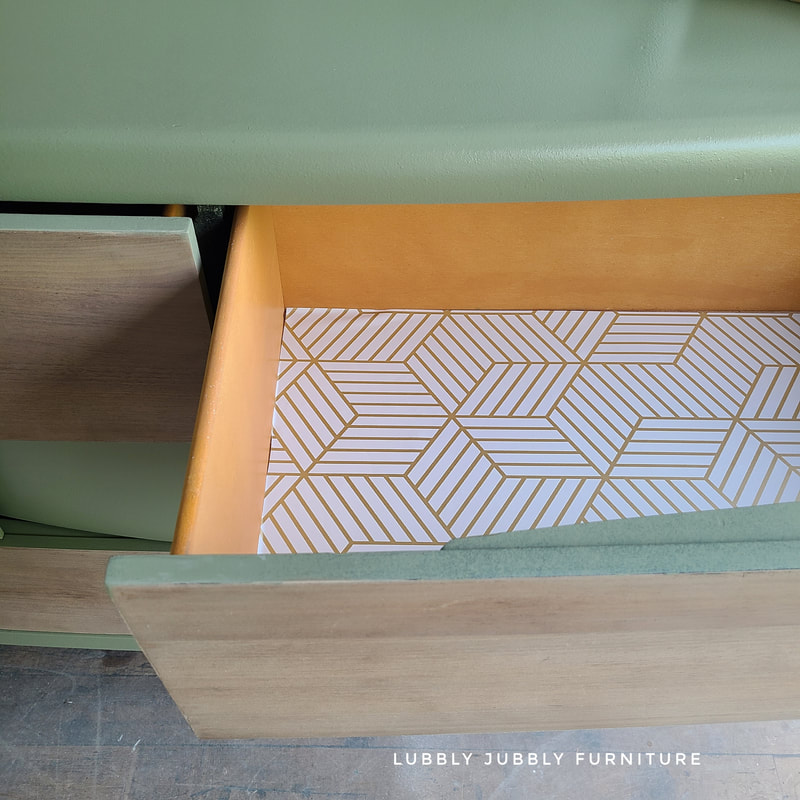 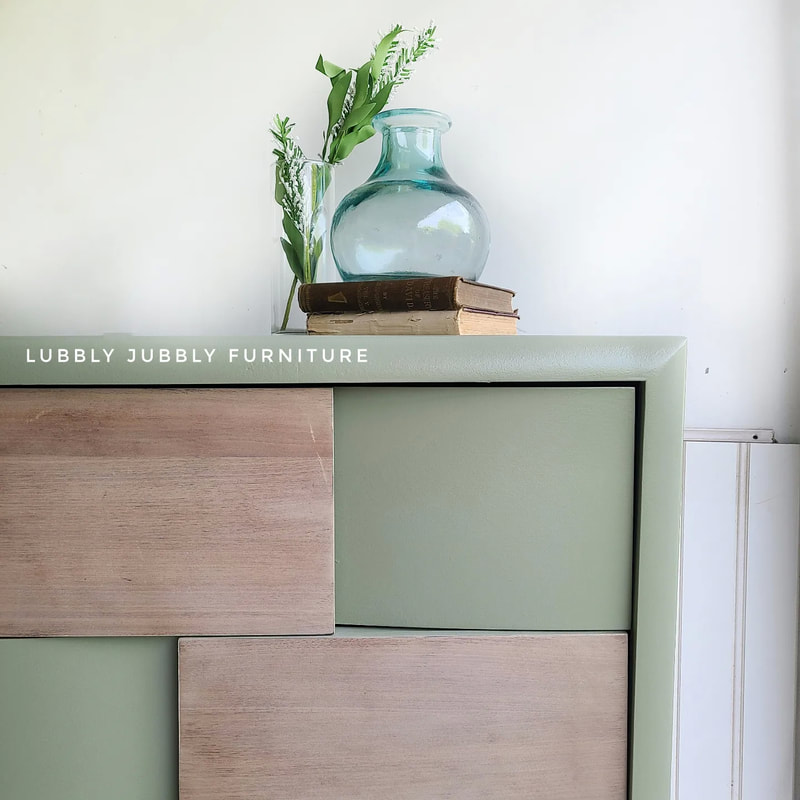 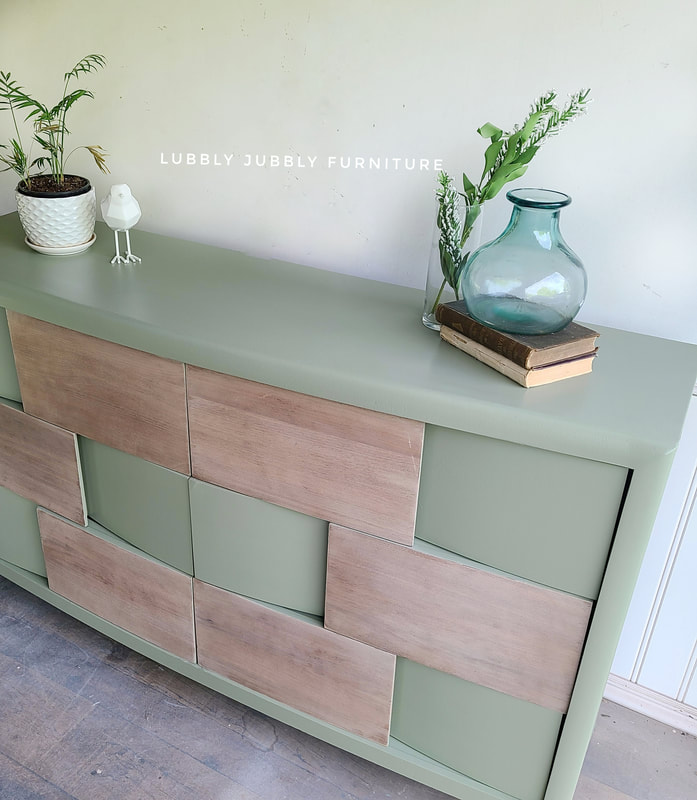 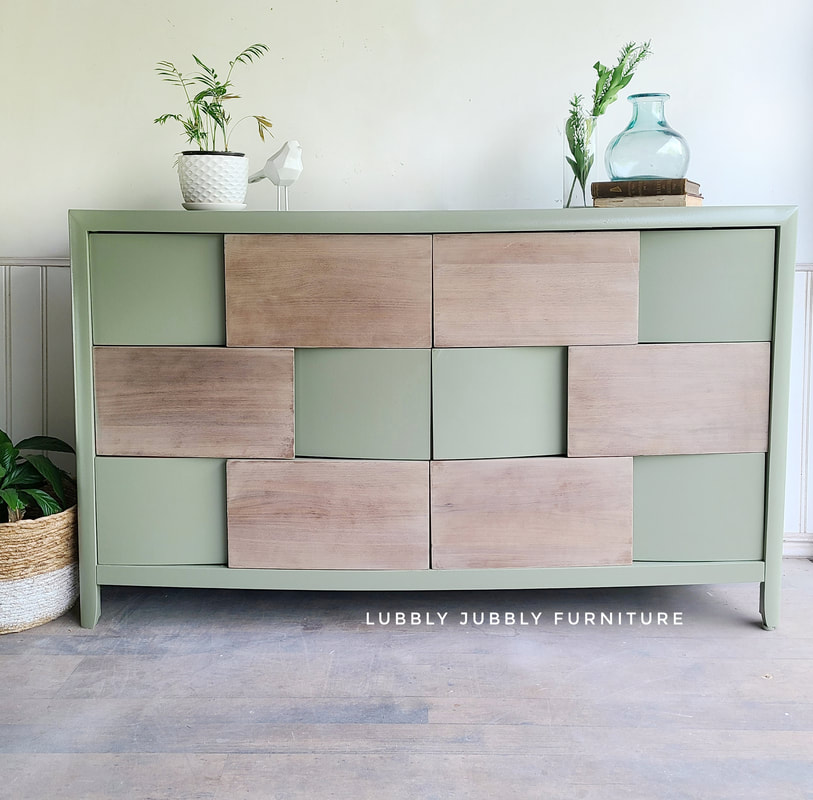  I always love window shopping on websites or stores with high end pieces of furniture or home decor items, but I could never afford the price tags. I decided I could make my own high end looking mirror and so can you. I had bought some dressers that came with mirrors and I never sold the mirrors with the dressers I painted, but I did keep them aside for the future. Some of the mirrors had vintage tops to them like the one above and some were straight edges, perfect for moulds. Other mirrors I had I actually had to give to Value Village due to them being outdated to the point of no updating lol they had so many outdated details it wouldn't work. Now the one in the picture turned out amazing and was the perfect mirror to use for moulds and to create my high end mirror look alike. This mirror sold immediately for a wedding, how amazing is that? Let's get started.... What you need A mirror Redesign With Prima Moulds Amazing Casting Resin found on Amazon or Michaels Paint Primer Sanding paper Cleaner Super glue, I used the Gorilla glue Paint brushes Clear Coat to Seal Gloves, very important to wear 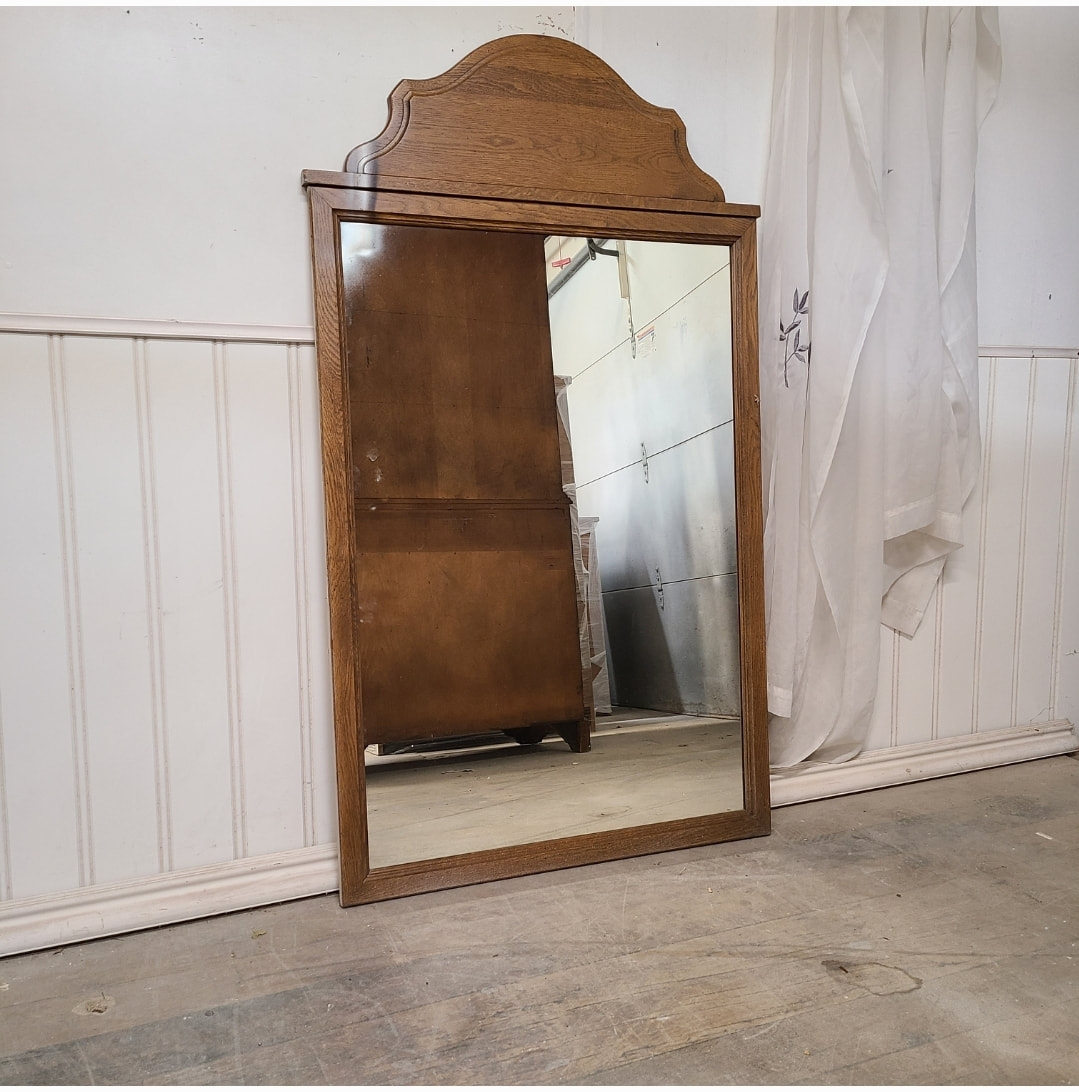 First thing I did was to take off the spoke things at the top either side of the mirror. As seen below... 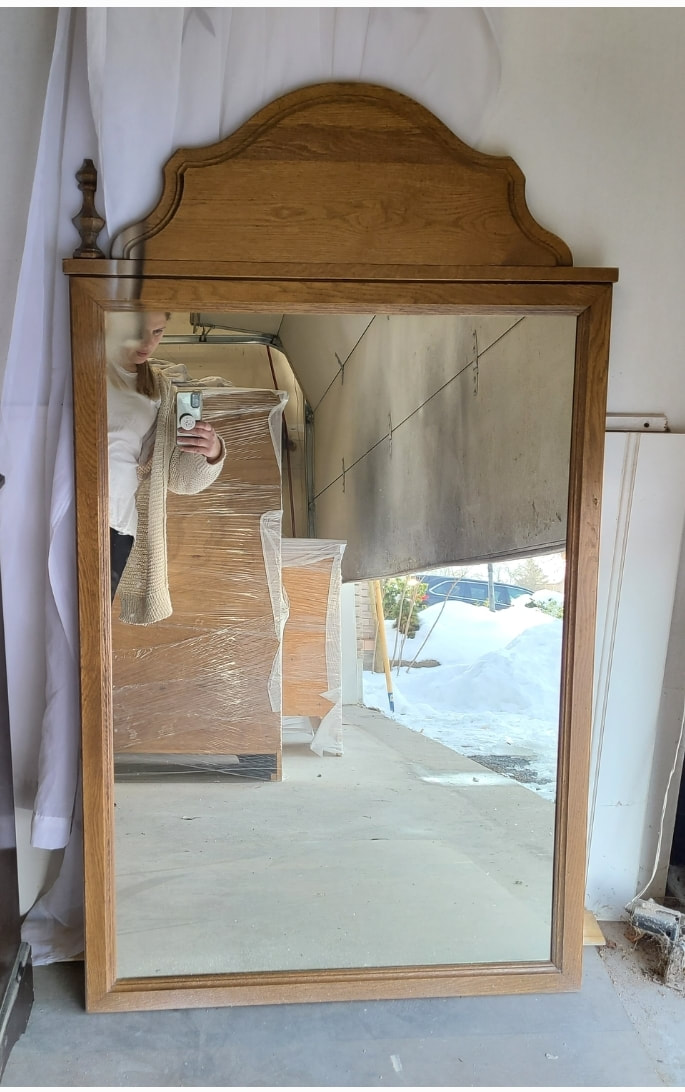  I then scuff sanded the mirror trim and top and cleaned the entire piece. I placed paper over the glass mirror and taped. I then primed 2 coats of primer, sanded with 220 grit sandpaper and then painted with Country Chic Paint in Crinoline. While that dried and set I made the moulds. These moulds are from Redesign With Prima I used quite a lot of moulds for this mirror but you can use any mould you want from the link WEAR GLOVES DURING THE WHOLE PROCESS OF MAKING MOULDS. It is important to wear gloves because this resin is very difficult to get off your skin. To make the resin you will need the Amazing Casting Resin. In the box comes two bottles, A and B . One is yellow liquid and one is clear liquid. It also comes with two little cups, if you are making alot of moulds you might want a larger container that you won't use again like i did. You are going to pour equal parts of liquid A and B into the larger container. It is a MUST that you pour equal quantities of each liquid or it won't set properly. Pour as much as you think you'll need for at least 3 moulds You may need to pour out more to make more moulds   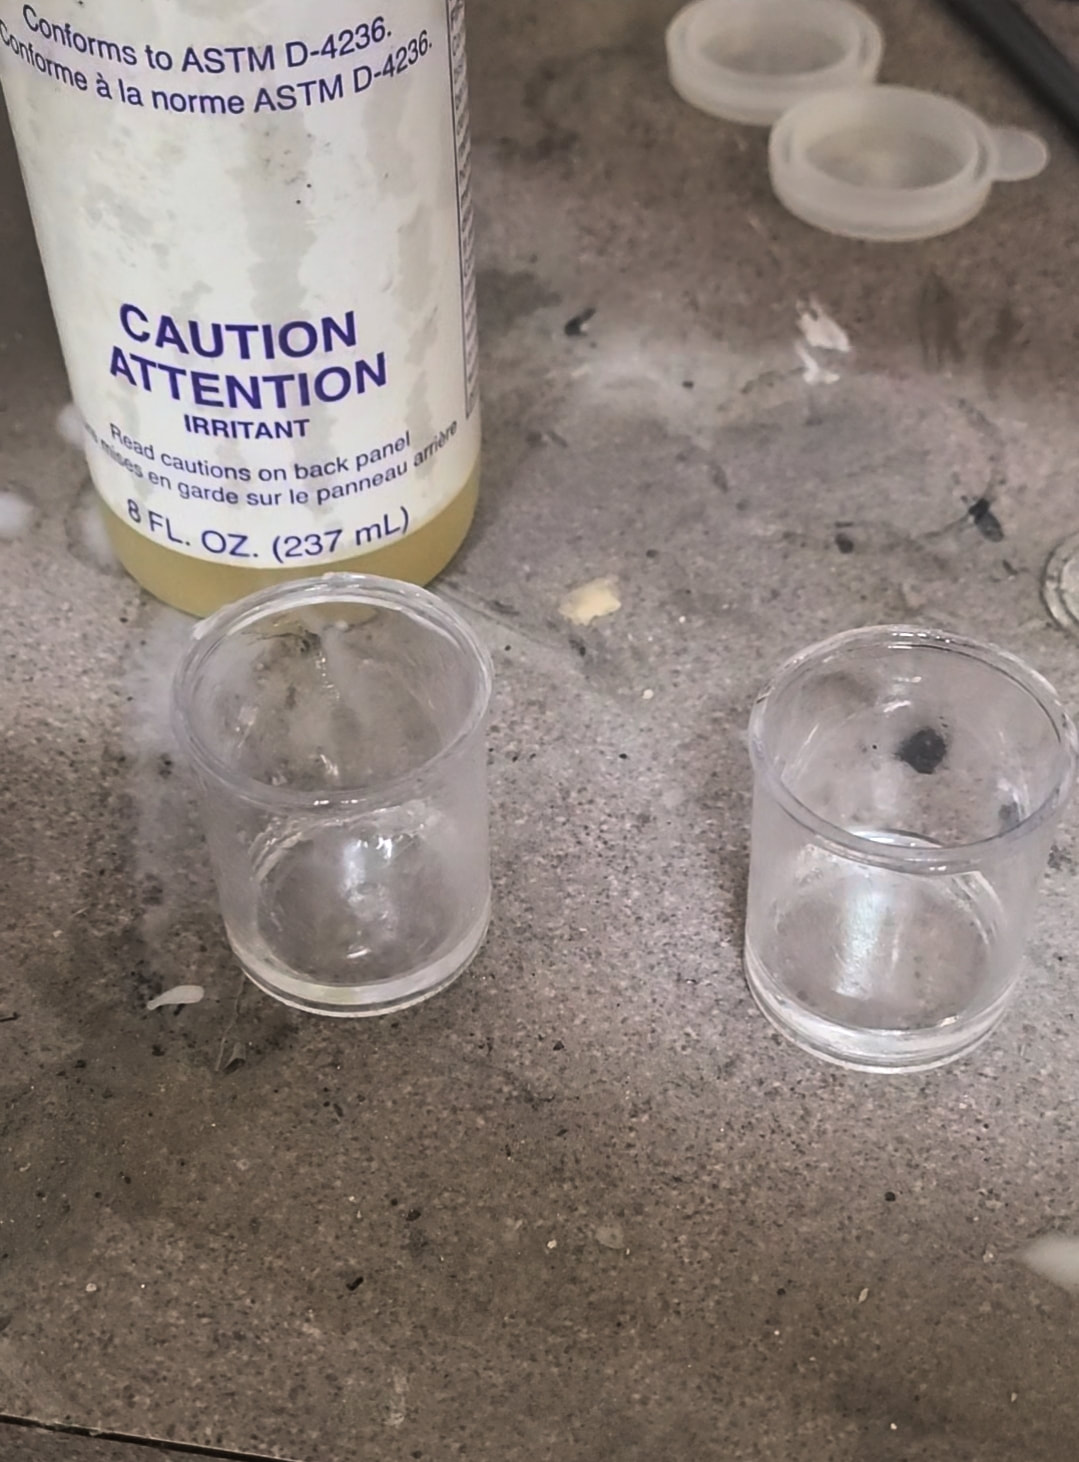 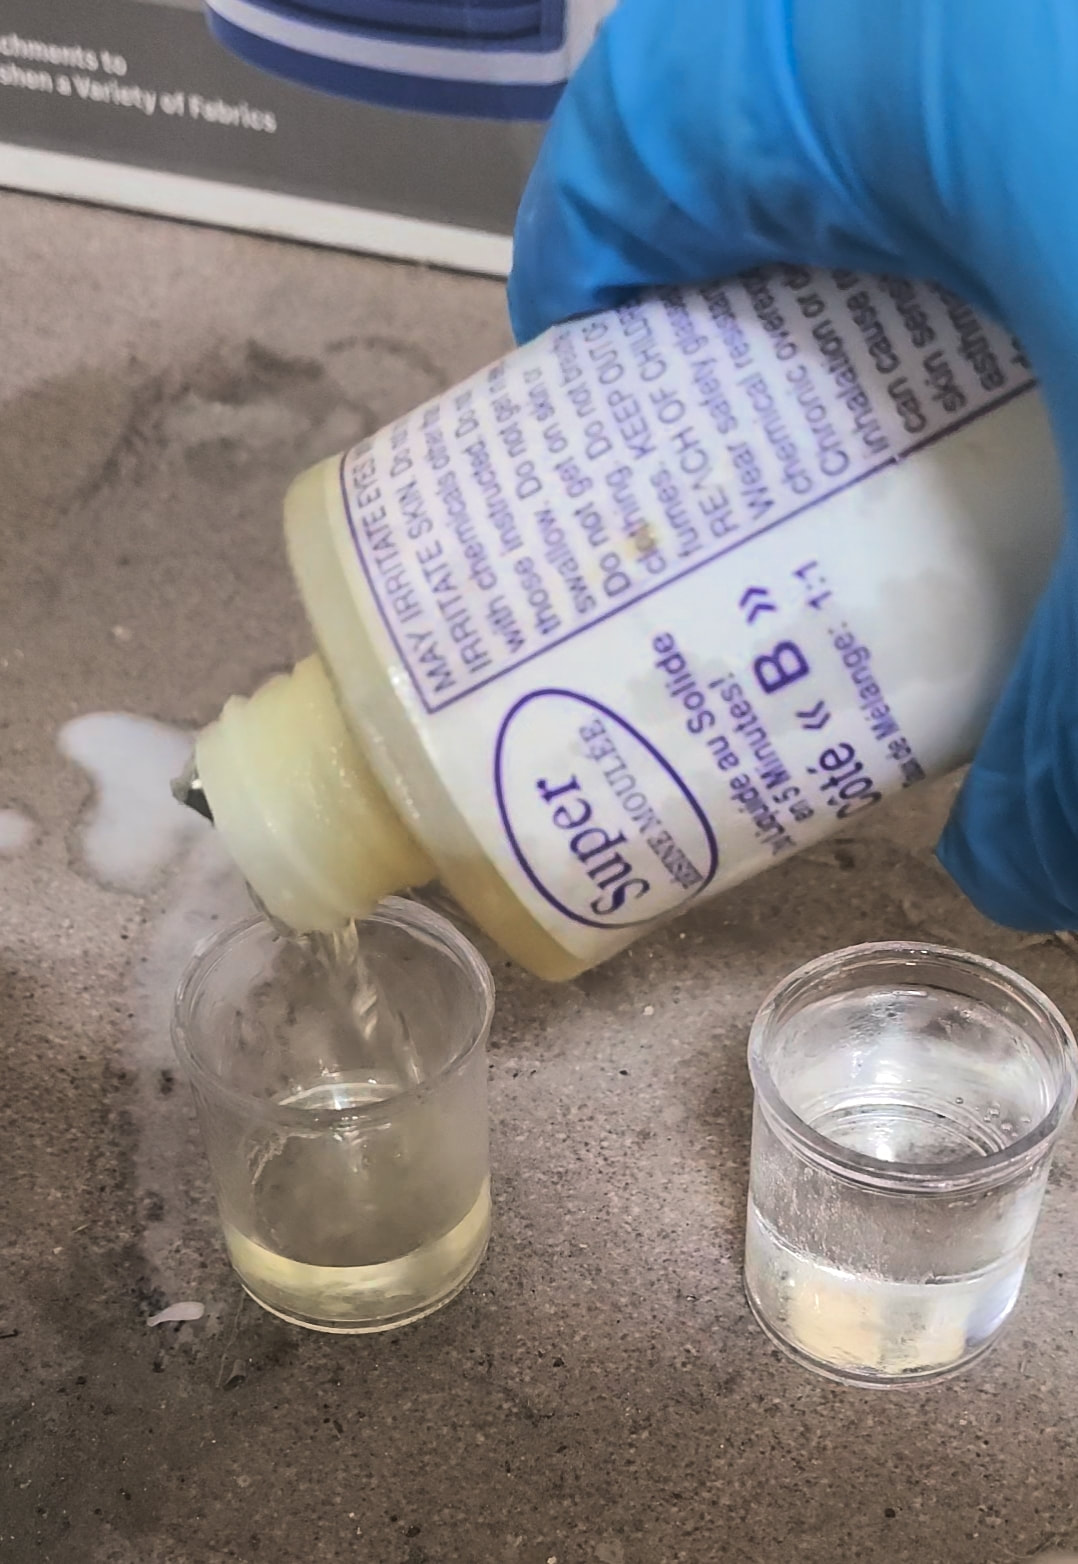 Once you have poured it into the container work fast to mix it really well until it is no longer cloudy. You can also follow the instructions on how to mix the resin on the box. Once mixed and it looks clear pour the resin into the moulds, if you need to make more then make more. You will notice the liquid turning white, wait until the moulds turn completely white and hard. The moulds do get a little warm and thats normal. Once they are hard you can pop them out of the mould case and make more. 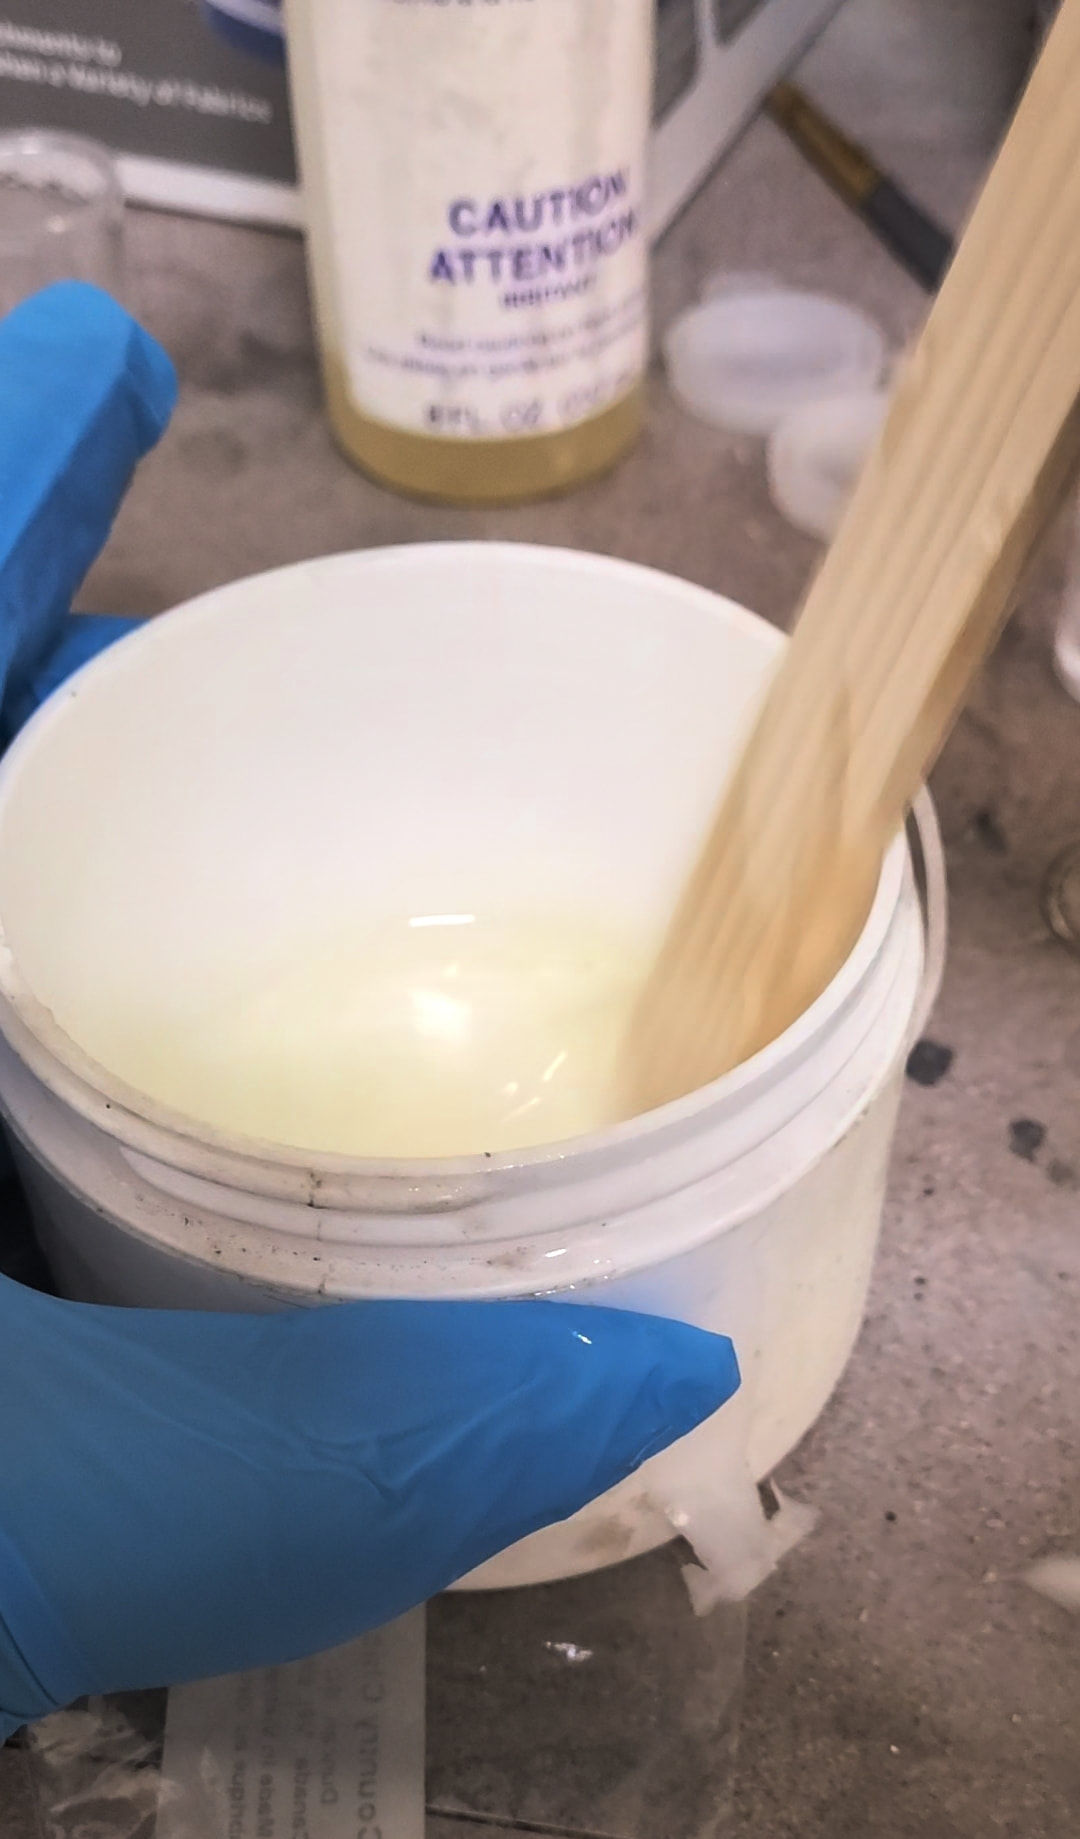 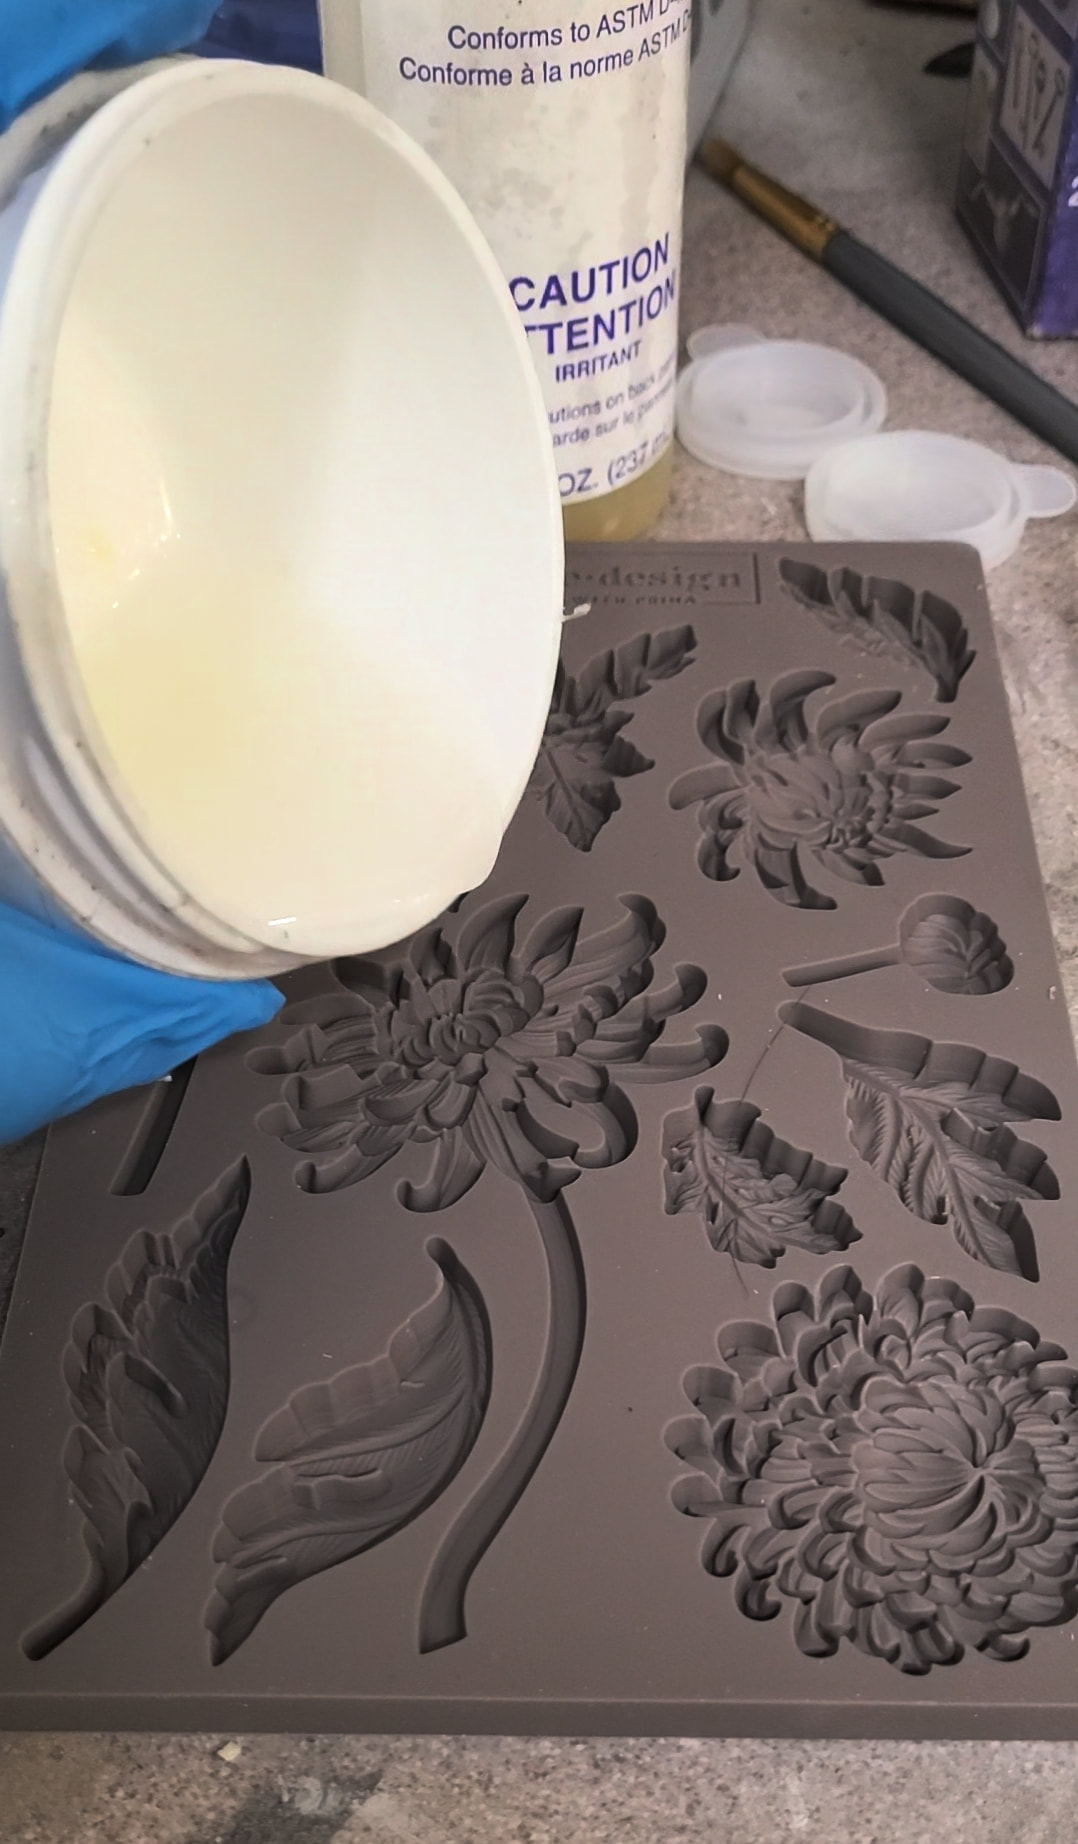 After the moulds are made you can start placing them on the mirror frame or where ever you would like them. Once you have them in place make sure you are wearing gloves to apply the super glue and glue eachnone down. Make sure the moulds don't over hang on the frame because when you lean it on the floor the moulds snap off. I learnt the hard way. You can then brush your paint over the moulds so they blend with the mirror frame that is already painted and then brush your clear coat on once the paint is dry. Make sure also to clear cost the entire mirror frame. Once everything is dry and ready you can take off the paper and tape and clean the glasd mirror with windex gently . Place your mirror on your wall and display your new high end mirror. I hope you enjoyed this post and project and tag me on Instagram or Facebook to let me know you made the moulds. 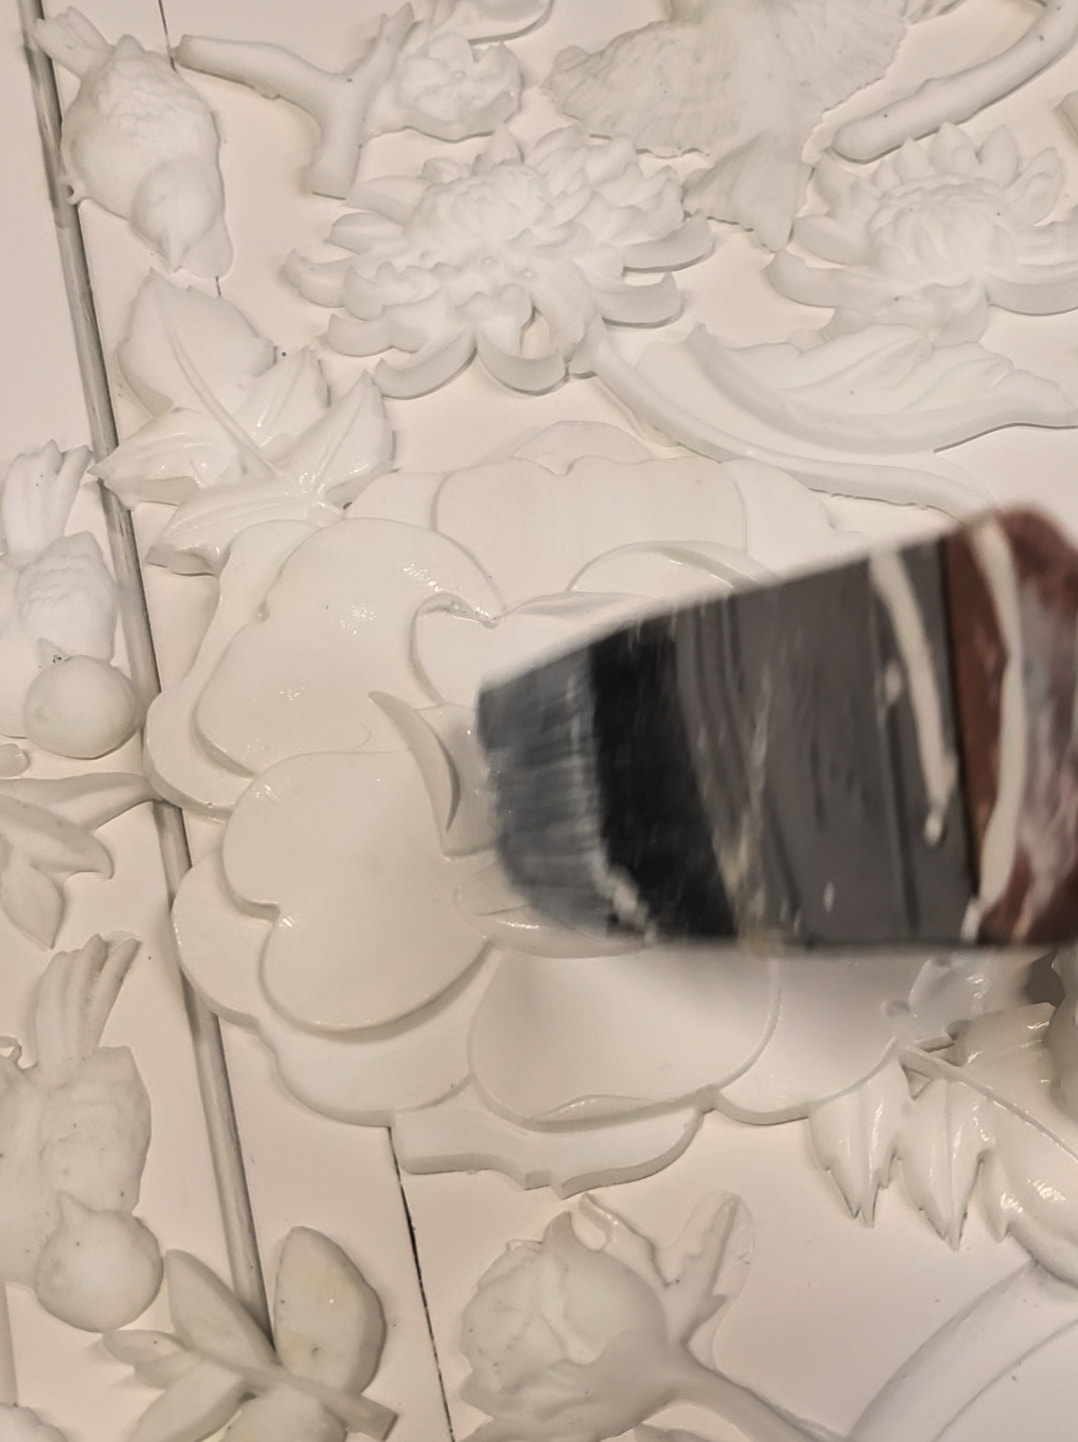 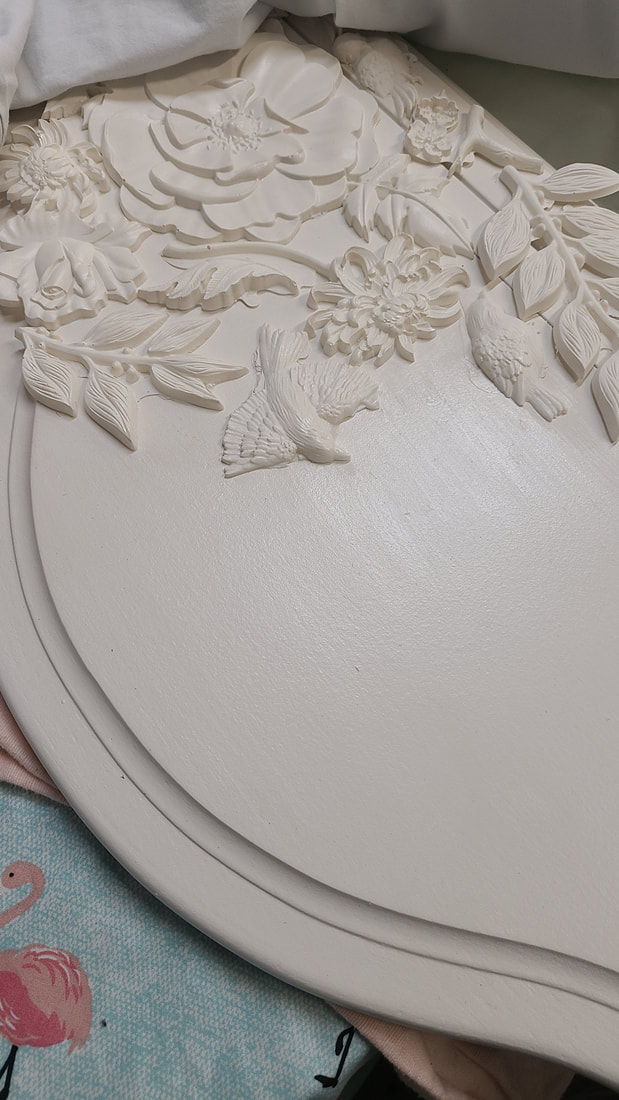 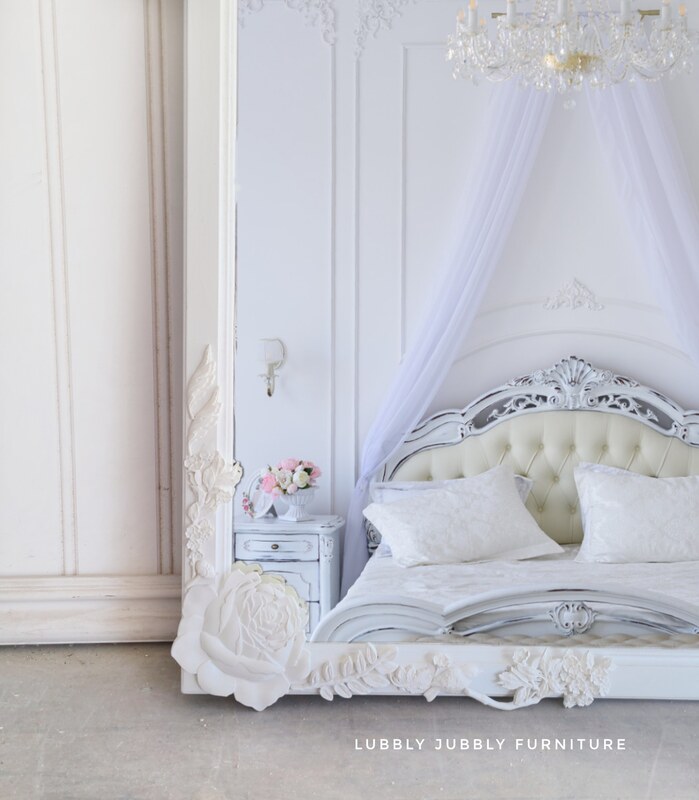 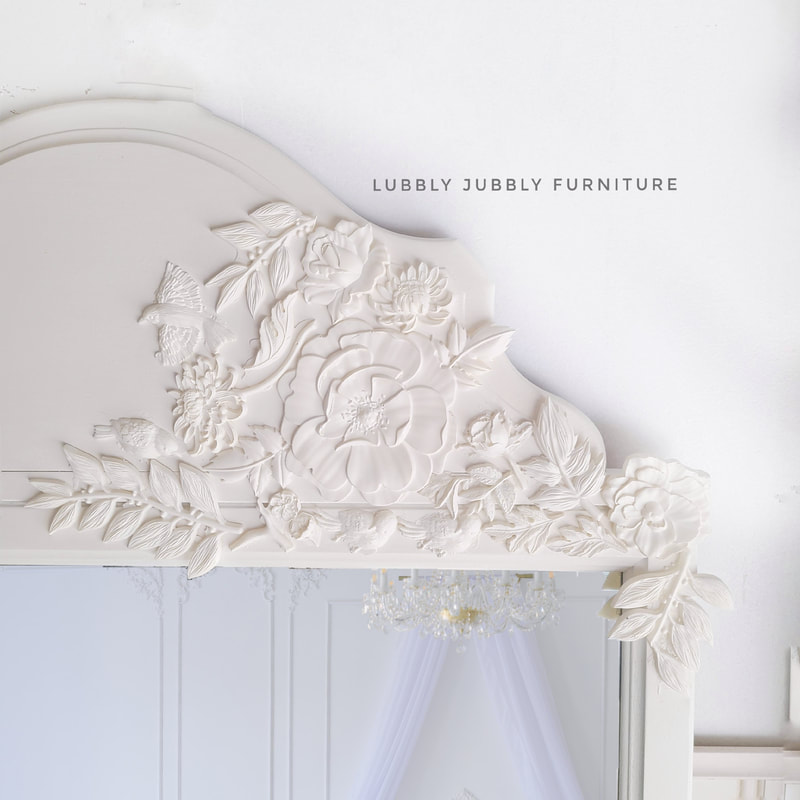 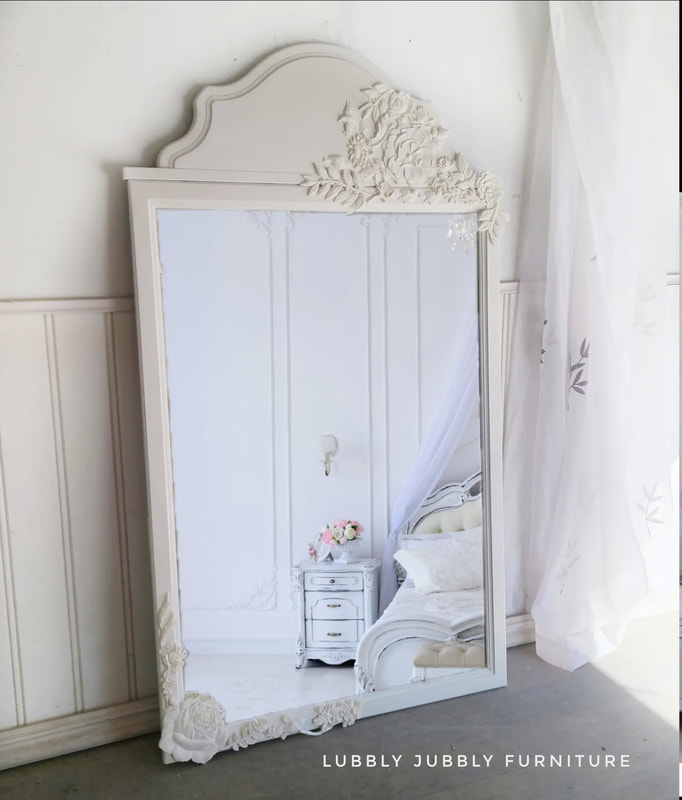 IMPORTANT: Some of the links on this website are affiliate links where i recieve a small commission, this is no extra cost to you. Thank you for supporting my small business. If you are attempting any projects and using tools, please wear the appropriate work wear and safety gear. Read all labels of every product you are using and follow instructions and guidelines for each individual product.
Thank you again for all your support in my small furniture business, i am extremely grateful.  How to make bead garlands..... I was making bead garlands about a year or two ago and it was so much fun, I was selling them at one point and they were very popular. You can make so many colours, I used yellow, orange, green, grey, pink and Jute string. I had stopped making them for a while and thought maybe I'll share them on my blog so you can enjoy making them yourself. It's actually a therapeutic project to do, fun and relaxing and time to create. When I thought of making the garlands, I realized I needed something to add to my furniture staging items and the garlands were perfect for that. They are great for home staging, furniture staging and just have to on shelves and home decor items that look pretty. You can create one for every season and mood and to match your home decor theme. Where to get these items to make a garland you ask.... well the string/yarn I got at dollarama and same with the jute. Make sure you have good string/yarn that won't shred on you. The beads i got 200 in a bag on Amazon. You can even get any size you want or mix and match. lets get started yarn or Jute tape scissors beads  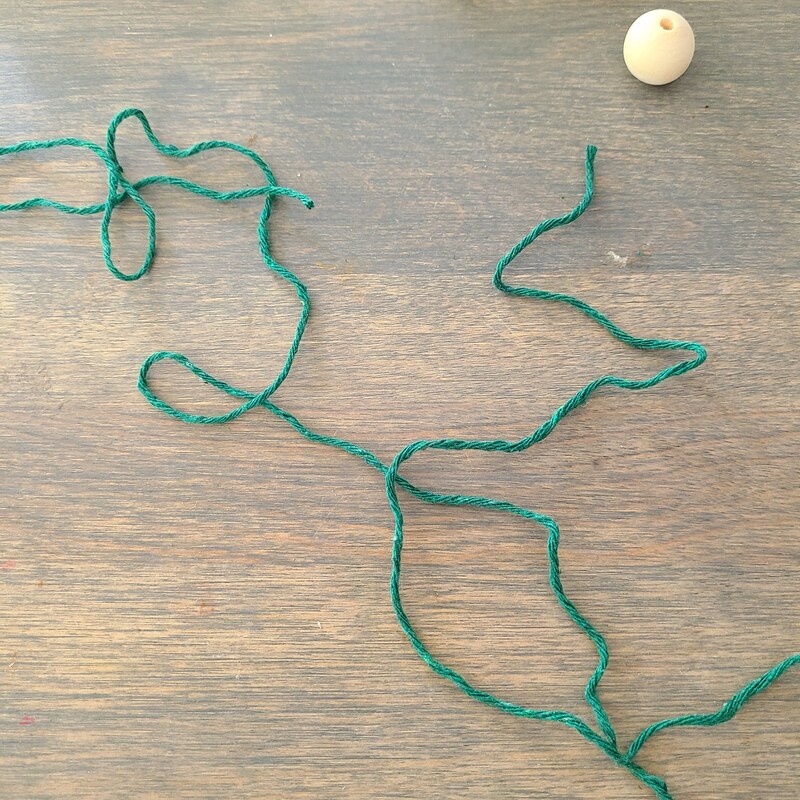 First you need to cut the yarn as long as you want your garland to be and take into account you need at least and inch or 2 at the ends to go through the tassles, add on a little length at the ends. Then you need a card like a postcard, i used a panel off a tylenol box as thats what I had at the time but a postcard width way is better. It all depends on how long you want your tassles at the end to be. What you're going to do is wrap the yarn around you card about 40 times making sure that the end is sticking out ready to be tied. You can wrap it around less times or more, all depends on how thick you want them. You are going to make two tassels. See pictures below 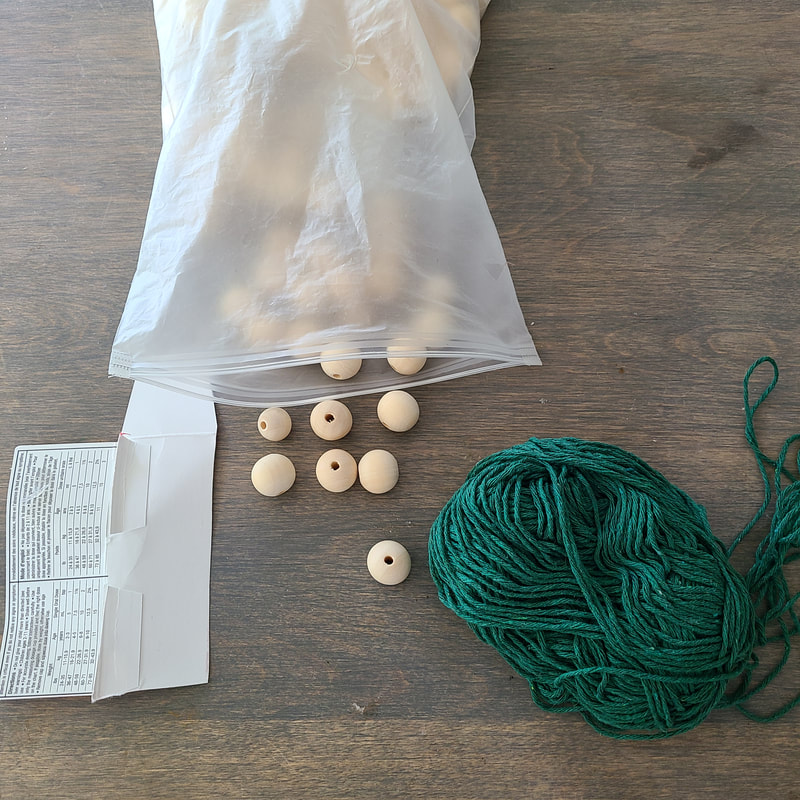 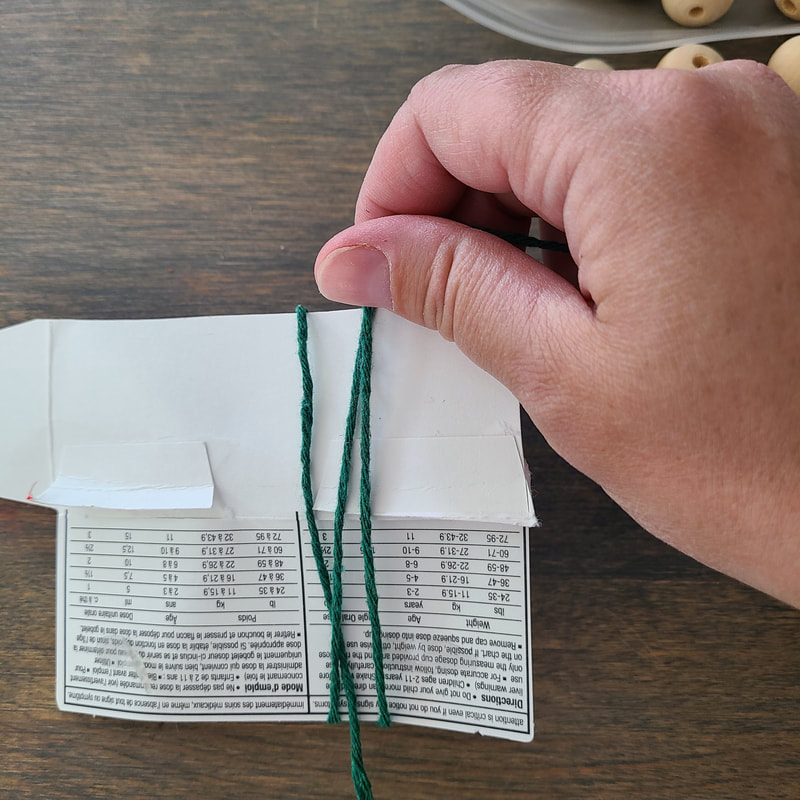 Once you have made two tassels tie the two ends in a small knot, take them off the card holding them in place so you don't lose the loop. Take some yarn about short ruler size, 15cm and tie it in a knot and start to wrap it around the top of the tassel creating a loop at the top. Again make sure the start of the yarn is sticking out the bottom ready to tie together.  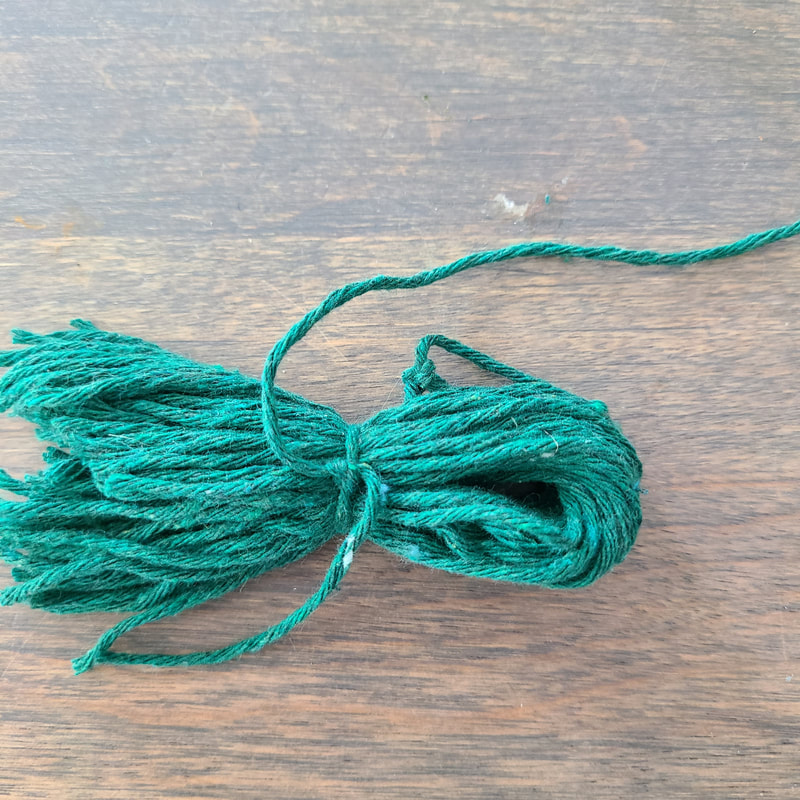 Make sure you have the loop at the top like the picture above. You are then going to take your yarn you cut to desired size earlier. Take your tape and cut two small strips. Wrap the tape around both ends od the yarn. This is to make the ends more durable and secure to thread easily through the beads. 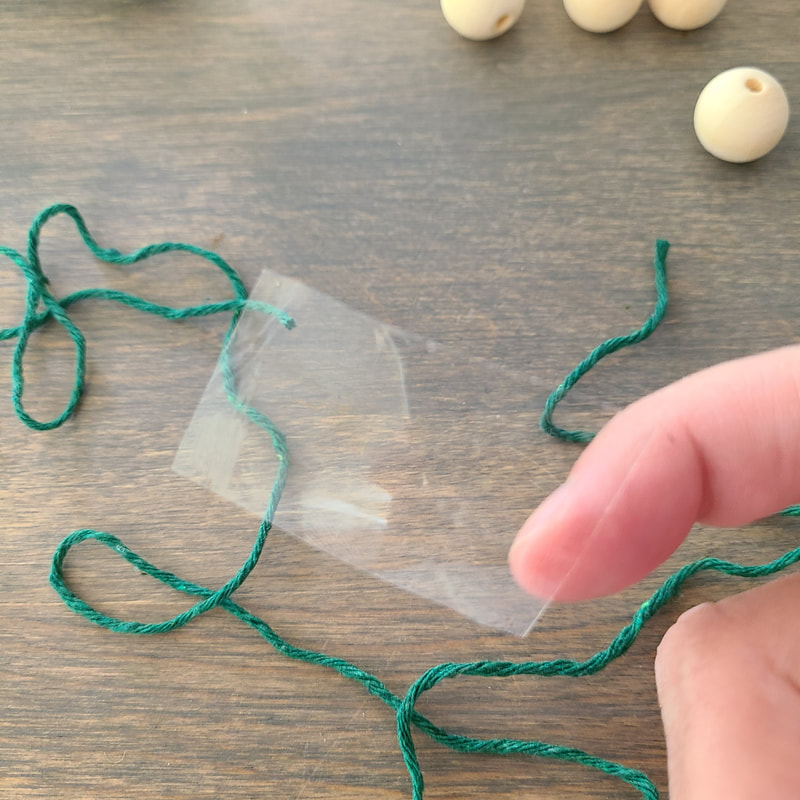 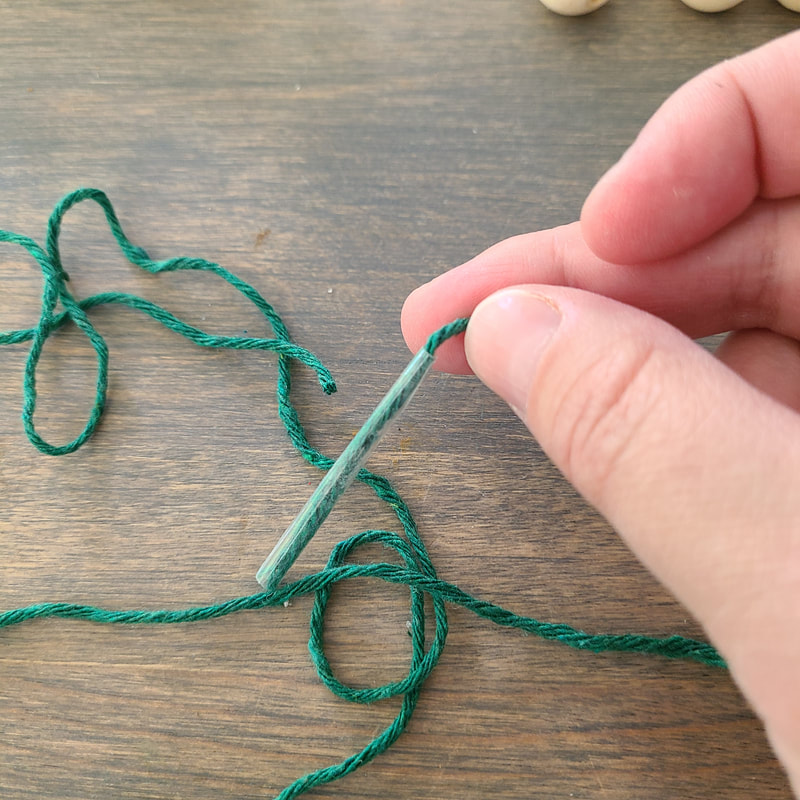 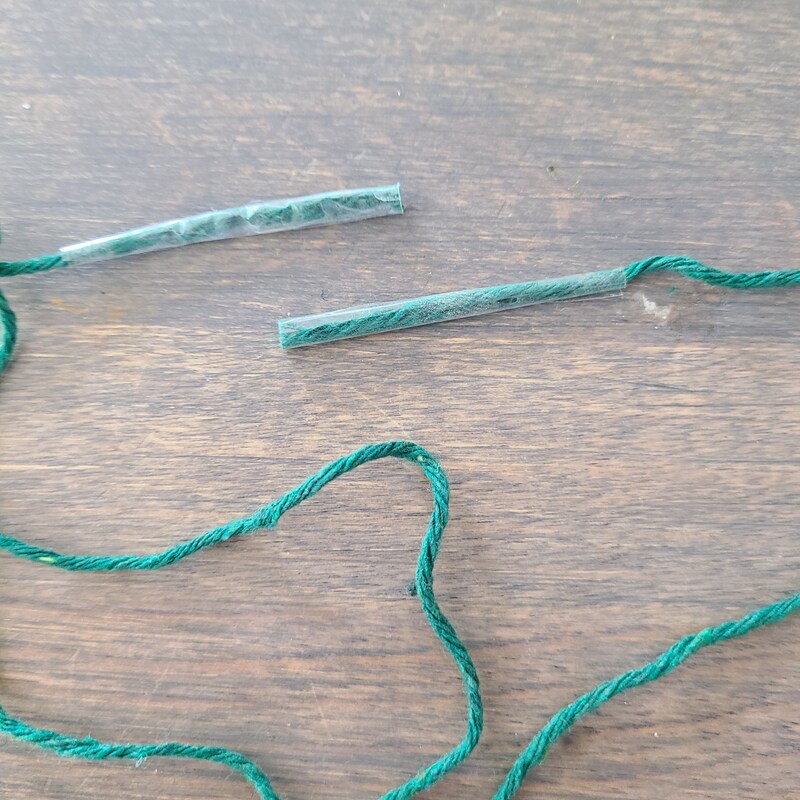 Once you have got tape on both ends you are then going to thread one end through one tassle loop and tie in a small knot at the top twice. You don't thread the whole string through just a small amount to knot. See picture below 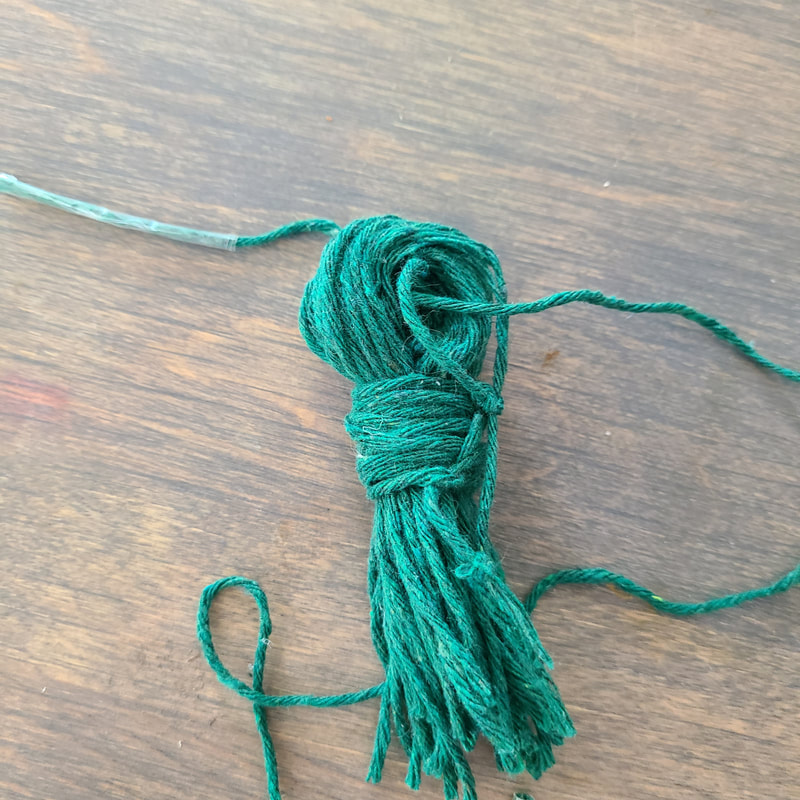 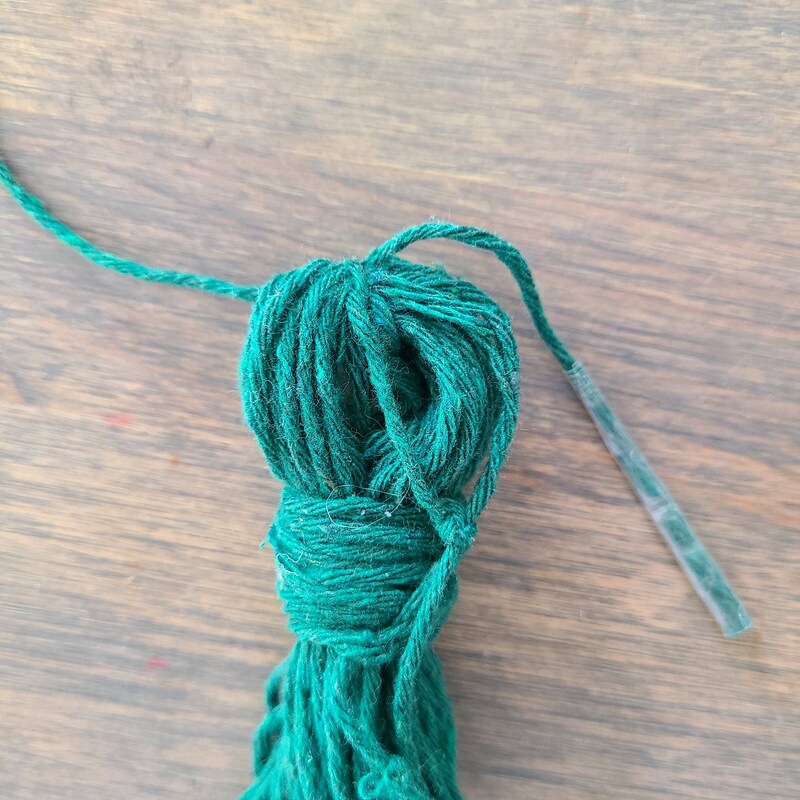 Once this is done you can start threading the other end through the wooden beads. When you add the first 4 or 5 beads make sure when thry get to the tassel that you thread thr taped end through those beads so that its hidden. When all the beads are on, make sure to leave some room at the open end to thread through your second tassle. Do the same with thr open end, thread through the other tassle and knot. Tie the string at the that tassle as close to the last bead as possible and thread the taped end through those beads. 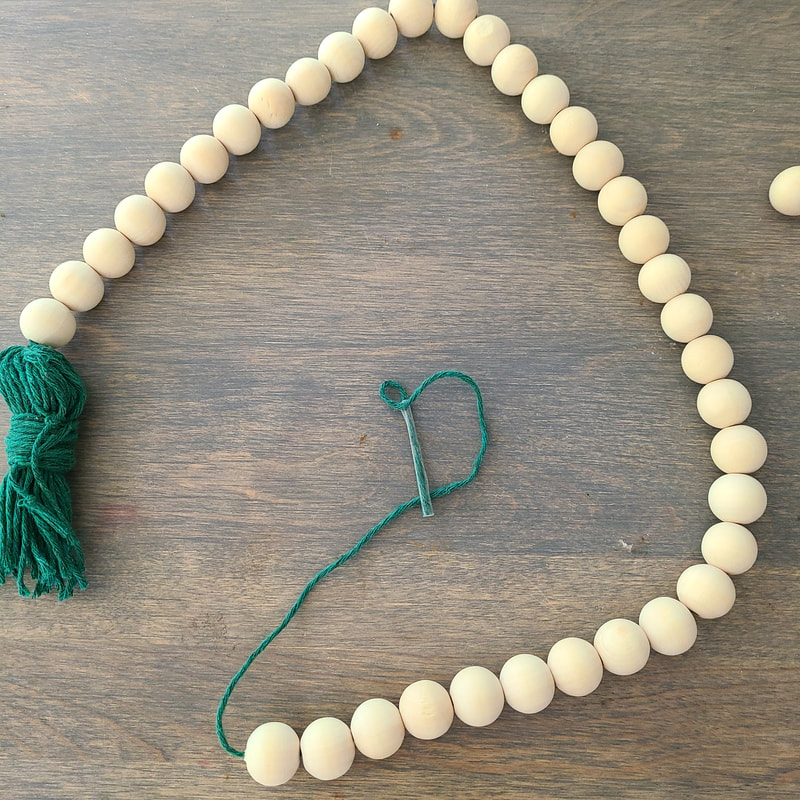 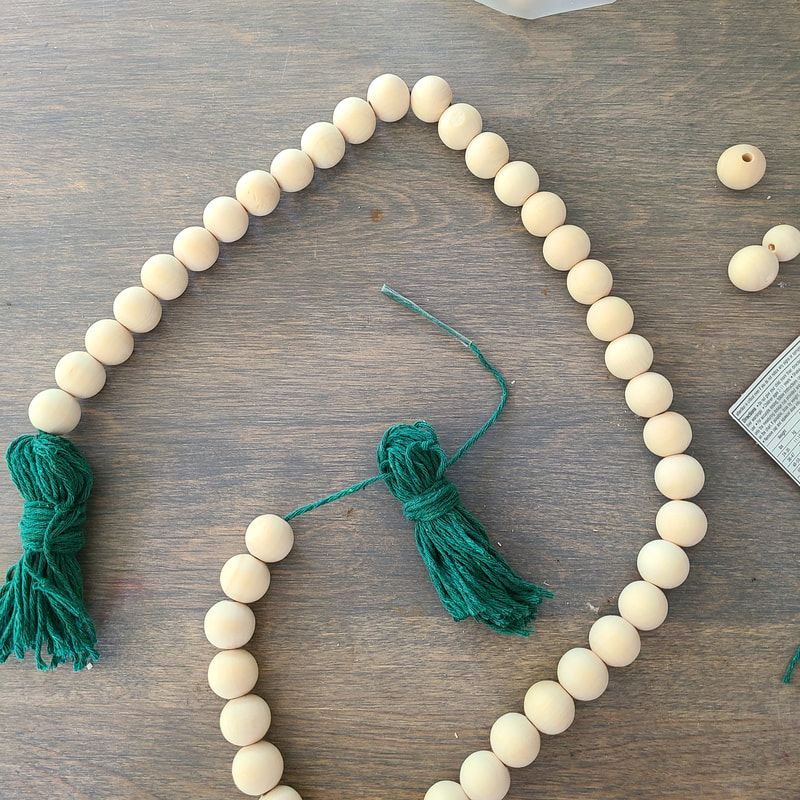 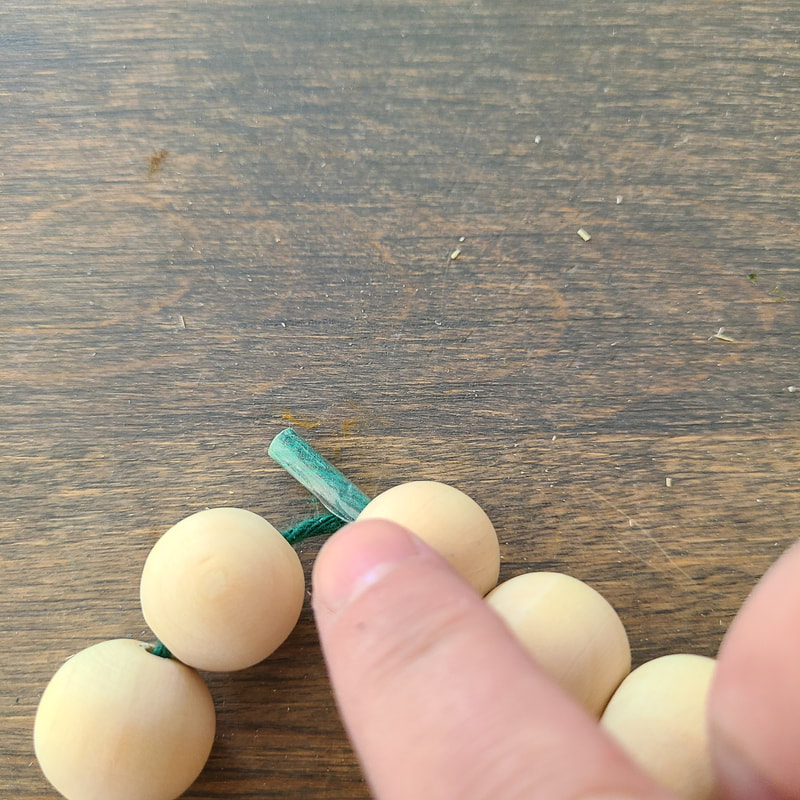 You can see in the picture above that I threaded the taped end through the beads. I also made sure the extra yarn was tied close to the end bead so that it wasn't loose. 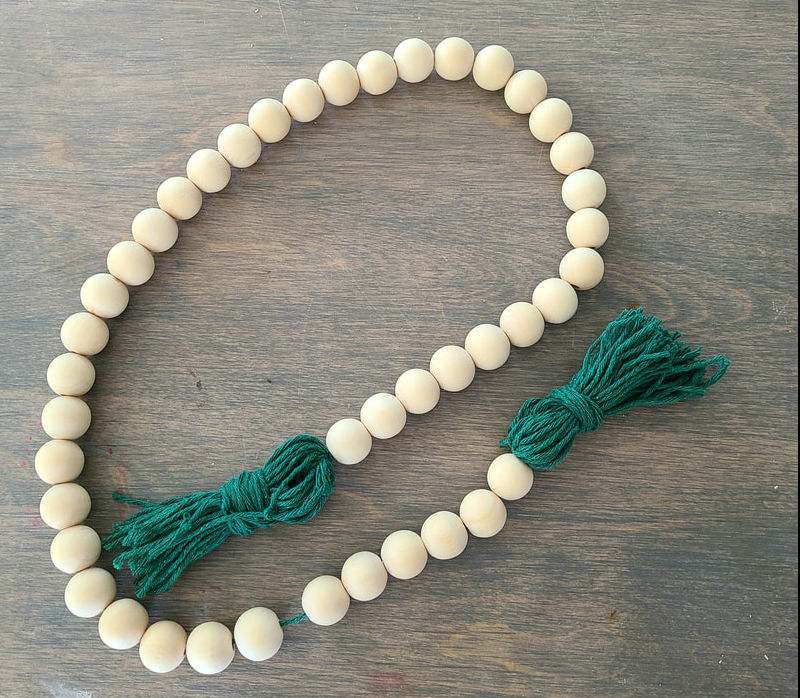  You are probably wondering why I am sharing a food recipe on a furniture refinishing page, well last night, which was Sunday evening I made roast chicken dinner. I make a roast every Sunday and the reason why is because I grew up England and every Sunday my Mum would make a roast dinner. We would go to church in the morning then have an awesome brunch filled with sausages, bacon, eggs, toast, the works. It was always a lazy relax day and come dinner time we had a roast. Sometimes it was roast chicken and sometimes roast beef. Now scalloped potatoes was not a British side dish to add with a roast chicken dinner and in fact I didn't have scalloped potatoes until I came to Canada at 17yrs old. We had a family gathering and my Aunt made scalloped potatoes, oh my goodness I loved them so much. I asked her how she made them and she told me the ingredients. My Aunt had said cream so I assumed she meant whipping cream, next family gathering I made the scalloped potatoes and when I went to go get some food the entire dish was gone. Everyone loved them. My Aunt asked what I put in it because it wasn't the same as hers and I told her I used whipping cream, she laughed and said thats why they are so good. Since then I like to make scalloped potatoes sometimes with my roast chicken dinner with gravy, believe when I say wow they are amazing and my family loves them too. lets get started on this recipe which is really quite easy and quick to make  Oven temperature: 400F Cooking time: 1 hour, until potatoes are soft Ingredients: 6 large potatoes, peeled 1 onion 1/4 cup of parmasean cheese grated 3/4 cup of whipping cream, picture below 473ml 1 cup maybe 1 and half cups of grated cheddar cheese 1 large long dish, 9x13 1 mandolin Preheat oven to 400f degrees. I have a mandolin slicer which is amazing and I really recommend getting. It has so many different blades for fries, or crinkle potatoes. I have a setting that is a blue dot and thats the thin one for thin potatoes that I use for scallop. If you don't have one thats okay you can slice the potaotes once peeled into thin slices. Layer the dish with the first layer of sliced potatoes, then do a second layer. Peel and slice the onion into string slicesand sprinkle over the potatoes. Then do two more layers of sliced potatoes. Pour the cream over the potatoes, making sure that its completely covered in cream. If you feel there isnt enough cream you can add some more. Sometimes I use the whole carton. Grate the cheeses and sprinkle over the potatoes until the whole top layer is covered in cheese. Place in the heated oven and cook for about an hour or less depending on whether the potatoes are soft. I always like to check once they start browning on top, i stick a knife in to see if they are soft enough. You don't want hard potatoes. If the top is cooking faster than the potatoes then put a layer of foil over them, that way they will cook and not burn. The best part are the crispy edges. Let sit for 5 min and serve. Make sure to let your guests or family know its hot when serving. Serve as a side dish or eat as is because they are that good! Enjoy  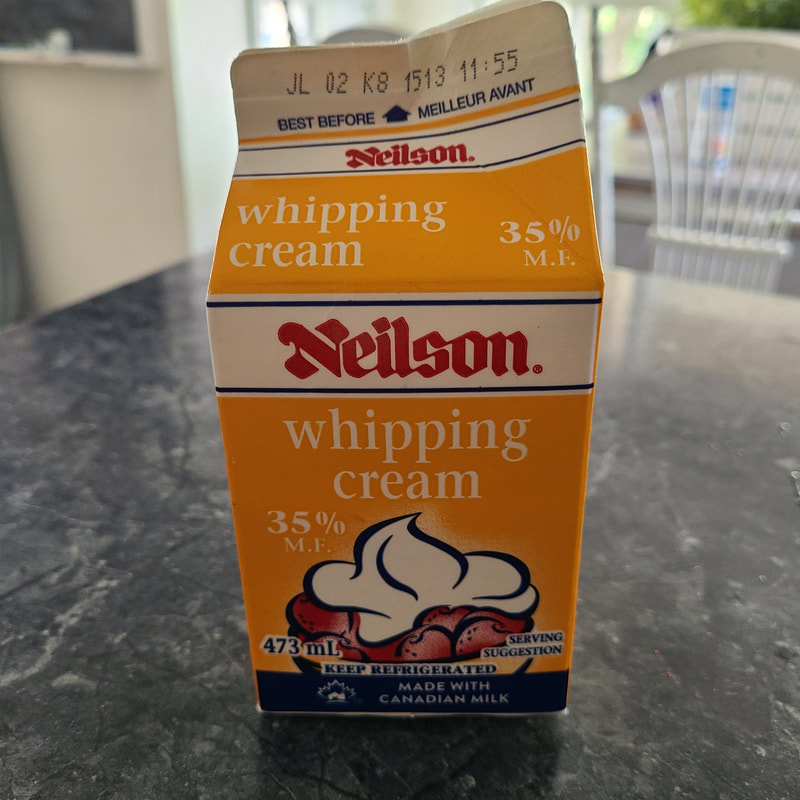 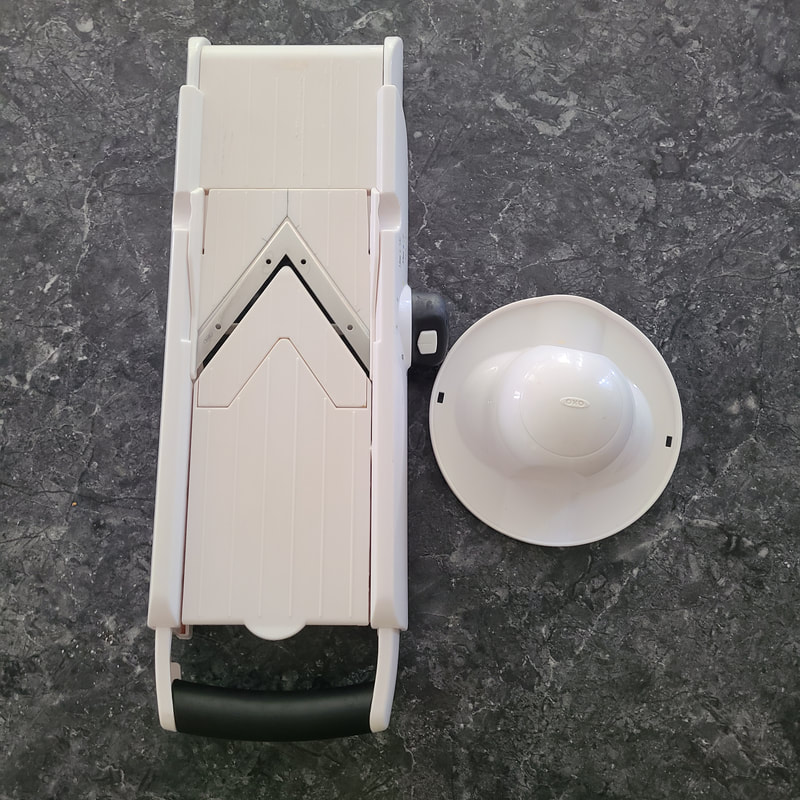 This is a mandolin slicer, I got this at Costco years ago but Im sure Walmart has them too. In the picture below you can see I have it locked but the blue dot is the setting I use for scalloped potatoes.    Stockings at Christmas are the most fun part of the day in my opinion. Coming down the stairs to see a large sock full of goodies, from candy, chocolates to items we love that are personal to our personalities. I love that my Husband does my stocking, I feel like its such a surprise to see what he got me and some of the joke things he adds in it. I find that Christmas stockings can sometimes be the hardest to fill and I end up putting items in each stocking that I am not really sure warrant as a gift ha ha, none the less whoever opens the their stocking in my house enjoy everything recieved. I think stockings take a little more thought and it brings back memories of my Mum who always seemed to find the most unique stocking stuffers and to this day I wish I could do the same. Great finds every year! Well lets discuss a painter/furniture refinishers stocking.... I know as a furniture painter that Id rather gifts at times to be for my work because I am painting Monday-Friday so why not have the things I need at Christmas than things I probably wont use. These items below are my top ten  Number one item I would say is paint, paint containers fit into stockings especially 4oz and 8oz pots. Most paint companies like Country Chic Paint carry small jars and you could get a paint colour your refinisher has never used before.  Number 2. This one is a must have, all painters/refinishers has to have wood filler and you can purchase mini containers of woodfiller at Lowes or Home Depot and they fit right into stockings. You could always buy wood filler in tubes as well, maybe in a tone or brand your person has never used before 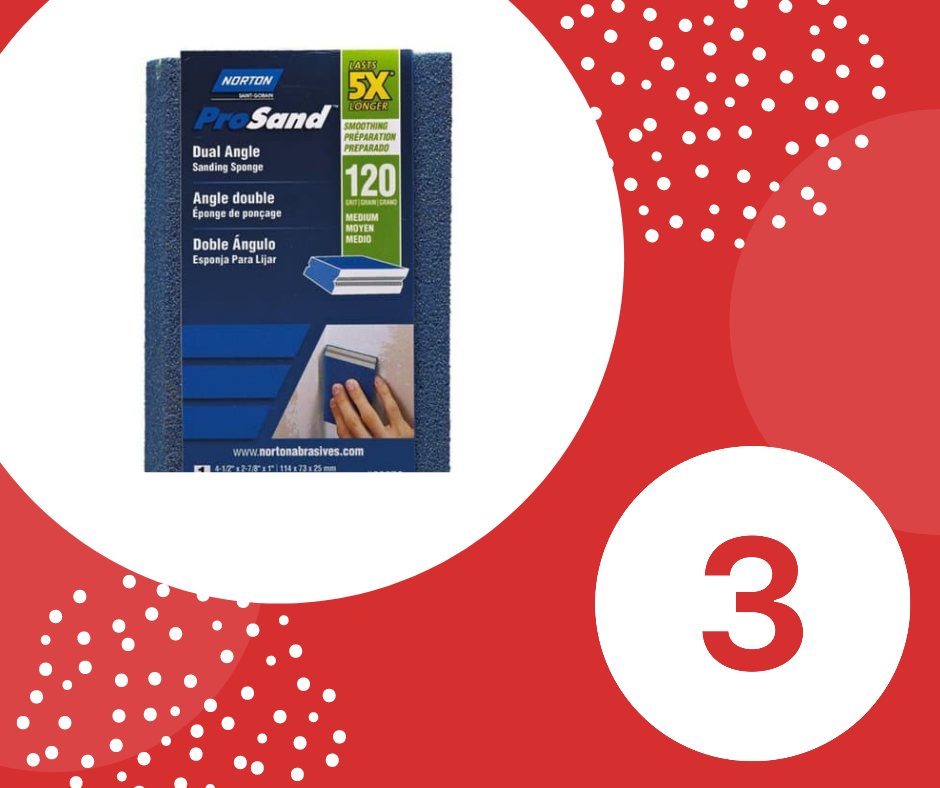 Number 3. Sanding pads are amazing to have i have so many hanging around my workshop. They are are great to use and clean easily and they create such a great finish. Definitely a stocking stuffer. 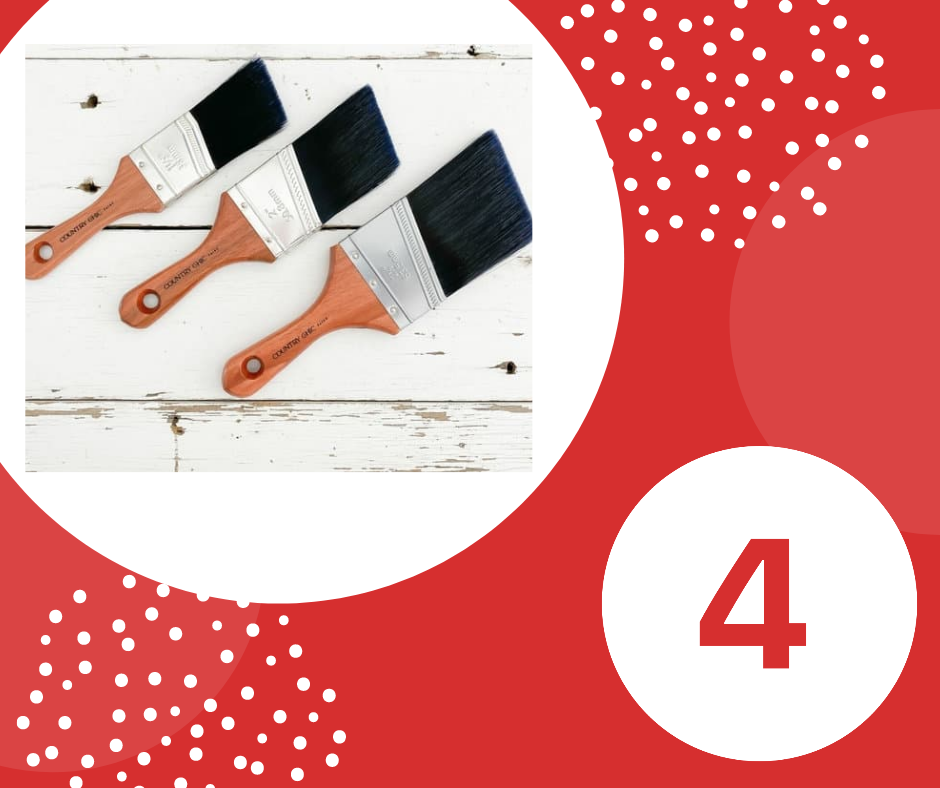 Brushes brushes and angle brushes are a must have even if you use a paint sprayer like myself. Brushes fit into stockings perfectly and I love these Country Chic Paint angle brushes, they are my favourite, so good for trim on drawers or brushing on clear coat. Must have 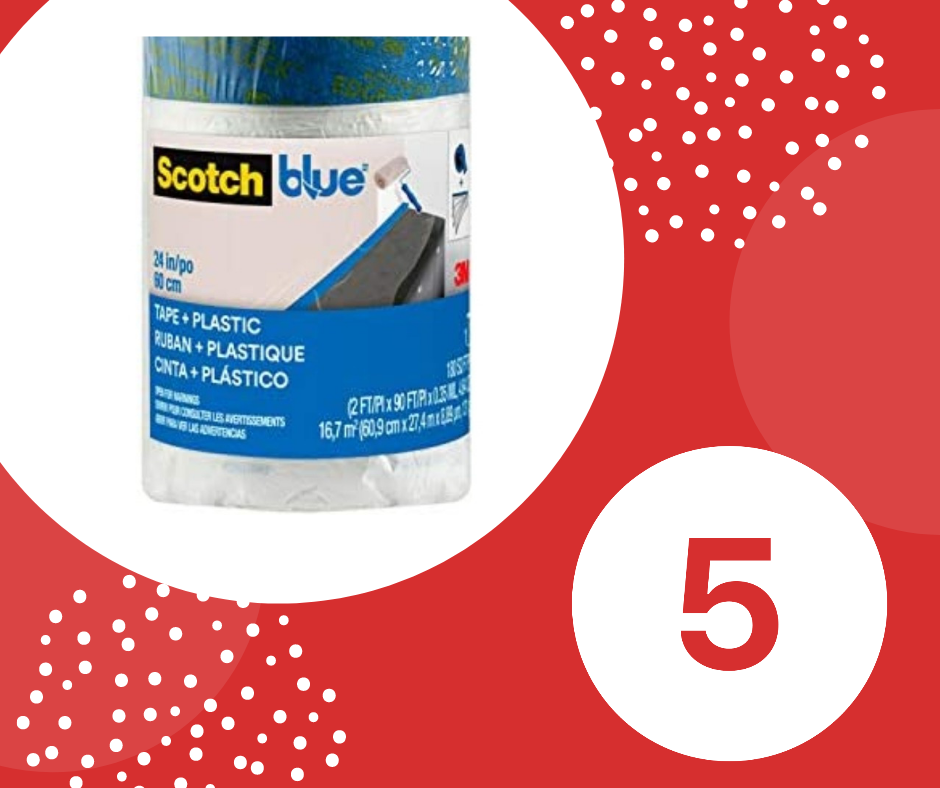 I use this painters plastic tape allllllll the time, everytime I have to cover up certain areas on a piece of furniture like raw wood tops, I wrap it up with this roll of tape. You can find these in different sizes on Amazon and they are awesome to have a great for a stocking stuffer.  These paint filters are the best ones I have found and always order them from Amazon. If you have a painter that spray paints then these are the filters to get. They are strong and hold a lot of paint and product and the mesh strains out any lumps needed to.  If your person is a YouTuber like myself or loves to record videos and reels and needs better voice overs, then this is the mic to use. I got this one from Amazon and I love it. It's affordable and easy to use and works great.  Country Chic sponges are the best for applying topcoats and glazes, even paint and provide a smooth clean streak free finish. I really recommend them and they fit perfectly in stockings.  NUMBER 9. The best brush soap ever!!!! Perfect for the brushes that are covered in product and need a good wash. This soap smells amazing and softens and cleans brushes. It contains natural ingredients with essential oils, perfect stocking gift for a painter 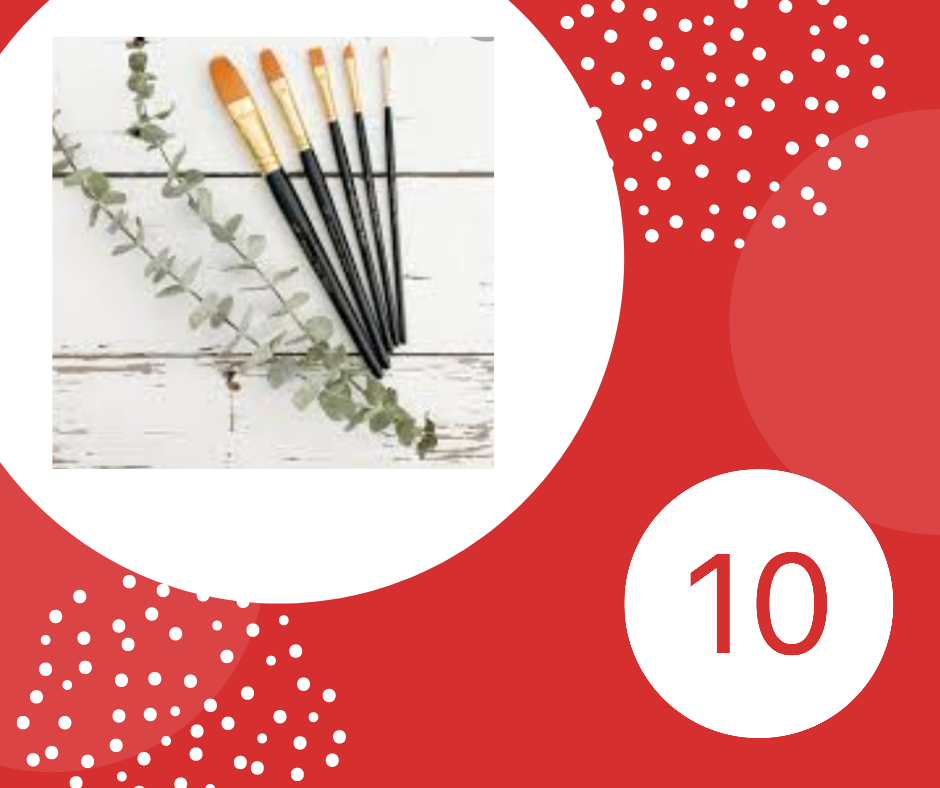 NUMBER 10. LAST BUT NOT LEAST! Country Chic Paint artist brushes. I use these brushes all the time, not only on canvases but also my furniture for the little details and drawer trims or even touch ups. Perfect pack to fit into a stocking. So that is my complete 10 stocking ideas for a furniture painter refinisher. I hope these items gives you some ideas on what to do for Christmas for whoever you are buying for. Stockings can be difficult to fill and that is why I am here to help and provide some ideas and of course don't forget to add chocolates and all the fun goodies that do go in a stocking. Have a wonderful Christmas everyone and enjoy your Holidays!!!!! love Meg  Who doesn't need a toy bin or storage box? I think we all do. I found this wooden box with a lid from the thrift store, as soon as I saw it I knew it would be the perfect piece for the transfer I needed to use. Now you don't have to use the construction transfer I used you can use so many of the other designs available at Redesign With Prima. let's get started!! 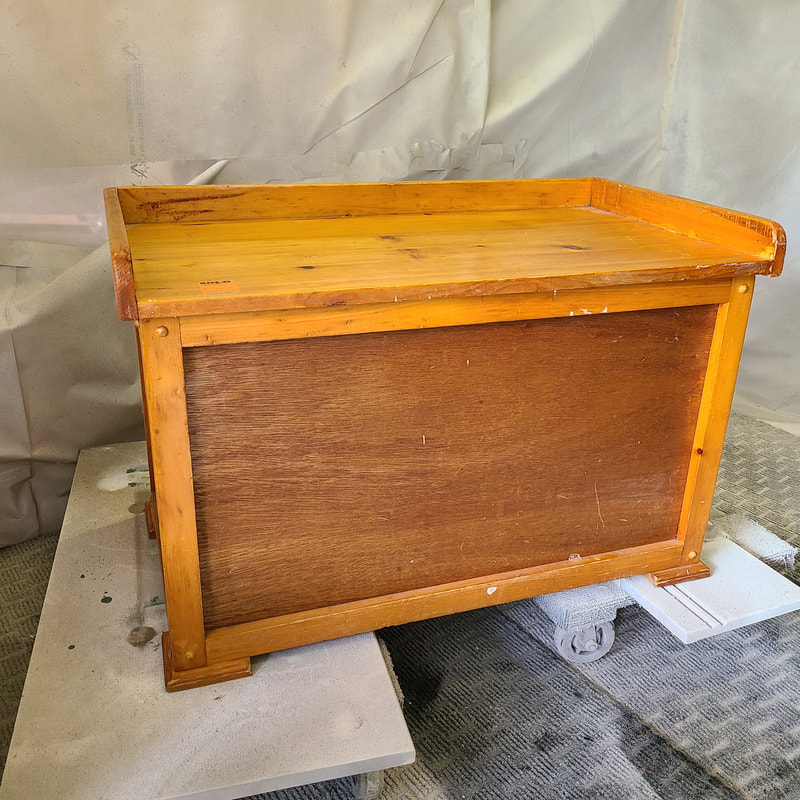 Like I said I found this bin at the thrift store and I wasnt planning on looking for a toy bin at all, I was looking for other pieces for other projects. First I sanded the piece, I scuff sanded the panels and sanded down to raw wood the trims. I then cleaned the entire piece inside and outside with Krud Kutter. 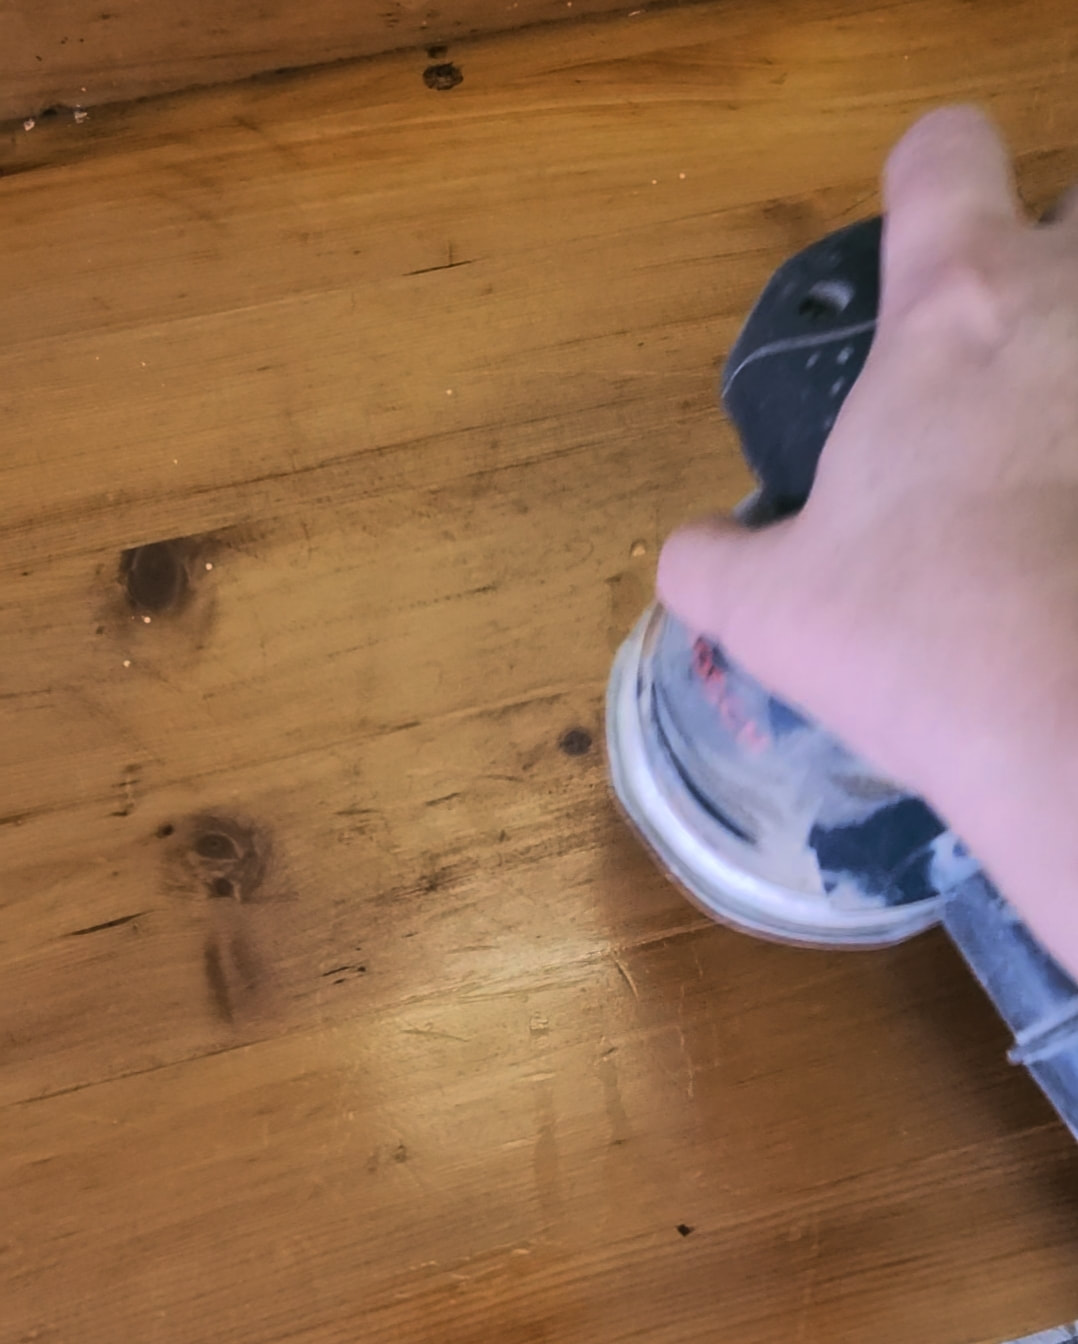 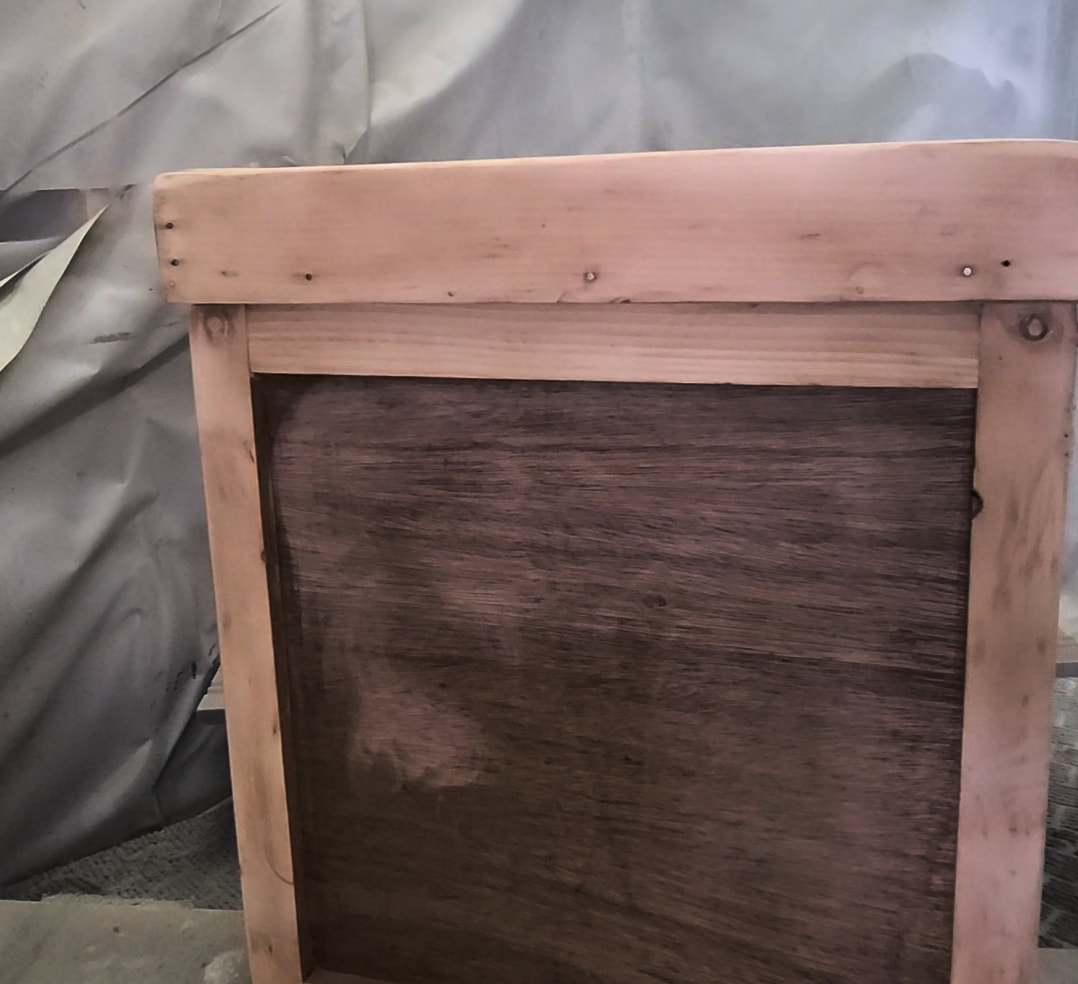 Once that was done I got my paint out and started painting the panels on all sides with Country Chic Paint in Soiree and using my Country Chic Paint angle brush. I did about two coats. 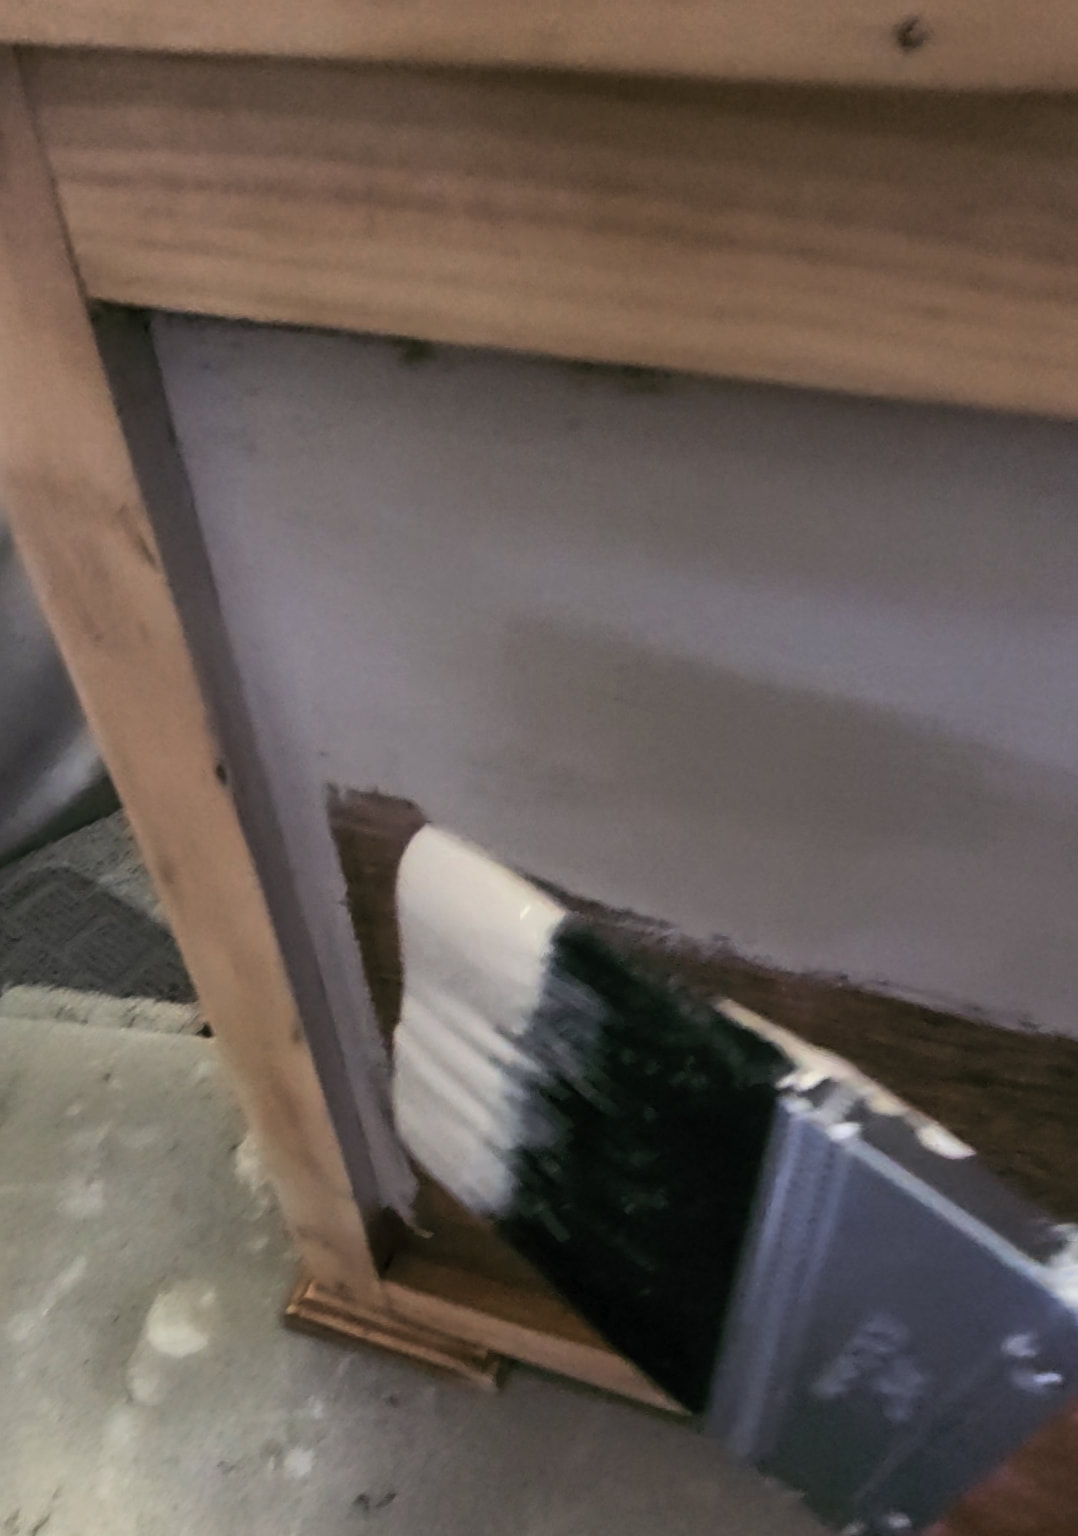 Once I did two coats and they were completely dry I added the transfers, figuring out where I wanted to place them. I also added some tissue paper in the inside of the box. I brushed Clear Coat on the inside panels and placed the paper on top and then brushed the clear coat again to seal. I sealed the entire piece with Clear Coat. To keep the wood trim the natural wood colour brush a soiree paint wash over the wood and wipe excess with a cloth. That way when you seal the bin the wood won't turn orange. Paint wash is spraying water onto the wood and brushing paint over it and wiping, or you can add a little water to your paint in a separate bowl. 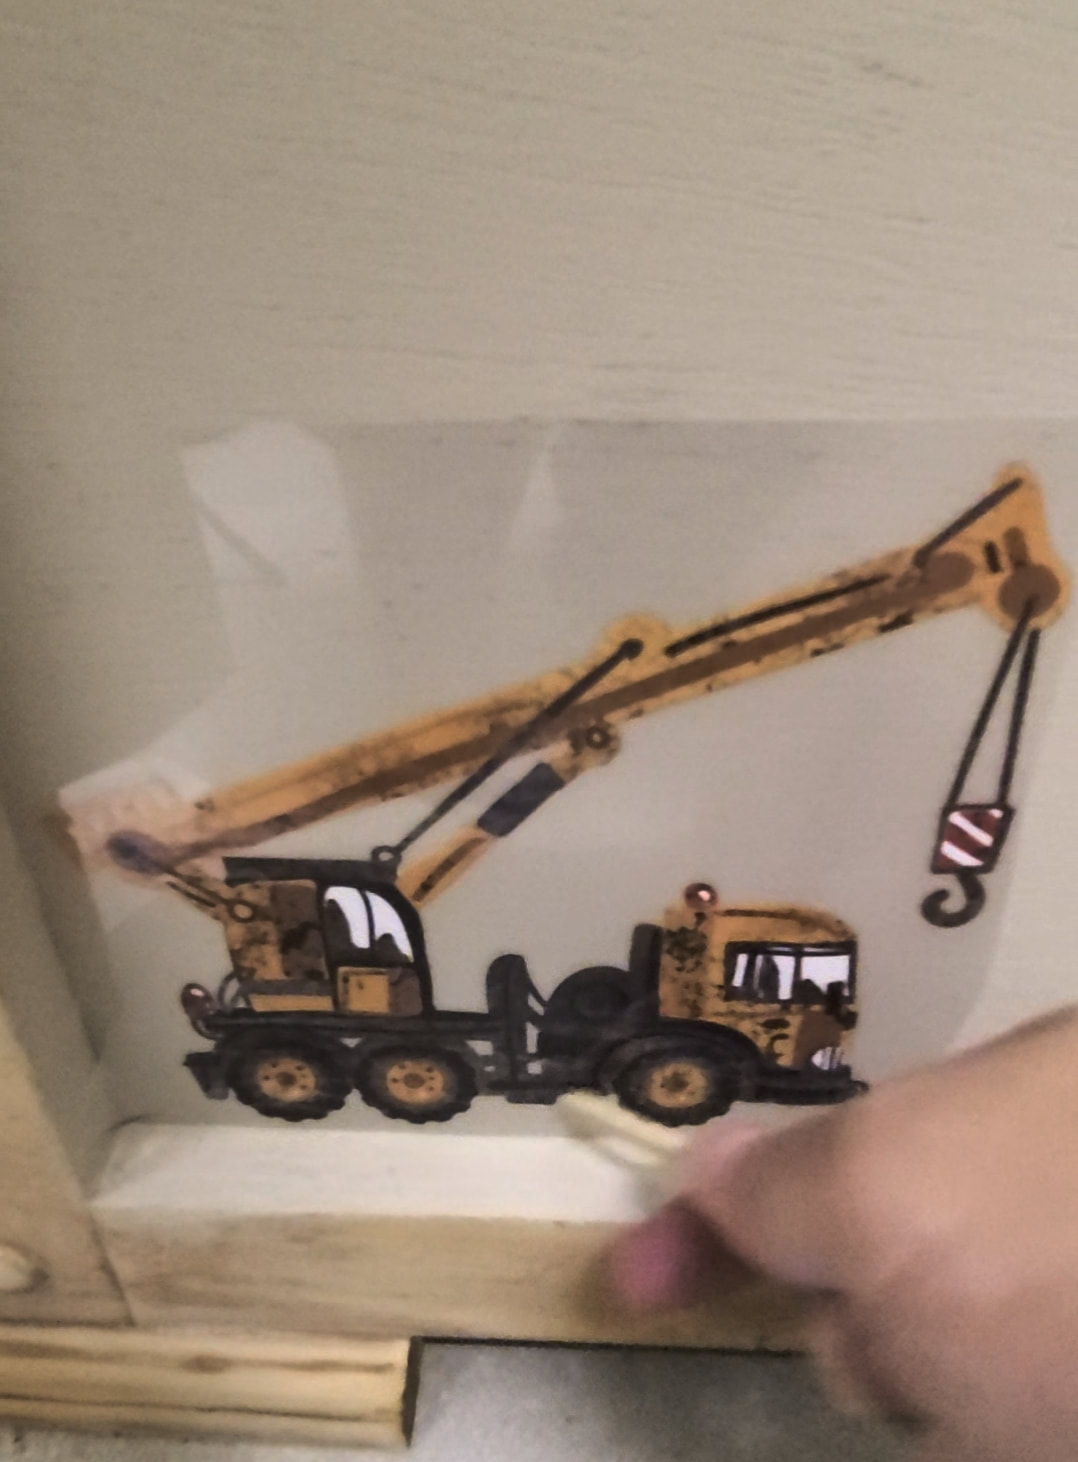 With the transfers you place it on the surface, rub with the tool or popsicle stick it came with and peel off the clear plastic and rub the transfer lightly with your fingers. Below are the final pictures, its really that easy and quick if this is the look you want, you can get very creative. I hope you enjoyed this Blog post and project and next weej ill be posting a brand new project, something for home decor that I love. Dont forget to check out my new Youtube video Take care Meg 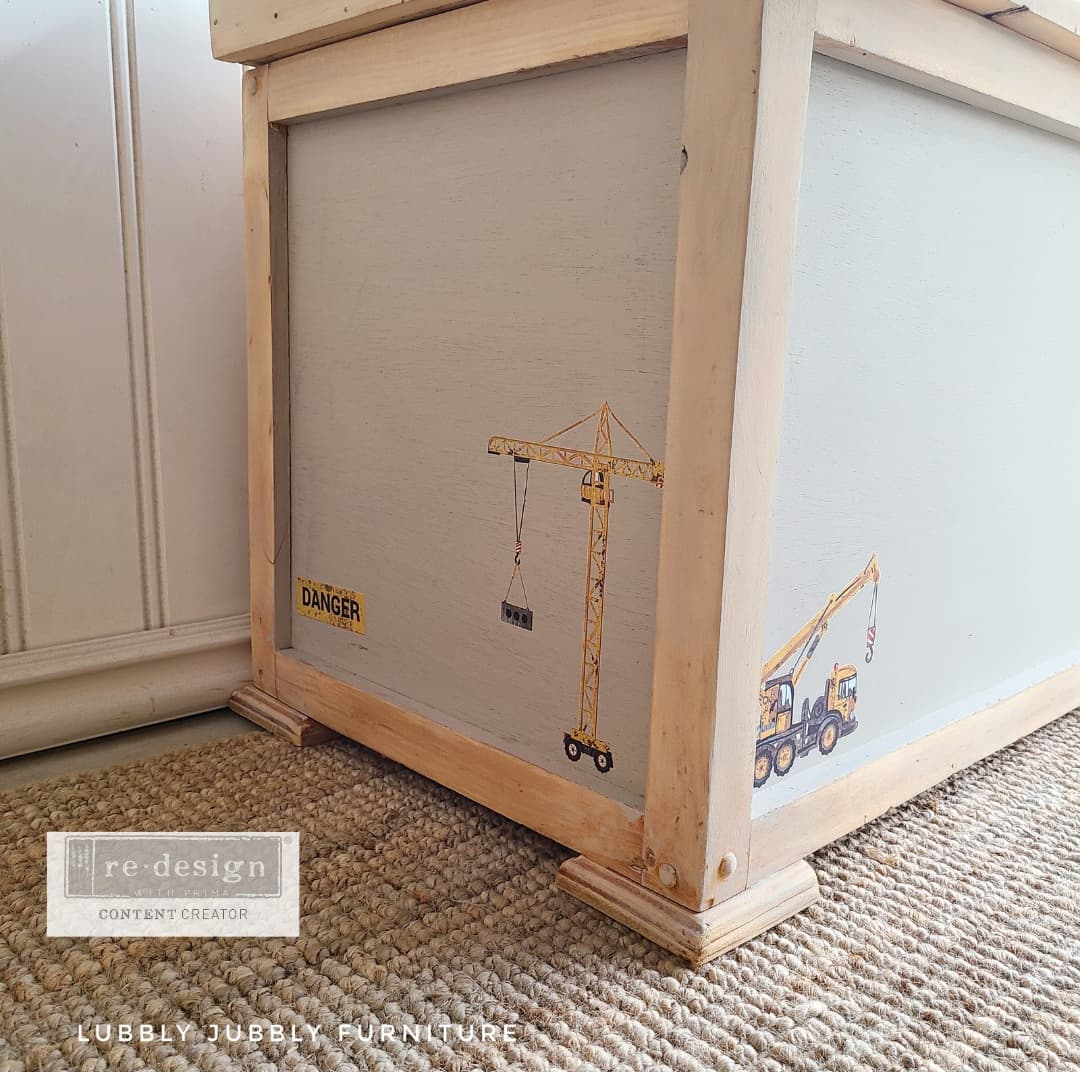 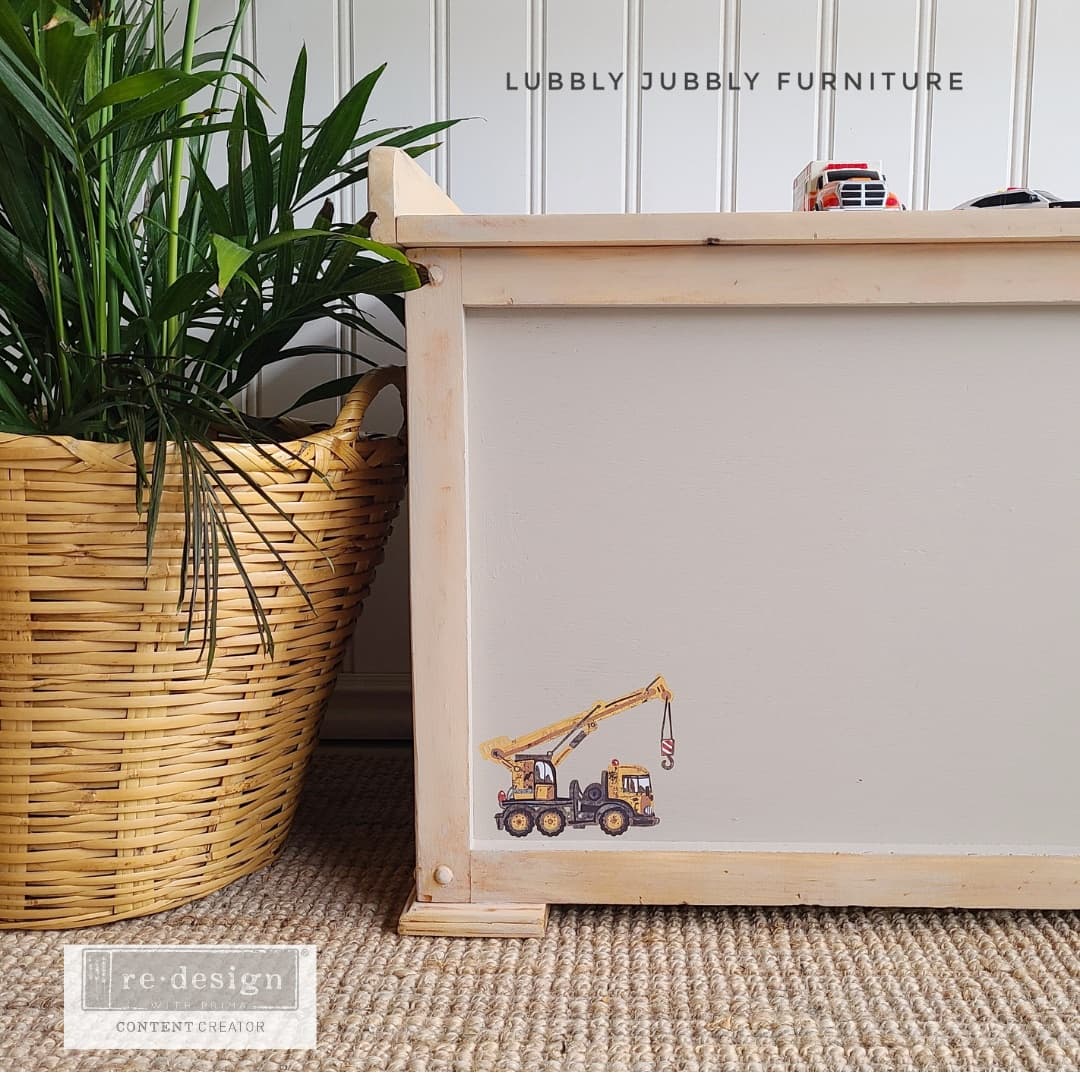 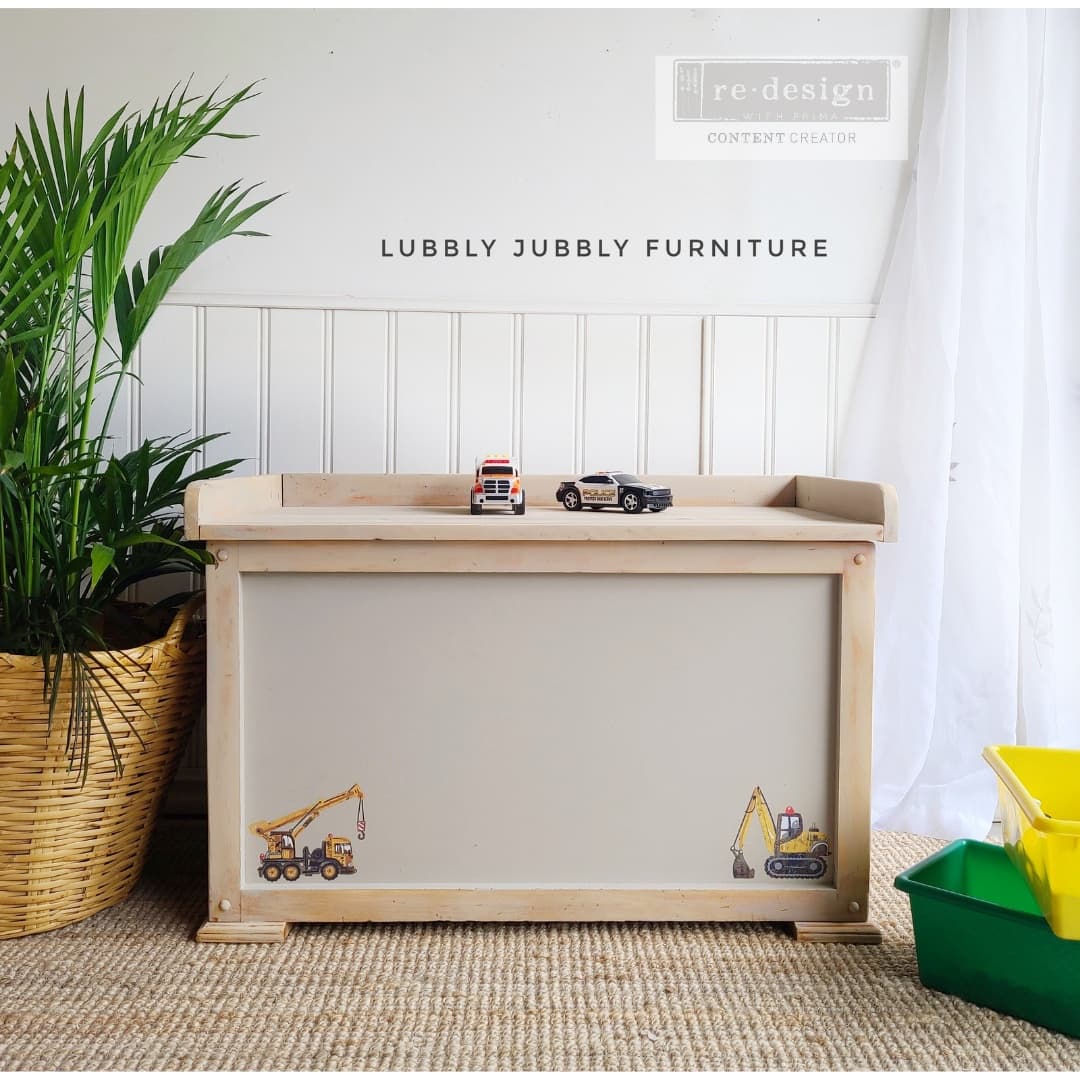 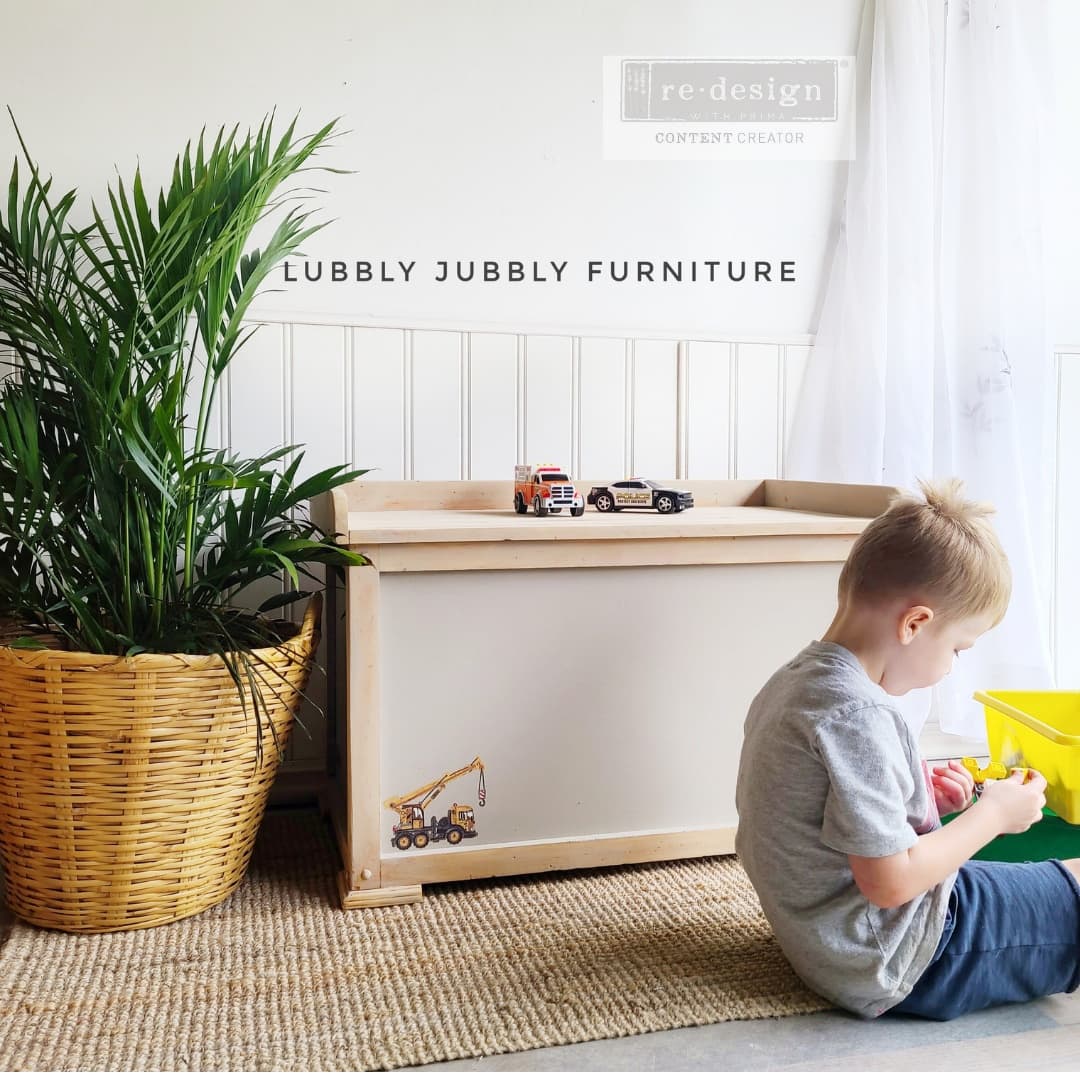 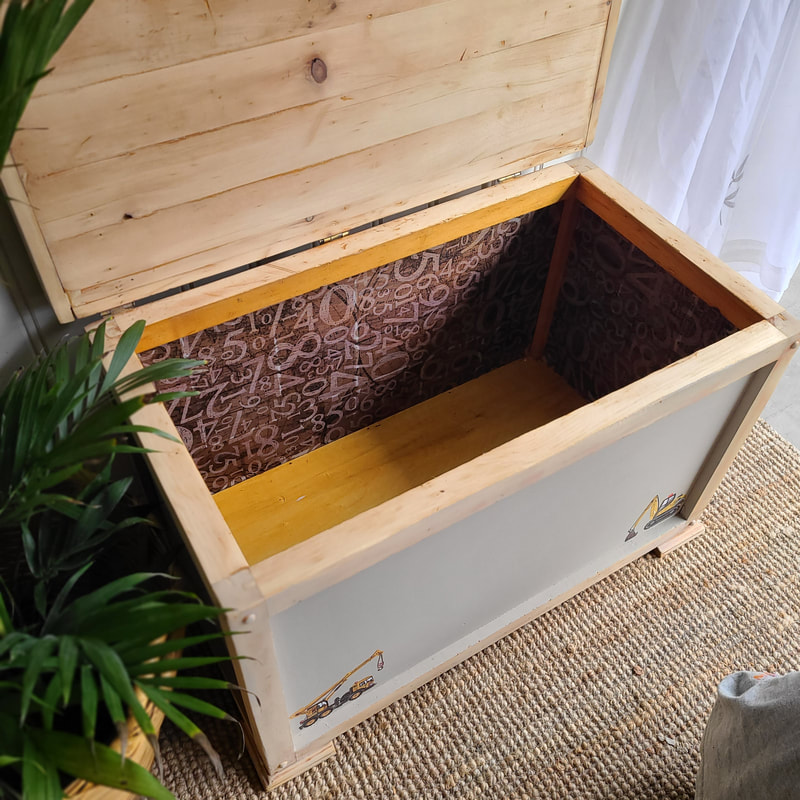 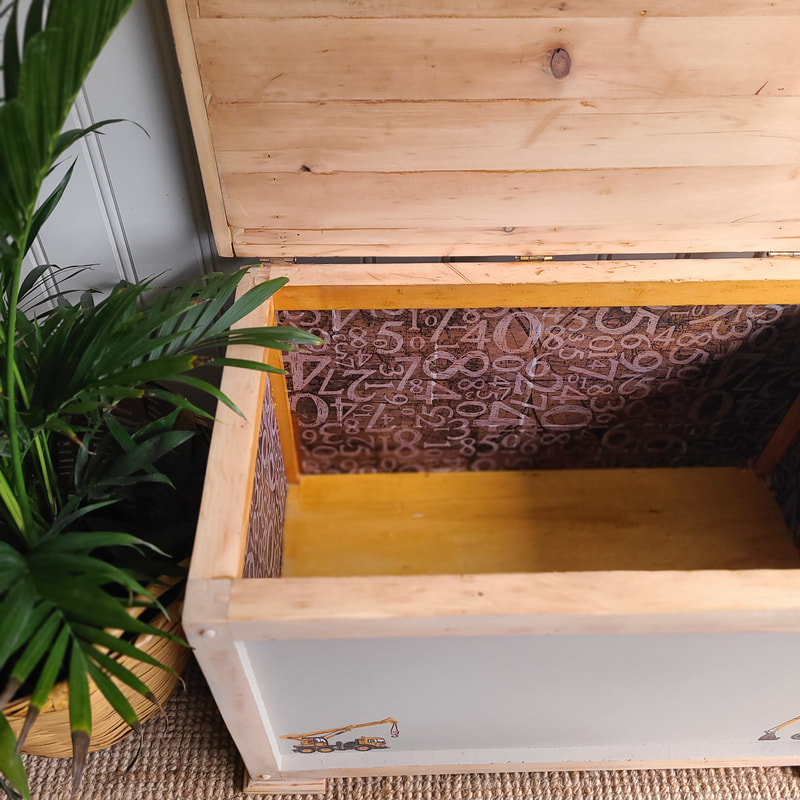 |
|
 RSS Feed